Category: Blog

  • Best Bolt Action Rifle: Top Picks for Precision Shooting

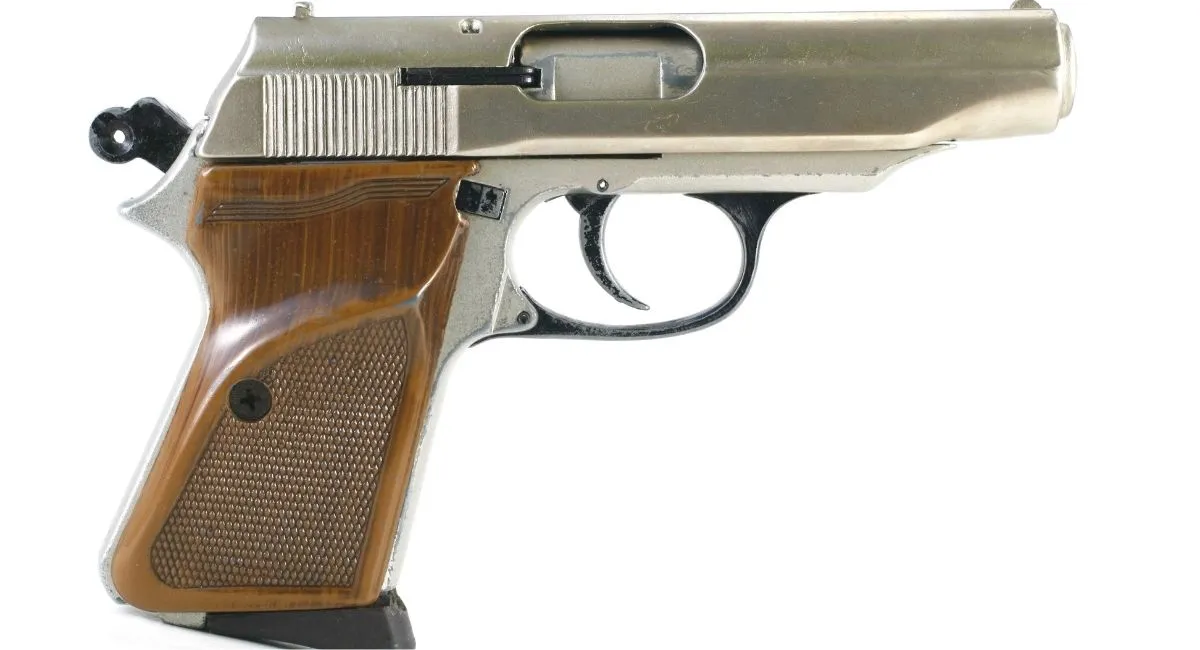
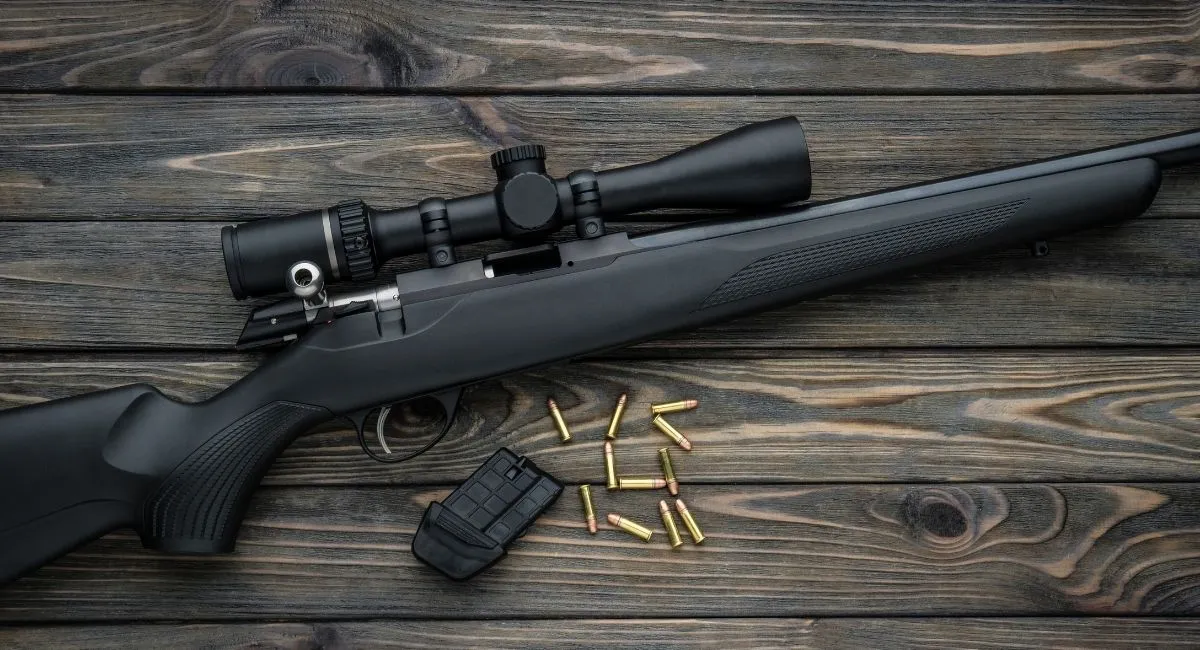
    Bolt-action rifles are renowned for their reliability and precision, cementing their position in the firearms market as the go-to choice for hunters, target shooters, and military snipers around the globe. While the core mechanism behind these rifles—the manual operation involving the lifting and pulling back of a bolt handle to eject a spent cartridge and load a new one—has remained largely unchanged since their inception, technological advancements and craftsmanship have greatly improved their accuracy, range, and ease of use.

    Selecting the best bolt-action rifle depends on the intended application, personal preference, and budget. For hunters tracking game in rugged terrain, a rifle with a lightweight design and high accuracy at long distances is paramount. On the other hand, target shooters might prioritize precision engineering and the ability to customize components. Similarly, military engagements demand unwavering reliability and durability under harsh conditions, making ruggedness and adaptability key attributes for a service rifle.

    Manufacturers have responded to these diverse needs with a range of models. Features such as adjustable triggers, ergonomic stocks, free-floating barrels, and compatibility with various optical systems are common among top-tier bolt-action rifles. The market boasts iconic models known for their historical significance and innovative designs that push the boundaries of ballistic performance. Whether for sport, utility, or defense, a well-chosen bolt-action rifle remains a timeless investment for those seeking the pinnacle of shooting accuracy and craftsmanship.

    Historical Evolution of Bolt Action Rifles

    Bolt action rifles have been a significant part of firearm history since their inception in the 19th century. Johann Nikolaus von Dreyse developed the first notable bolt action rifle in 1824, known as the Dreyse Needle Gun, which saw extensive service with the Prussian army.

    The development of metallic cartridges in the late 1800s further improved the bolt action platform. These advancements were pivotal in the success of models such as the British Lee–Metford and Lee–Enfield rifles, the German Mauser, and the American Springfield. Their improved accuracy and faster loading times than their predecessors revolutionized infantry tactics and warfare.

    During the World Wars, the reliability and robustness of bolt action rifles were tested and proven. Rifles such as the Mauser Gewehr 98 and the Mosin–Nagant were widely used due to their durability and the ability to withstand harsh conditions.

    Post-World War II, bolt action rifles remained prevalent in both military and civilian applications for their precision. They became the mainstay for hunting, target shooting, and sniping roles because they were highly accurate and simple to maintain.

    Modern bolt action rifles use advanced materials and technology to enhance performance. They incorporate precision engineering and ergonomic designs to meet the requirements of contemporary marksmen and hunters.


    Era Notable Bolt Action Rifles
    19th Century Dreyse Needle Gun
    Early 20th Cent. Lee–Enfield, Mauser, Springfield
    World Wars Gewehr 98, Mosin–Nagant
    Post-WWII Remington 700, Winchester Model 70

    The current industry highlights models like the Remington 700 and the Winchester Model 70 for their reliability, accuracy, and adaptability to various shooting disciplines. Bolt action rifles still hold a revered place among firearms, continuing to evolve with cutting-edge innovation.

    Fundamentals of Bolt Action Rifle Mechanism

    https://www.youtube.com/watch?v=k5VyiLf3fd4

    A bolt action rifle is a firearm operated manually with a bolt handle to load and unload cartridges. The mechanism comprises the bolt system, trigger mechanism, and magazine types, each integral for the precision and reliability of the rifle.

    The Bolt System

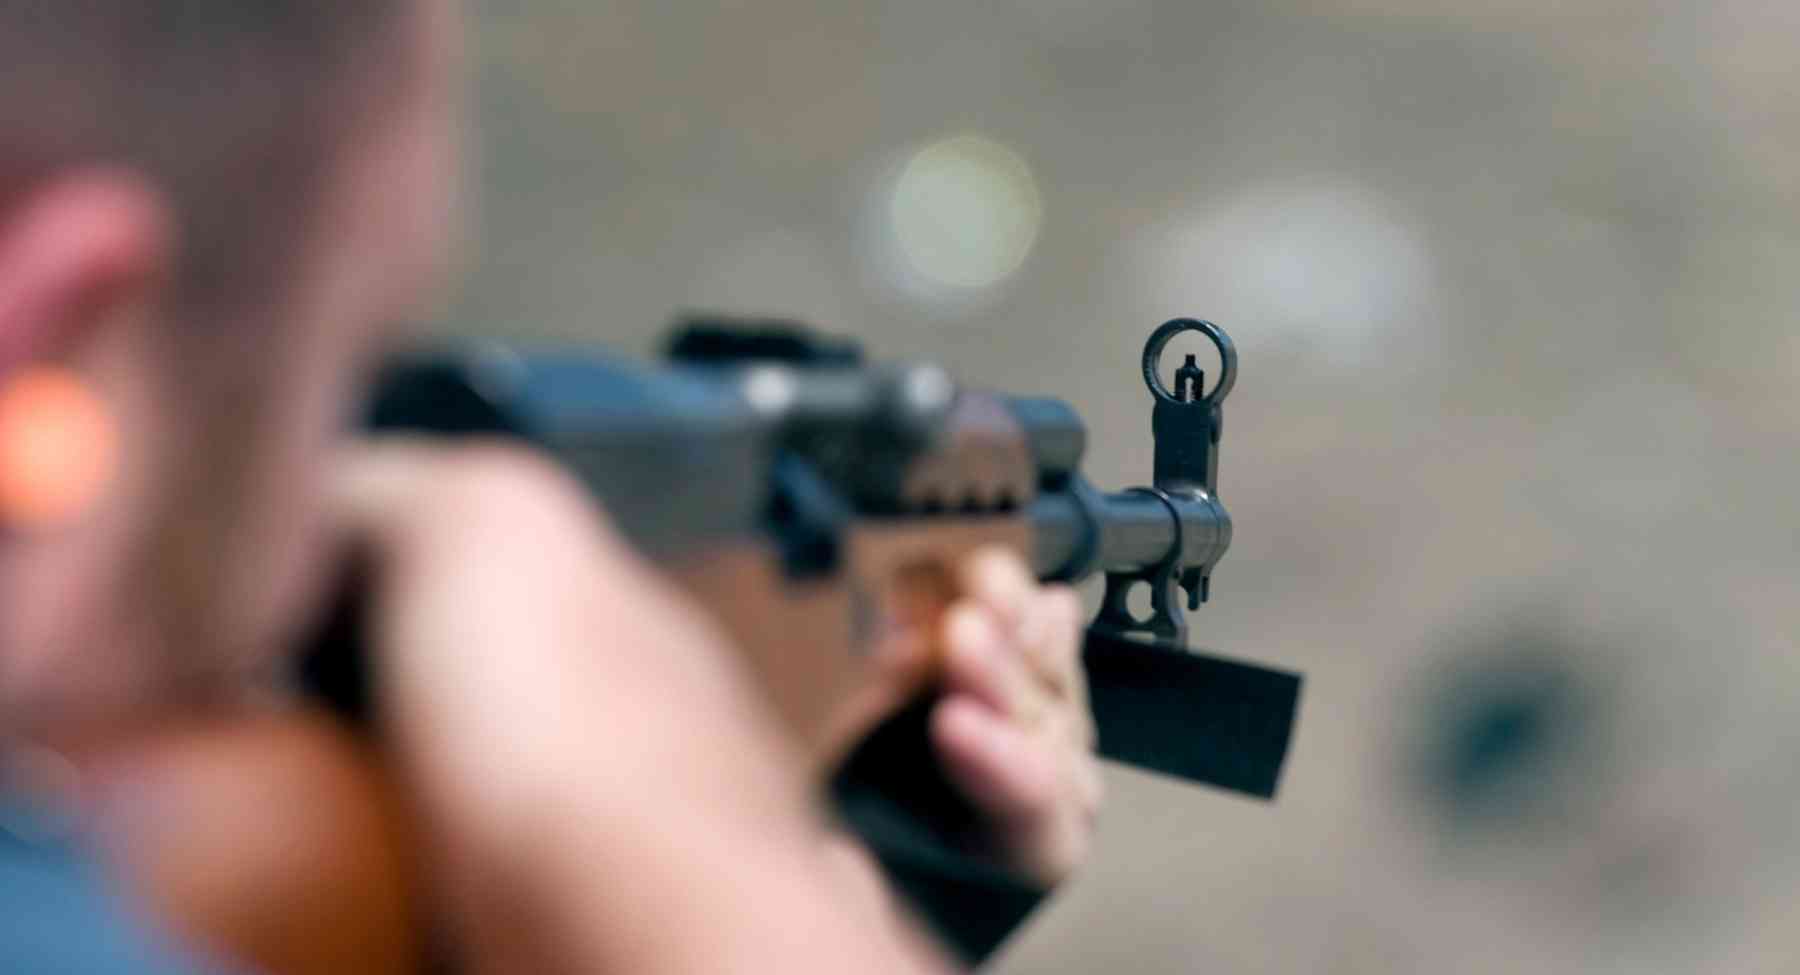
    The bolt system of a bolt action rifle consists of the bolt handle, bolt body, firing pin, extractor, and ejector. This mechanism is renowned for its strength and contributes greatly to the rifle’s accuracy. When the bolt handle is lifted and pulled back, the bolt unlocks and the spent cartridge is extracted and ejected. Pushing the bolt forward and down then chambers a new cartridge from the magazine.

    • Bolt Handle: Provides leverage to manually operate the bolt.
    • Bolt Body: Houses the firing pin, extractor, and ejector.
    • Firing Pin: Strikes the cartridge primer to fire the bullet.
    • Extractor: Hooks onto the cartridge to remove it from the chamber.
    • Ejector: Expels the spent cartridge out of the action.

    Trigger Mechanism

    The trigger mechanism of a bolt action rifle is crucial for firing precision. An adjustable trigger, such as AccuTrigger or TriggerTech, allows shooters to fine-tune the trigger pull to their preference, thus improving accuracy. It consists of a trigger shoe, sear, and connecting components that release the firing pin when the trigger is pulled.

    • Trigger Shoe: The part of the trigger that the shooter’s finger contacts.
    • Sear: Holds the firing pin back until the trigger is pulled.
    • Adjustable Trigger: Allows customization of the trigger pull weight and travel.

    Magazine Types

    The magazine is where cartridges are stored and fed into the chamber. Bolt action rifles can have different types of magazines:

    1. Internal Magazine:
      • Typically built into the rifle.
      • Cartridges are loaded from the top of the rifle, either singly or with a stripper clip.
    2. Detachable Magazine:
      • Can be removed from the rifle for loading or replacement.
      • Offers the convenience of carrying multiple pre-loaded magazines.
    3. Single-Shot:
      • No magazine present; each cartridge is loaded directly into the chamber.
      • Common in precision shooting disciplines.

    Most bolt action rifles utilize an internal or detachable magazine, each providing unique benefits for various shooting applications.

    Characteristics of Top Bolt Action Rifles

    Top bolt action rifles are defined by their exceptional accuracy, durability, and user-friendly design. These attributes are critical for shooters looking for reliable and high-performing firearms.

    Accuracy and Precision

    A hallmark of the best bolt-action rifles is their accuracy and precision. Manufacturers optimize barrel design, using high-grade steel and advanced rifling techniques to ensure consistent bullet velocity and trajectory. They typically come with precisely machined receivers and stocks that are designed to minimize vibrations and maintain stability during shooting.

    Build Quality and Materials

    Build quality is paramount in top bolt action rifles. The use of premium materials like carbon fiber for stocks and high-quality steel for barrels and actions contributes to both the longevity and performance of the rifles. Quality rifles are often the result of meticulous craftsmanship and stringent quality control processes.

    Handling and Ergonomics

    The handling of a rifle significantly impacts a shooter’s experience and accuracy. Top models feature sleek, lightweight designs for easier maneuverability. Ergonomics play a crucial role, with stocks shaped to support a natural grip and stance, reducing shooter fatigue and improving control. Many high-end rifles incorporate adjustable triggers and cheek pieces for a personalized fit.

    Popular Bolt Action Rifle Models

    Within the realm of firearms, several bolt action rifle models stand out for their reliability, precision, and enduring popularity among enthusiasts and professionals alike.

    Remington 700 Series

    The Remington Model 700 series is a firearms staple, revered for its accuracy and versatility. It features a strong action design and is available in numerous calibers and configurations, making it suitable for a variety of shooting disciplines.

    Ruger American Rifles

    Ruger American Rifles are known for their affordability without sacrificing performance. Models like the Ruger American Predator offer innovative design features such as a power bedding system to enhance accuracy.

    Savage Arms Models

    Savage Arms is synonymous with innovation, with the Savage Model 110 being one their flagship offerings. This rifle is admired for its AccuTrigger system that provides shooters with a crisp, customizable trigger pull.

    Weatherby Options

    Weatherby’s Mark V rifles are renowned for their high quality and craftsmanship. They are tailored to handle high-pressure cartridges, and their performance in hunting scenarios is exceptional.

    Tikka Variants

    Finnish manufacturer Tikka is respected for its high-quality rifles, such as the Tikka T3, which boasts a smooth action and a reputation for consistent precision straight out of the box.

    Other Notable Models

    This category includes an array of reputable firearms like the durable Browning X-Bolt, the classic Winchester Model 70, and the robust Bergara B-14 HMR. Other notable entries are the CVA Cascade, Sig Sauer Cross, Mossberg Patriot, and the Howa 1500, all of which offer unique features that cater to various shooting needs and preferences.

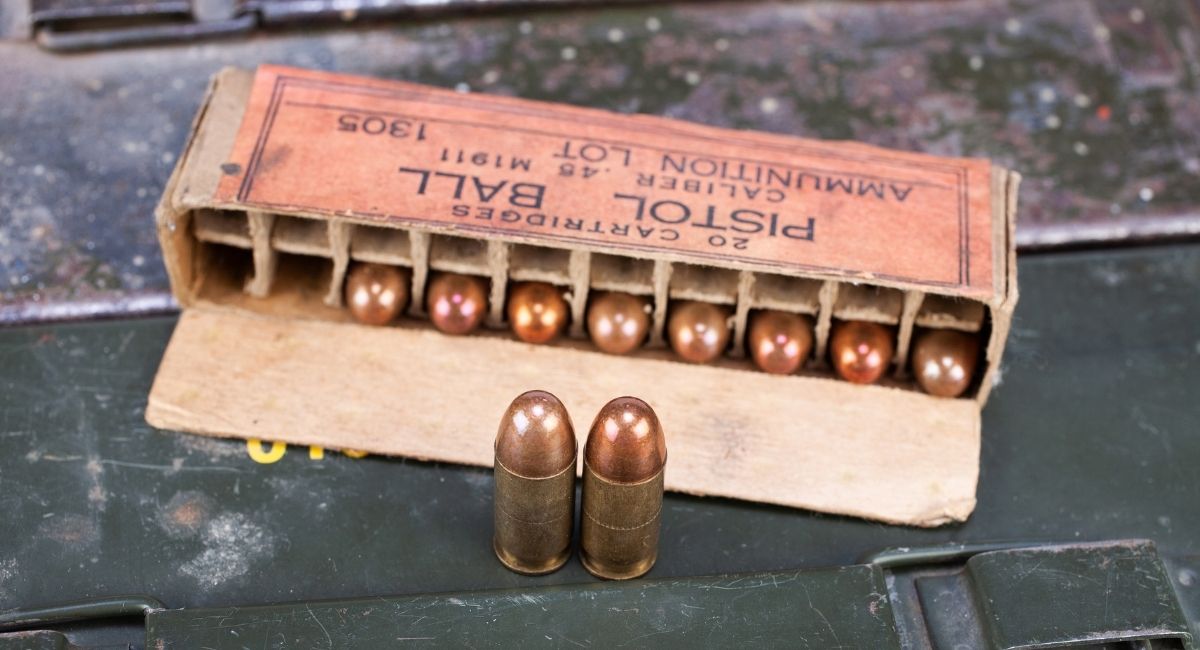
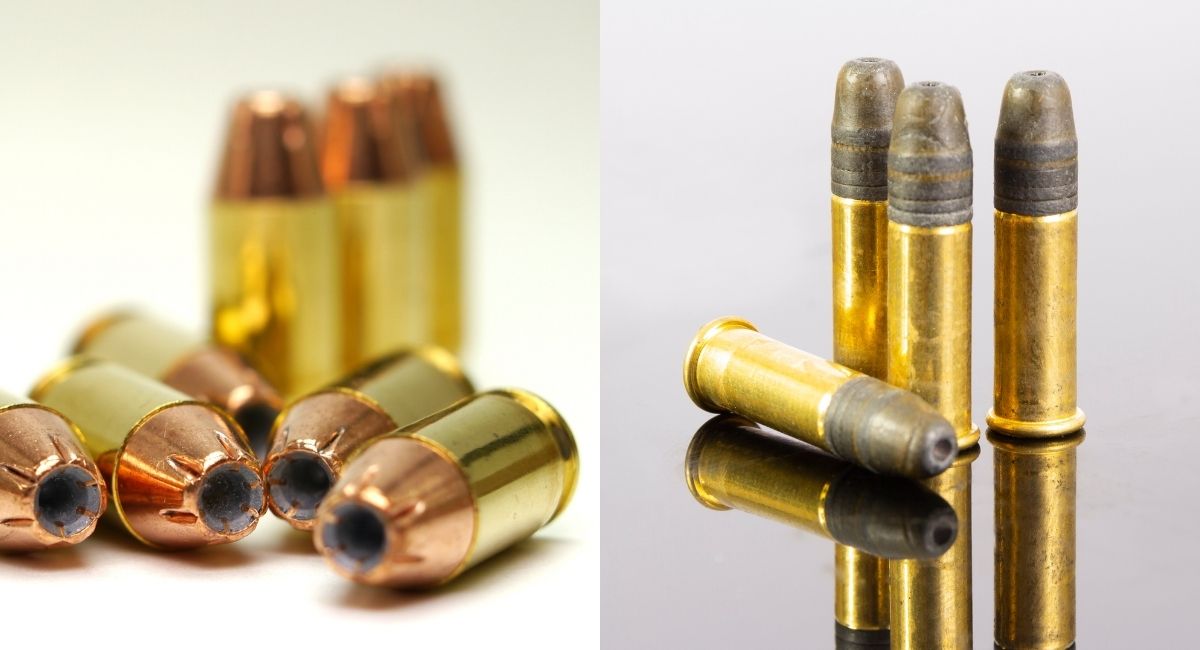
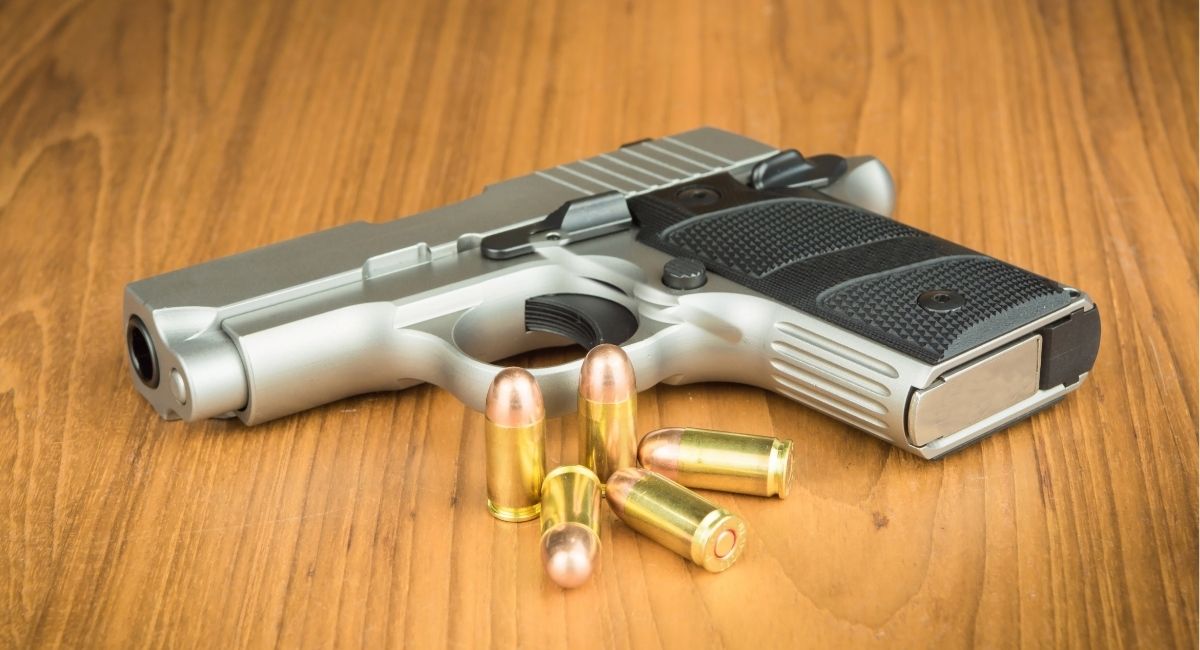
    Choosing the Right Caliber and Ammunition

    https://www.youtube.com/watch?v=9NnkGpbm6uA

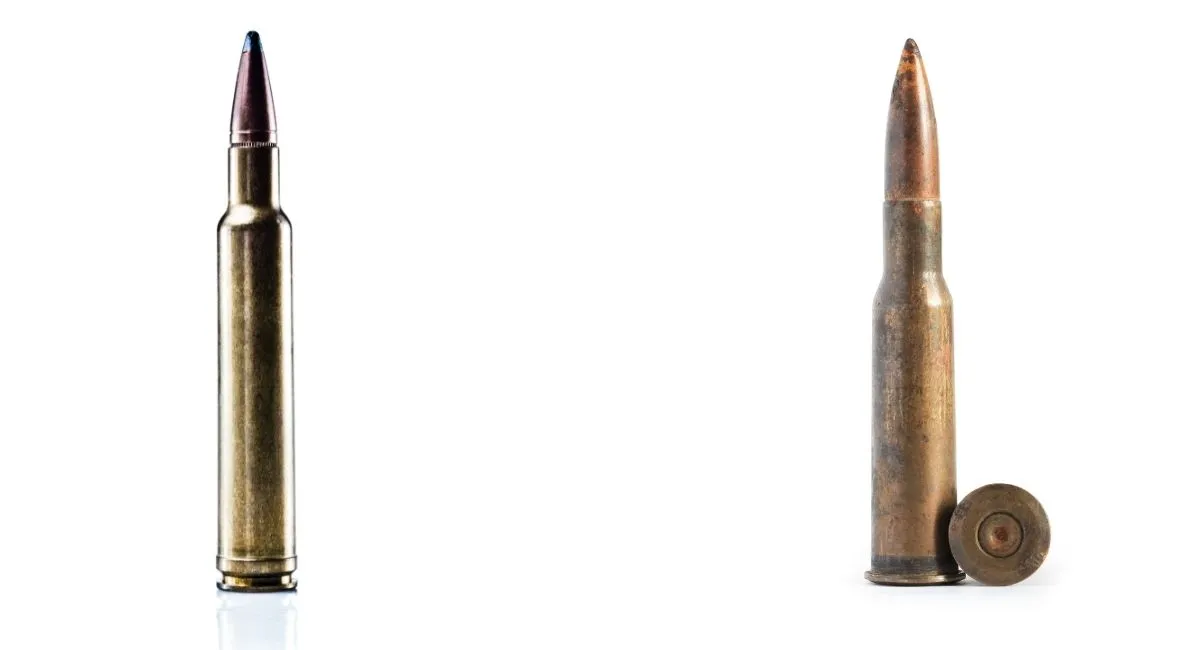
    Selecting the appropriate caliber and ammunition for a bolt action rifle is pivotal. When considering calibers, 6.5 Creedmoor and 6.5 PRC are noteworthy options. They are known for their long-range precision and moderate recoil.

    6.5 Creedmoor is widely used and suitable for various shooting disciplines, from hunting to competitive shooting. Its versatility is attributable to the balance of long-range accuracy, manageable recoil, and a wide variety of available loads.

    In contrast, 6.5 PRC offers shooters a higher velocity and flatter trajectory, beneficial for long-range shooting. It presents a step up in performance, especially at distances beyond 1,000 yards.

    Caliber Best Use Case Advantages
    6.5 Creedmoor Versatile shooting, including hunting Accuracy, reduced recoil
    6.5 PRC Long-range competition and hunting High velocity, flat trajectory

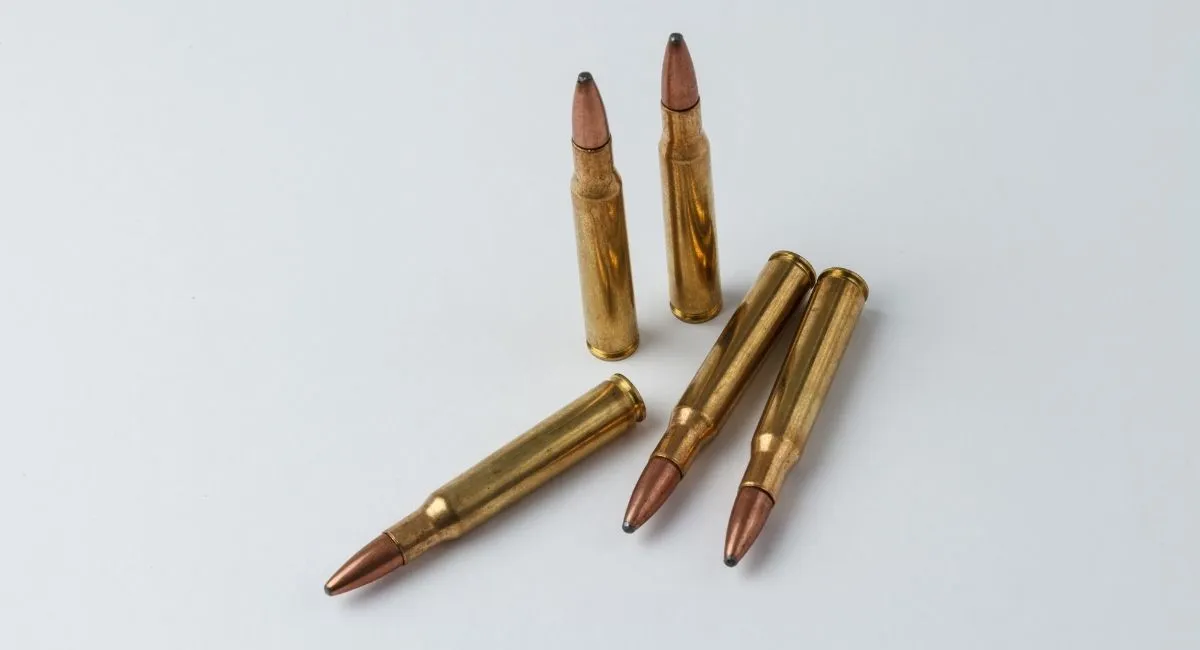
    One should consider the availability of ammunition. 6.5 Creedmoor is more readily available than 6.5 PRC, making it a practical choice for shooters who frequent the range or partake in common hunting scenarios.

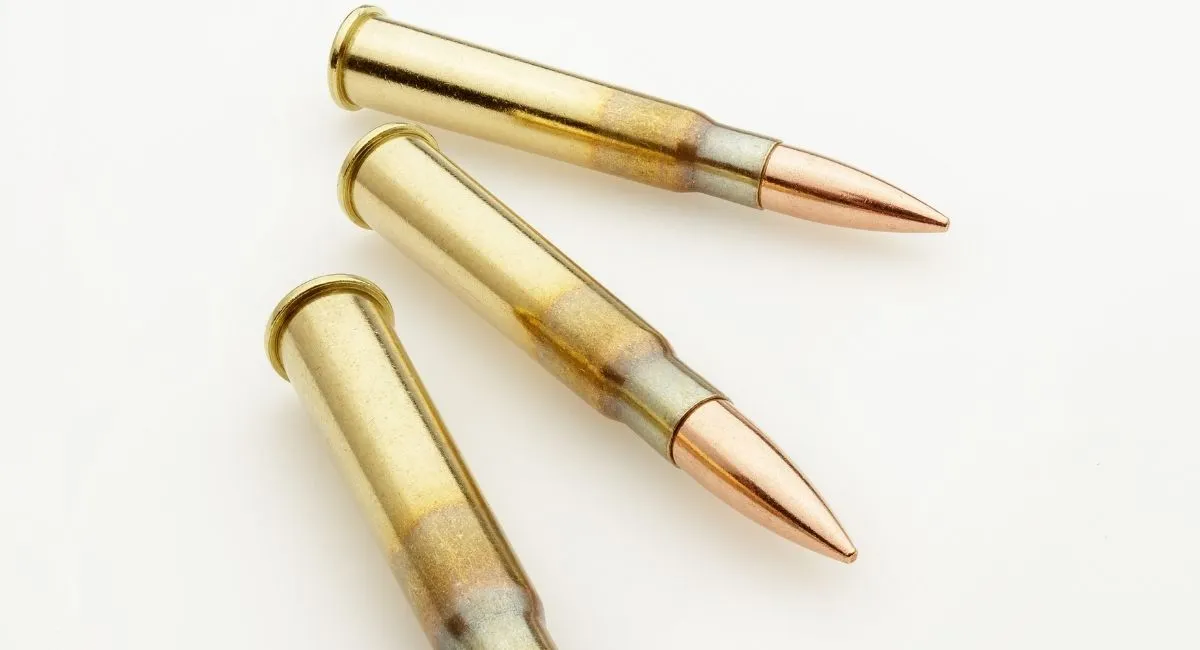
    For ammunition, it is essential to focus on quality and consistency. Match grade ammo, while more expensive, is manufactured to tighter tolerances, ensuring better consistency for precision shooting. Hunting ammunition is often designed for optimal terminal performance, prioritizing quick and humane kills.

    In summary, the choice of caliber and ammunition hinges on the user’s shooting goals and scenarios. The 6.5 Creedmoor is ideal for a multitude of applications whereas the 6.5 PRC excels in reaching out to greater distances with higher precision. Users must weigh their needs against ammo availability and cost.

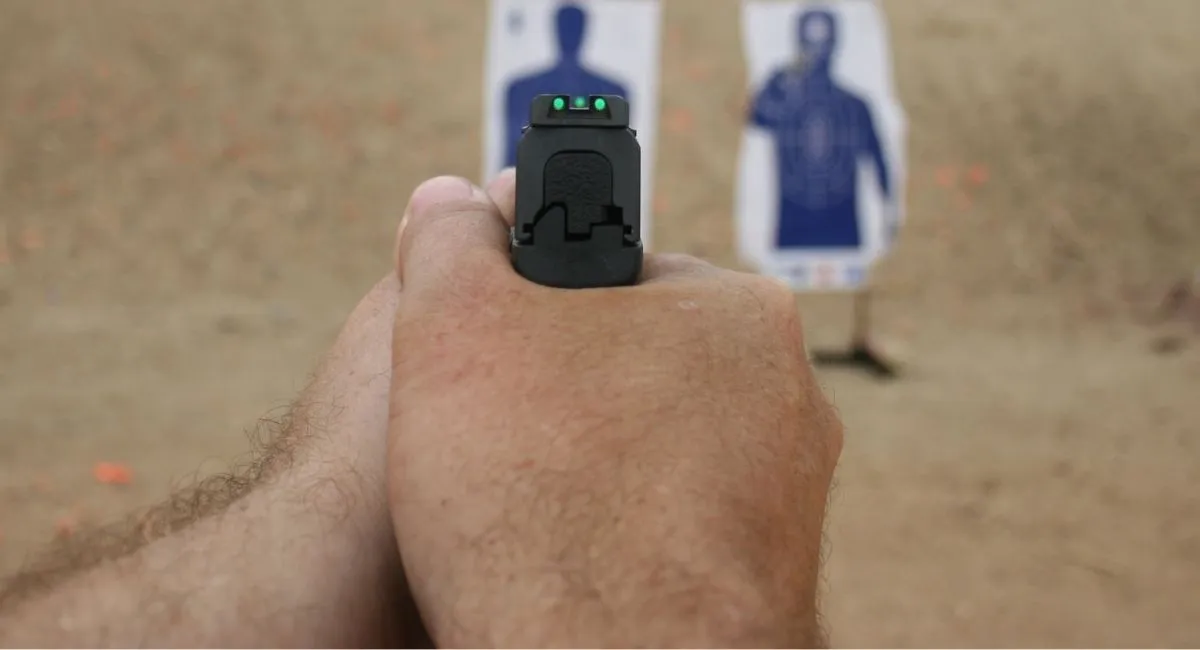
    Applications and Use Cases

    Bolt action rifles offer precision and reliability across diverse scenarios. They are highly favored in activities requiring accuracy and sustained performance.

    Hunting with Bolt Action Rifles

    In the realm of hunting, bolt action rifles are prized for their accuracy and ease of maintenance. They are particularly effective in big game hunting situations where a single, well-placed shot is crucial. These rifles offer hunters the necessary precision to ethically harvest game at varying distances, ensuring a humane practice.

    • Preferred Calibers:
      • .308 Winchester for versatility
      • .300 Winchester Magnum for larger game

    Target and Long-Range Shooting

    Target shooting and long-range shooting enthusiasts frequently choose bolt action rifles for their consistent accuracy. The rifles’ mechanism allows for a more stable barrel, which in turn results in tighter groupings at long distances, essential for both recreational shooters and competitive marksmen.

    • Key Features for Long-Range Accuracy:
      • Heavy barrels
      • Adjustable triggers

    Military and Tactical Use

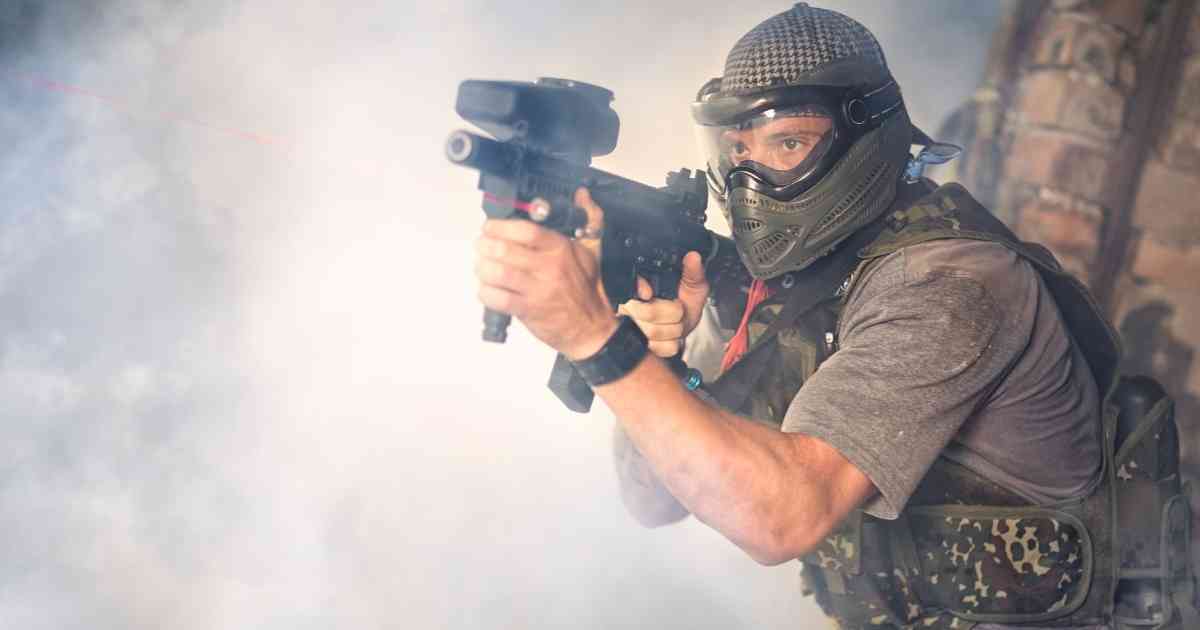
    Bolt action rifles have a storied history with the military, especially with snipers and military snipers. The rifles’ design allows for superb accuracy, making them ideal for high-stakes situations requiring precision. In modern tactical settings, bolt action sniper rifles are instrumental in long-range engagements where stealth and the first-shot advantage are paramount.

    • Notable Military Models:
      • M40 (United States Marine Corps)
      • L96A1 (British Armed Forces)

    Survival Situations

    In survival scenarios, the reliability of a bolt action rifle can be life-saving. Their simplicity and fewer moving parts reduce the likelihood of malfunction, which is essential when one is reliant on a firearm for protection and hunting for sustenance in the wilderness.

    • Advantages in Survival:
      • Durability
      • Simplicity of operation

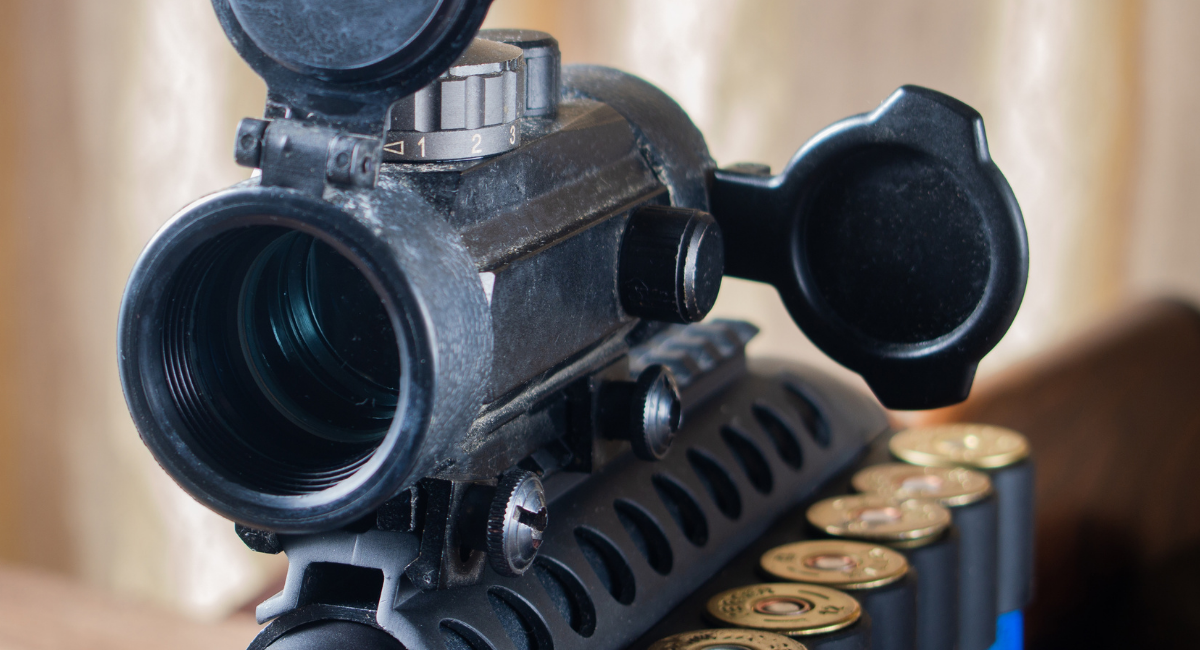
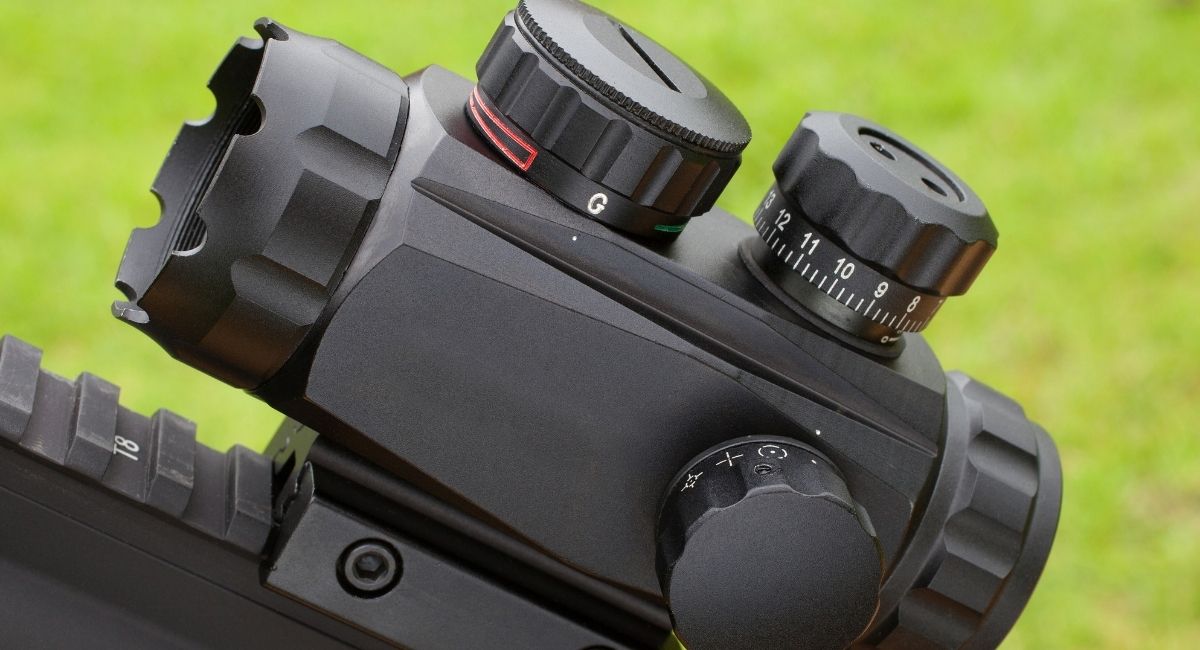
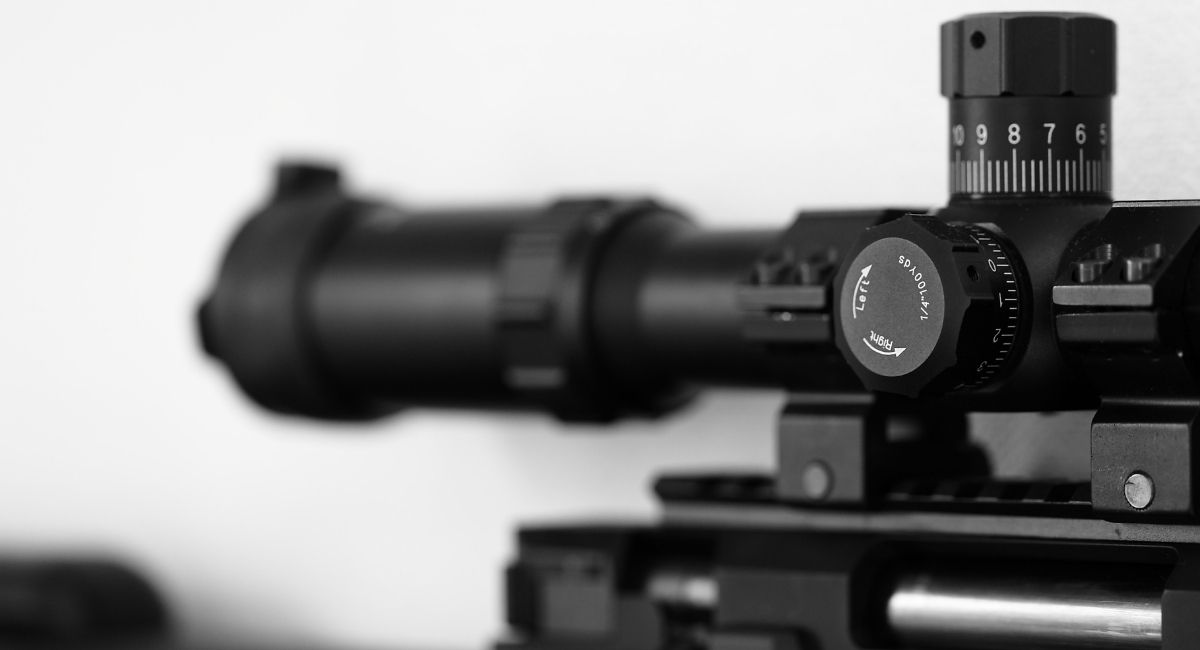
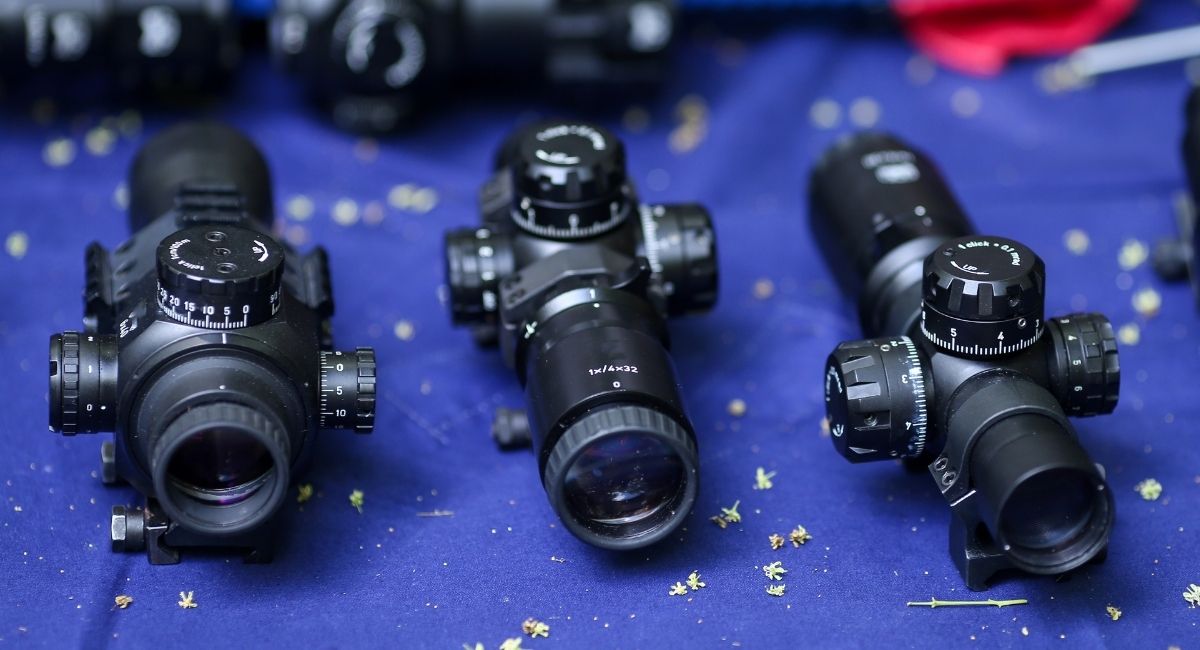
    Enhancements and Customization

    Upgrading a bolt action rifle involves precise changes to the barrel, stock, and the addition of accessories to improve performance and handling.

    Barrel Modifications

    One can significantly enhance a rifle’s accuracy and balance by opting for a free-floating barrel, which avoids any contact with the stock, thus reducing the potential for vibration and harmonic distortion when firing. Moreover, fluted barrels not only reduce weight but also increase the surface area, aiding in better heat dissipation. The addition of a muzzle brake helps in recoil reduction, improving shot follow-up times and overall accuracy.

    Stock Adjustments

    Adjustable stocks like the Accufit system allow shooters to customize the length of pull and comb height for a personalized fit, which can drastically improve shooting comfort and accuracy. The process involves meticulously altering the stock to allow for better ergonomics and shooter stability. Consideration for adding a proper sling attachment can also improve rifle handling and portability.

    Aftermarket Accessories

    The use of aftermarket accessories can elevate a rifle’s functionality remarkably. Installing a detachable magazine offers quicker reloads and more carrying capacity as opposed to internal magazines. For those seeking a crisper and more sensitive trigger pull, the Bergara curved trigger is a popular upgrade that provides a clean break with minimal pull weight, enhancing the shooter’s control and precision. Accessories should be chosen based on compatibility and desired improvements in performance or ergonomics.

    Price Range and Affordability

    Bolt action rifles come in a wide array of prices, catering to various budget requirements and preferences. The following subsections break down options based on their cost, from budget-friendly rifles to premium selections.

    Budget-Friendly Options

    For those on a tight budget, there are several bolt action rifles that offer reliability without breaking the bank. The Remington 783 and the Thompson Center Compass are notable examples, often priced under $400. They provide a cost-effective solution for beginners or occasional shooters looking for an entry-level rifle.

    • Remington 783: Approximately $350
    • Thompson Center Compass: Around $300

    Mid-Range Models

    Mid-range bolt action rifles offer a balance between price and performance, typically costing between $400 and $800. The Savage Axis II is a popular choice, providing improved features and better accuracy than many of the lower-priced models.

    • Savage Axis II: Generally falls between $400 – $500

    Premium Rifle Selections

    At the high end of the market, premium rifles present top-tier craftsmanship, precision, and durability for enthusiasts and professionals willing to invest more. Prices can exceed $1000, with the cost reflecting the superior materials and advanced technology used in these rifles. These are sought after by seasoned hunters and competitive shooters demanding unmatched performance and reliability.

    Maintaining and Caring for Your Rifle

    Proper maintenance is key to ensuring a bolt action rifle remains reliable and performs optimally. Owners should follow a regular cleaning and inspection routine to prolong the rifle’s life and maintain its ruggedness in various conditions.

    Cleaning the Barrel:

    • Ensure the rifle is unloaded.
    • Use a bore brush and cleaning solvent to scrub the barrel’s interior.
    • Use a clean patch to wipe away residue and check for obstructions and wear.

    Lubrication:

    • Apply gun oil to moving parts, but avoid excess lubrication, which can attract dirt.
    • Focus on the bolt action mechanism, as smooth operation is essential for reliability.

    Stock Maintenance:

    • Wipe down the stock with a clean, dry cloth.
    • For wooden stocks, occasionally apply a suitable wood treatment to prevent cracking.

    Rust Prevention:

    • Keep metal parts dry and clean.
    • Store the rifle in a cool, dry place and use desiccants if needed.

    Routine Inspections:

    • Periodically check for loose screws and worn parts.
    • Ensure the scope mount and action screws are properly tightened to maintain accuracy.

    Use Appropriate Ammunition:

    • Utilize the correct caliber and bullet type recommended by the manufacturer.
    • Inconsistent or improper ammunition can affect reliability and performance.

    By attentively caring for their bolt action rifle, shooters can trust in its dependability for years to come. Regular maintenance not only preserves the integrity of the rifle but also ensures its consistent performance, whether it be for sporting, hunting, or tactical purposes.

    Global Perspective

    When examining the best bolt action rifles on an international scale, different regions hold their own preferences and regulations that influence the availability and choice.

    In Europe, firearms legislation varies significantly between countries, but bolt action rifles often find favor for their reliability and precision. European manufacturers like Sako and Tikka from Finland are renowned for their high-quality craftsmanship and performance, drawing upon a long-lasting heritage of rifle making.

    The following is a brief overview of key European countries and their notable bolt action rifles:

    Country Preferred Bolt Action Rifles Remarks
    Finland Sako 85, Tikka T3x Famed for accuracy and durability
    Germany Mauser M18, Blaser R8 Emphasizes traditional design coupled with modern innovation
    United Kingdom Accuracy International AT Known for military and law enforcement applications

    Hunters and marksmen in Europe tend to opt for rifles that are robust, with a proven track record for accuracy. The Scandinavian countries, in particular, have a long tradition of hunting, which influences their preference for versatile and weather-resistant rifles.

    The bolt action system in these rifles is favored for its simplicity, which results in fewer mechanical failures, an important consideration in regions with harsh climates. Moreover, the customization options offered by European manufacturers ensure that shooters can tailor their rifles to their specific needs, whether for sport, hunting, or competitive shooting.

    Each European country’s history, culture, and legal landscape help shape their bolt action rifle market, offering a diverse yet focused array of options that reflect their unique hunting and shooting heritage.

    Advancements and Future of Bolt Action Rifles

    Bolt action rifles have experienced significant innovations, especially in the domain of tactical applications and efficiency of use. Modern tactical bolt-action rifles now often incorporate advanced materials for reduced weight and greater durability, as well as ergonomic designs that enhance shooter comfort and accuracy.

    One notable advancement is the integration of the straight-pull bolt action mechanism, exemplified by rifles such as the Savage Impulse. This design allows shooters to cycle the action more quickly than traditional turn-bolt rifles, without the need for vertical movement. This innovation facilitates speed and fluidity in operation, which is particularly beneficial for tactical use in high-pressure environments.

    The Future of Tactical Bolt-Action Rifles

    In looking to the future, the following features are expected to advance:

    • Materials: Use of novel alloys and composites for enhancing strength-to-weight ratios.
    • Customization: Modular designs allowing for easy customization and adaptability.
    • Precision: Continual improvements in manufacturing tolerances leading to increased accuracy.

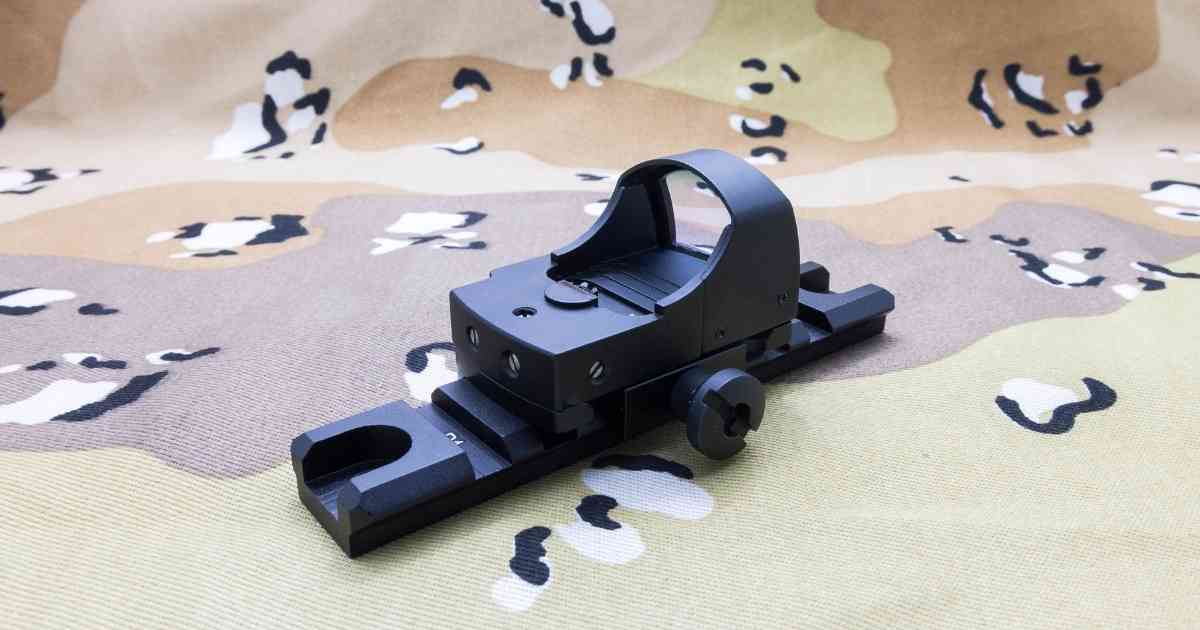
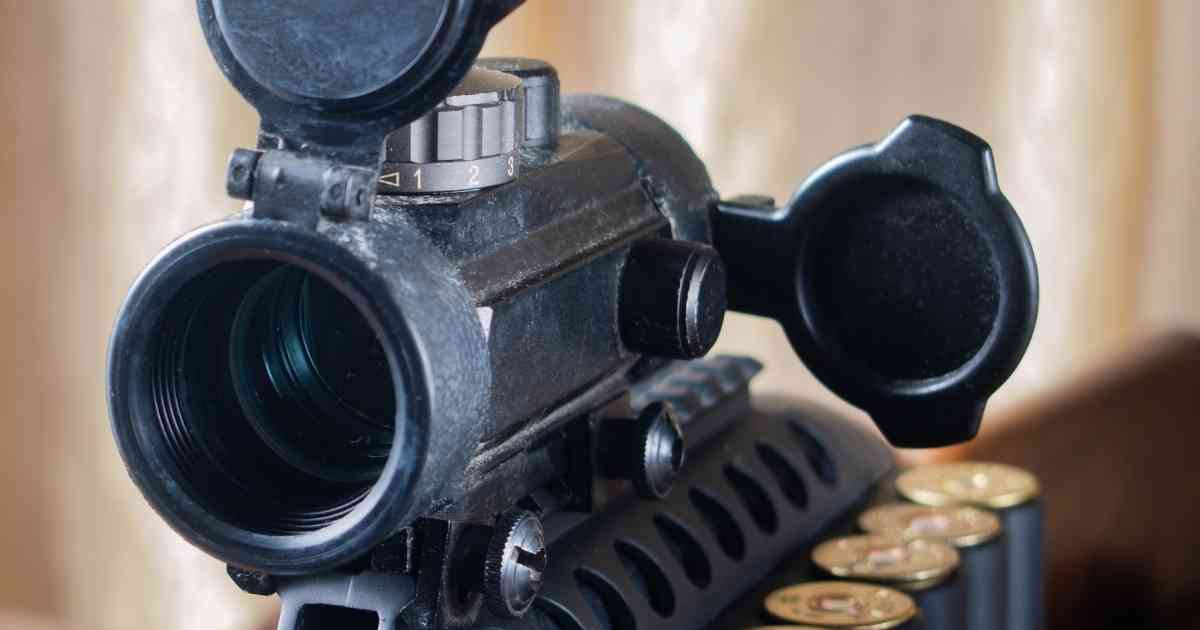
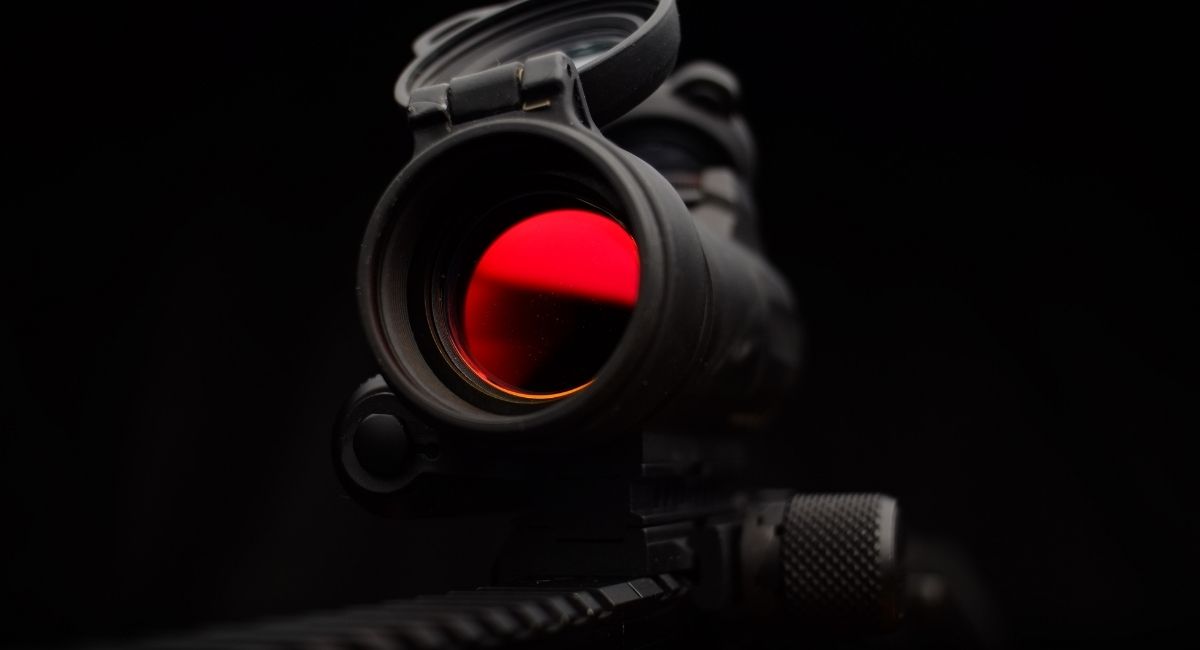
    The progression of these rifles encompasses not only physical design changes but also incorporates technological enhancements. For instance, the integration of smart scopes and ballistic calculators is expected to increase, providing the shooter with real-time data to make more informed decisions for long-range shooting.

    Additionally, the commitment to sustainability is likely to influence future designs with a focus on using environmentally friendly materials and manufacturing processes. This approach responds to both an ethical imperative and market demand.

    In summary, bolt action rifles continue to evolve through technological improvements and design refinement, ensuring their relevance and efficacy in various shooting disciplines.

    Legal Considerations and Responsible Ownership

    When obtaining a bolt action rifle, an individual must navigate a complex web of laws that can vary significantly by country, state, or even local jurisdiction. Legislation often includes background checks, waiting periods, and specific licensing requirements. Potential owners should research local regulations and comply with federal laws—such as the Gun Control Act of 1968 in the United States, which mandates background checks and sets forth restrictions on ownership.

    Responsible ownership also includes safe handling practices to ensure the welfare of the owner and those around them. Firearms should be stored unloaded in a locked safe or with a gun lock, separate from ammunition. Owners should regularly maintain their bolt action rifles to keep them functioning safely and should never handle firearms while under the influence of intoxicants.

    In terms of transportation and usage, laws commonly dictate where and how firearms can be carried. Owners must remain informed about the legality of transporting their rifle to places such as shooting ranges, hunting locations, or across state lines.

    Safe Practices Description
    Storage Keep unloaded in locked storage
    Handling Never handle while impaired; maintain regular care
    Transportation Follow laws on carry and transport

    Every bolt action rifle owner has a duty to understand and practice these legal and safety protocols. They serve not only to protect the individual but also the community. Compliance and etiquette in handling firearms reflect the owner’s respect for the power such a weapon possesses.

    Conclusion

    In assessing the best bolt-action rifle, one must weigh factors such as precision, durability, and user experience. The consensus among enthusiasts and experts points to a select few that stand out for their consistent performance.

    • Precision: Quality bolt-action rifles offer tight groupings and exceptional accuracy.
    • Durability: They often feature robust construction that withstands harsh conditions.
    • User Experience: Ergonomic design and smooth action are typical hallmarks.

    Enthusiasts often debate the nuances that distinguish the best models, but it is generally accepted that a top-tier bolt-action rifle merges consistent accuracy with a seamless mechanical operation. While personal preference plays a role in selecting the right rifle, the marketplace provides options that cater to a variety of needs, ensuring that there is a perfect match for every shooter.

    It is crucial for buyers to consider the context in which they will use their rifle, as this will heavily influence their final decision. Careful research and consideration of personal shooting habits will guide users to an informed choice, one that ensures a reliable and gratifying experience on the range or in the field.

  • A Guide to Running With a Gun

    A Guide to Running With a Gun

    Running is a great way to get some exercise and relieve stress, but it’s not always the safest activity. What if you’re out for a jog and find yourself in danger?

    It’s essential to be careful when you’re out jogging, especially if you’re alone. You may feel safe in your neighborhood, but that doesn’t mean something terrible can’t happen.

    If you have a concealed carry permit, you can protect yourself by taking your firearm on runs. A concealed carry permit allows you to carry your weapon safely and legally in public places where guns are prohibited.

    Whether it’s an angry dog or a violent human who wants to hurt you, running with a gun could save your life in an emergency.

    This article will go over the basics of running while carrying a firearm.

    Why Should You Run With a Firearm?

    running with a gun

    The running community has been rocked in the past few years by a series of attacks against runners. Several high-profile cases have hit the news, and it seems like every time you turn around, there’s another story about someone getting attacked while out on the run.

    The issue is especially concerning for female runners because they comprise a large percentage of those who have been attacked. 

    In a recent Runner’s World report, more than half of female joggers under 30 reported experiencing harassment, often sexual. In addition, a 52-year-old woman was mauled to death by a pack of aggressive neighborhood dogs on the loose.

    The statistics don’t lie. In light of these startling incidents, many people wonder whether they should continue their morning runs or give them up altogether. 

    While it is impossible to eliminate the risk of injury during exercise, you can take some steps to reduce your chances of being targeted by criminals and other dangerous individuals. 

    One simple way is to carry a firearm with you when you go out for a run.

    Here are some reasons why jogging with a concealed weapon is worth considering:

    1. Running with a gun is an excellent way to protect yourself from animals like dogs or bears that might attack you while you’re out.
    2. You can use your gun to defend yourself against other people who might try to hurt you on the run, such as muggers or kidnappers.
    3. You can defend others who may need help during an animal or human assailant attack.

    Why Regular Gun Holsters are a Bad Choice for Running Armed

    running with gun

    If you’re a runner, you know the right equipment can make all the difference between an exhilarating run and a miserable slog. 

    So what happens when you add a traditional holster to your running gear? Let’s find out!

    A Traditional Ankle Hostler Will Put Extra Weight on Your Foot

    Adding some weight to your ankles while jogging will slow you down and be a big distraction. And that is not the only problem with ankle holsters.

    While ankle holsters are a popular option for many people, they’re not the best for runners who want a secure way to carry firearms.

    First, ankle holsters are often uncomfortable to run in. They can rub against your leg and cause chafing. Thus, it will be hard to focus on running without worrying about the pain in your ankles.

    Second, ankle holsters can be difficult to access while running because you have to bend down to draw your weapon. Most importantly, If you prefer running shorts instead of pants, ankle holsters may not be your best bet as you won’t be able to conceal them.

    Note: A trigger guard is a must-have in gun holsters. If your holster fails to adequately protect the trigger guard, it can lead to an accidental discharge.

    A Traditional IWB Holster Will Pull Your Running Shorts Down

    Most athletic shorts are stitched with breathable fabric and a stretchy waistband to keep you comfortable. Unfortunately, no matter how light your pistol is, it’s bound to pull your pants down the second you take off running. 

    Traditional holsters are great for walking around but not so much for running. They can be bulky and uncomfortable when you move at high speeds. They also don’t give you much freedom of movement — you may feel restricted by them as soon as you start running.

    A traditional holster can badly hinder your stride. It may also make it hard to draw your weapon quickly, which could be deadly in a self-defense situation. When you run with a traditional holster on your hip, your stride is thrown off by the weight of the gun pulling down on one side.

    As a result, you’ll likely shift and adjust the weight of your gun throughout your run. If you have to run after a mugger or chase down a suspect, the weight imbalance could put you at a disadvantage.

    You might also be tempted to dump some of your ammo to reduce the overall weight you have to carry. We get it! But we don’t recommend it. 

    It’s never a good idea to sacrifice safety for convenience, especially when you carry a gun. Some day you might need every single one of those bullets for self-defense. So make sure you have enough ammo before heading out into the wilderness!

    On a side note, try Warfytr Liberty Holster if you’re hell-bent on jogging with an IWB holster. You can attach your gun to your sportswear at any angle and lock it into place. This unique design allows for easy movement and functionality, even during high-impact activities like running and exercising. 

    The Four Best Ways to Carry Your Gun While Running

    running with a gun

    What’s the best way to carry your gun while running? We’ve got four great suggestions for you!

    1. Funny Packs

    If you’re a member of the “fanny pack” camp, chances are you’ve had to deal with some pretty funny jokes about your choice of bag. But don’t let those jokes get to you!

    But if you do want to take the joke in stride, here are some ways to deal with it:

    • Just laugh it off. Giggling is good for your health.
    • Wear a fanny pack that matches your running outfit. Although most people prefer a plain black pack, colorful options may spice things up for you.

    2. Chest Packs

    The chest holster is the ideal carry for any wannabe action hero. It clips to your chest and holds your gun securely like a baby in a sling. Moreover, chest packs have straps that go around your shoulders and back. 

    They also include roomy pockets to hold small items like keys or credit cards. 

    But if you’re wearing a waist or chest pack, you can’t avoid fiddling with straps and buckles before you can reach for your gun. Additionally, you may have trouble keeping the weight centered over your hips or shoulders if you’re not used to wearing one of these packs.

    Practice wearing your pack for familiarity when you’re in the field. You should be able to draw your firearm quickly, so get accustomed to those movements before an emergency arises. Again, building muscle memory is vital here!

    3. Belly Bands

    The belly band holster is designed to hold the gun snugly against your side, keeping it out of sight and secure. Belly bands are comfortable and easy to use, making them a popular choice for runners who want to carry their guns while exercising.

    4. Concealment Shorts

    While there are several ways to conceal a gun during a run, none are as effective as concealment shorts. Concealment shorts hide your weapon from prying eyes. 

    Concealment shorts are more comfortable and less restrictive than a holster, but they still allow you to reach your gun quickly if needed.

    They have pockets built right into them that hold your weapon in place and keep it from bouncing around as you run. These pockets are also made of stretchy material to accommodate any size pistol — even those with extended clips!

    Why You Should Take a Concealed Carry Class Before Running With a Gun

    You should be proficient in drawing your firearm and firing it before going for a run with one. If you aren’t sure what this entails, you can find online resources to learn proper safety and handling procedures for firearms. 

    For instance, a concealed carry class will teach you how to safely and effectively use your revolver in different situations, from self-defense to hunting. In addition, you’ll learn the laws surrounding the use of firearms and how they apply to you as an individual.

    Conclusion

    So there you have it, folks. We hope this guide has helped you learn how to run with a gun and feel more confident about your safety when you’re on the road.

    Don’t let the fear of being attacked stop you from running — just know you can take steps to keep yourself safe from harm. Running with a gun is one way to be sure you’re prepared to defend yourself. 

    And remember: the best way to learn how to jog with a concealed weapon is through hands-on training and experience!

  • How to Camouflage Yourself – A Complete Guide

    How to Camouflage Yourself – A Complete Guide

    You can find almost anything in a camo color scheme these days. We can attribute this popularity to the growing hunting industry.

    Camouflage is not a new practice. Ancient communities used it to disguise themselves while hunting animals and when avoiding enemies. And the basic techniques involved have not changed much at all, we are still using many of the same principles and practices today.

    It’s even possible you could find yourself in a situation where you may need to use camouflage. You could find yourself in a survival situation, or you might even be hunting for fun. This article will teach you how to camouflage yourself in any of these situations.

    Why Do You Need Camouflage?

    Camouflage is vital to the success of a hunter because it greatly enhances their ability to blend into the natural surroundings. Predators, like deer or elk, which hunters often pursue, have evolved to be highly sensitive to movement and changes in their environment. Any slight visual or audible cue can alert them to a human presence.

    Wearing clothing that mimics the patterns and colors of the environment can significantly reduce the chances of being detected by these sharp-eyed animals. This increased invisibility allows hunters to get closer to their quarry without being noticed, improving their chances of a successful shot.

    Besides, different types of hunting require different types of camouflage. For example, a waterfowl hunter would likely use a marsh pattern, a deer hunter might use a forest or brush pattern, and so on. This variety allows hunters to adapt to the specific environment they are in, making them even more difficult for animals to spot.

    Finally, wearing camouflage also helps hunters feel more immersed in the wilderness, enhancing the overall hunting experience. This immersion is important because hunting is as much about the process and experience as it is about the end goal. Hence, by seamlessly blending into nature, hunters not only increase their chances of success but also enrich their connection with the natural world.

    How Does Your Target See You?

    This is important to understand the psychology of who you are hiding from. When hunting, you will need to know how the quarry sees you. Animals have varying visual capacities, some even more astute than humans.

    A bird is a good example, as it has tetra-chromatic vision, meaning it can see many colors than humans. Wearing camo fabrics may do more harm than good. A deer can see within a 310-degree angle without having to move. So you may think you are hidden, but you are not.

    Unlike humans, animals like deer have no UV filter. You are missing the mark if you are wearing camo wear made with UV radiant dye. Most commercial camo fabrics come pre-brightened with UV brightness. This beats your entire reason for stealth.

    Aside from hunting, you could also be hiding in a typical environment with people. Here, work on not sticking out.

    How to Camouflage Yourself

    Camouflaging yourself involves blending into your surroundings and not presenting anything that appears out of place. There are two ways to do this. Wearing the most suitable camo clothing or not wearing anything except materials you find in the woods.

    Clothing

    winter camouflage

    Clothing is the first consideration you must make when starting the camouflage process. If you are trying to remain unseen in an urban area, then military patterns will not work. Bright colors will not work in the snow either.

    Your clothing needs to blend in with the environment you are in. You may need to dress like the people in your surroundings. Try blending in with the vegetation when hunting or hiding in the woods. This does not mean you can simply wear any green outfit and be ready to go.

    You must first scout the area and figure out the most dominant colors. Are there any trees? The best way to judge is to squint until the area is blurry and then mimic what colors you see. In this scenario, it is always safer to go with earth tones fabrics.

    You will notice a difference between military camo clothing and commercial camo fabrics. In the past, the military used a single color in an earth tone for their uniforms. But this had to change to the patterned fabric we see to date.

    The military conceals their outfits and weapons based on the concept of mimicry. Most military vehicles have camo patterns or camouflage paint in an earth tone.

    Choosing the Right Camouflage Clothing

    Camouflage clothing comes in all kinds of different patterns. Some patterns try to mimic specific terrains and habitats. The fabric’s colors will tell you the appropriate place to wear a particular camo outfit. 

    The most common colours in nature will nature from shades of greys, greens, tan, and white in case its winter, and this explains why most camo fabrics come in these shades.

    Mimicry Camo Outfits

    Some of these camo outfits have patterns that will mimic twigs and green leaves. Others can match a plain covered in snow. Buying the right mimicry outfit will help you blend with the environment.

    Sometimes the patterns in these camouflage outfits are not enough to conceal you in any situation. You will need to buy different outfits for each specific weather and location change.

    3D Camouflage Patterns

    3d camouflage

    A 3D pattern camouflage outfit will blend in even better with your environment. Some of these outfits can make you look like a pile of dried leaves. You can blend perfectly during the dry seasons in the woods.

    3D patterns can also have hanging fabrics to make them look more authentic. But be careful because these can get caught in thickets. Regardless, they make an excellent choice of hunting gear.

    Disguise

    Some camouflage clothing uses the science of disguise using break up patterns. These patterns will help disguise you to blend in with the terrain around you. If you are going somewhere rocky, you can buy outfits with a pattern that matches the rocky area.

    You should also learn the difference between micro patterns and macro patterns. If you are hunting for prey closer to you, then micro patterns are an excellent choice. Macro patterns will work better for long distances.

    Clothing Accessories

    These include things like helmets, hats, toques and backpacks. These should match your outfit as closely as possible; you can’t go wrong with earthy tones. Worn helmets are more likely to have shiny surfaces and smoother textures, and you can hide this by covering them with foliage from the surrounding area. You can use strings, rubber bands, camouflage bands or burlap strips to hold the foliage in place. You can do the same for your bag and hat.

    Expensive Gear

    The world of camouflage has become a multi-billion industry. This can be confusing because so many companies offer different textures and patterns. Remember that these speciality outfits can be expensive and are not meant for daily use.

    A brand-name camo outfit may not be helpful if you still have not mastered the techniques to keep hidden. We discuss these techniques below.

    Positioning

    a sniper hidden on the grass

    So now that you have the right outfit, next on the checklist is your positioning. You need to find something larger than you to break your outline, known as dead space.

    Dead space is an area where your predator or prey will not be expecting you to hide. This would be a place where people are less likely to look. This could be a large hill, a building, tall trees, and the like.

    Dead space should be able to break down your shape, cover you and create shadows to conceal you. But dead space is not only found in the woods. If you are somewhere in public, like a mall, dead space is somewhere people are not looking.

    Your dead space should have a barrier that separates you from your prey or predator. This could be a tree, a boulder, or a wall, which will give you an edge when you need to surprise your target.

    Movement

    Movement is your biggest enemy when trying to camouflage yourself. A moving target is easy to spot no matter what you are wearing. Even if you camouflage yourself, movement is easy for the eye to catch. The best thing to do is lie low and use hand or arm signals to communicate.

    You may also want to avoid moving when it is windy because wind carries scents. Hunters forget that their hunt begins as soon as they start. Considering the wind’s direction beforehand will help you plan your movement. You do not want to give yourself away before the hunt begins.

    Planning begins with researching the location of your game. This research helps plan entry and exit points. This will help figure out the camo you need, the wind, the best weapons to use, and the best places to set up.

    Sometimes hunting starts with a hike before reaching your intended hunting location. You will work up a sweat, which we try to avoid because sweat has a distinct odor. To avoid this problem, travel in light clothes and then change on site.

    Outlines and Shadows

    Someone or an animal viewing you from afar will only see your outline or shape unless they are using a sniper. Your shadow also moves as you move, sometimes giving you away. For instance, a bag pack or a helmet creates a recognisable outline.

    Use bigger existing shadows to hide your own. You can also break up your shape by blending it with your surroundings. If you are hiding from an enemy, something as big as the vehicle you travel in is easy to see from afar. The best way to prevent drawing attention is to leave your car and walk further.

    An excellent way to conceal your outline is to wear earth-tone clothes. Trees, shrubbery, and bushes are not perfectly symmetrical or neat. This helps hide you and your camouflaged outfit.

    Shine

    Polished devices produce a particular shine that could reveal where you are hidden. Jewelry, car mirrors, items with glossy paint, helmets, oily skin, and shiny equipment all reflect light.

    Do not bring flashy or reflective items if you need to conceal yourself. You should also refrain from smoking or using a flashlight, especially when it is dark outside.

    Scent

    Smells will cling to you. As you move, you will leave a trail of strong scents such as perfume, sweat, or smoke. This creates an easy pathway for animals to locate you.

    The wind carries scents, and animals generally can identify strange smells. You can use wind currents to your advantage by keeping in mind “upwind” and “downwind.”

    Being “downwind” means moving while facing the wind. This would mean that the wind is blowing your scent backwards. This technique will work if your target is in front of you.

    Hunting requires a bit of discretion, and you may want to leave anything with a strong scent. You may need to forgo scented deodorant, soaps, and sweaty clothes.

    You could also avoid showering on hunting days and use unscented detergent. There’s scent-proof camo clothing these days. Although expensive, you can try it if you can fit it into your budget.

    You can also buy cover scents like acorn scent, pine, and fox urine. Look for an odor that is familiar to the hunting area.

    Take Cover

    Taking cover is important if you are protecting yourself from weapons. Trees, stumps, and logs are among the natural objects you can cover yourself with. You can also look for hollow ground or make your trenches.

    Hilly areas, for instance, contain natural hollows you can hide in to wait out any gunfire. Wooded areas are also a perfect hiding location.

    You should avoid open areas, hilltops, and ridges. You can even cover yourself by leaning on a wall. If you find it hard to find somewhere to take cover, try using a sniper veil or shemagh to blend in.

    Instead of buying these fabrics, you can use any debris on the forest floor. Dead leaves, branches, and grass can serve this purpose.

    Apply Patterns

    To apply patterns, you can use mud, ground charcoal, clay, or white ash to cover your skin. The more you exert yourself, the shinier your skin will get. When painting your skin, be careful not to apply only one color throughout your body. You must combine these materials and colors to make a camouflage pattern.

    If you do not want sharp, symmetrical edges, make irregular patterns to match your surroundings. Be sure to match the colors as best you can. For instance, you cannot use red mud in an area with brown mud.

    Using charcoal is an excellent choice because it has unscented properties. Do not use lots of it, though, because black absorbs even more heat. People often forget the area behind their ears and under their chins. Ensure that you cover everywhere with exposed skin.

    Scatter Equipment

    You can scatter equipment either as an individual or if you are working in groups. Placing all your equipment in one space will get you noticed. But if you disperse your equipment and troops, it reduces your exposure. Do not be too scattered that you cannot communicate with the team. Remember that hand and leg signals work better than having a conversation.

    Using Camouflage to Stalk

    Every battle has a defence and offense strategy. So far, we have covered how to use camouflage to hide. Whether hunting, playing paintball, or in battle, hiding is not enough. You may need to find out about your opponent’s position and strategy.

    You will need to perform some stealthy stalking in this case. For this strategy, pick a route covered with thick vegetation so you can move undetected. Hollowed out areas like trenches let you observe your enemy undetected.

    Camouflage also involves movement. You may want to avoid moving sideways while stalking your prey or enemy. The best way to approach your enemy is to approach them straight on. Here are some common stalking techniques:

    Stalking Game Animals

    We have already covered choosing the best routes to enter and leave a hunting den. This helps you map your movement so that you move faster. The best course has enough natural obstacles, so you are concealed at every step.

    The best way to stalk game animals is to approach them head-on. In this way, you can notice subtle movements such as eye movement and ears twitching. Animal stalking requires keenness.

    Your eyes reflect light. Squint your eyes the closer you get because of how good animals’ eyesight is.

    You will also need to contain any excitement, especially if you are an amateur hunter. You need to prevent yourself from making unnecessary noises. Close your mouth too because your teeth can reflect the light as well.

    Crawling

    Crawling involves moving your hands and knees. You can also crawl in trenches. If you are crawling somewhere with dead leaves, know that they will make noise, and dead twigs will snap. The best way to move in this position undetected is to move one limb at a time and be sure to keep it quiet.

    Upright Stalking

    Upright stalking is walking stealthily to observe your target undetected. With stealth walking, you need balance to hold your position.

    Remember to emphasise walking with the balls of your feet so that your steps are light. Use your feet to feel for any twigs or dead leaves that may cause a noise before placing your entire feet on the floor.

    Your arms are another thing to worry about. We tend to spread our arms when finding balance. You may hit a lateral obstacle such as a low-hanging tree branch. As you move your feet, remind yourself to keep your arms close to your body.

    Prone Stalking

    Prone stalking looks more like a push-up by focusing on your hands and toes to move forward. This technique risks dragging the vegetation, making a noise, and leaving markings.

    How to Prevent Yourself From Being Traced

    What is the use of using all these camouflage techniques if your opponent can trace you? You not only need to camouflage your body and movement but also get rid of anything that may trace back to you. There are several ways to do this, including:

    Have Several Start Points

    Having several starting points involves setting up decoy footprints at different entry points. This technique is essential, so your opponent does not recognise the exact path you chose. This will delay them at the very least and give you a big head start.

    Hunt on Rough Terrain

    It is hard to be tracked in rough, rocky terrain unless you drop hints. This is tricky to track because your footsteps will not be imprinted on the ground.

    Restore Vegetation

    After messing up the vegetation, putting it back to hide the disruption may not benefit you. It will slow you down. Although, it may confuse your opponent about the direction you took. So this could be very helpful. You can also use something like a tree branch to hide your footsteps.

    Take Care of Your Feet

    The first thing you can do is invest in foot coverings. You can get commercial ones or make yours using old socks, sandbags, or rags. Another method would be changing your shoes every few miles, making it harder to trace you. Another way to ensure that you are untraceable is to use shoes with common tread marks.

    Change Your Direction Often

    Using only one path to travel is easy to trace. So changing your direction and using popular paths will help to confuse your opponent. A common path will have more traffic to overpower your scent. But only use this technique if you have been in the area long enough to know the walking patterns. 

    You can also confuse your opponent by walking backwards. But be careful because this may be a dangerous choice if your path is full of obstacles.

    Walk along Water Bodies

    Water is good at obscuring your footprints and scent. You can easily escape and hide by travelling through a body of water. Although, a problem arises when your footprints become wet and more noticeable. These pronounced steps may draw more attention to you outside the water body.

    Place Obstacles on Your Tracks

    This is a clever way of covering your tracks and placing a tree branch on the pathway to derail a pursuing opponent. You can also use a tree branch to make the path look unused, especially if multiple tracks are along the way.

    Avoid Fires

    The light from a fire travels far, and its smoke can be identified from even further. Avoid using them if there’s even the slightest chance that your opponent will smell or see any of these indicators. Avoid the use of bright flashlights and smoking at night.

    Final Thoughts

    We have covered how to camouflage yourself in different situations. You must map the journey beforehand to understand the terrain and routes. Aside from disguising yourself, you must also hide your tracks and track your enemy.

  • How to Sight in a Red Dot Scope Without Shooting

    How to Sight in a Red Dot Scope Without Shooting

    Shooting is a fun hobby and sport that sends an explosion of sensation throughout your body. To make the activity even better, you will need a simple, accurate, and prompt process. This is where a red dot scope comes into focus.

    One of the easiest ways to sight in a red dot scope without shooting is by using a bore sighter. Bore sighting involves lining up the barrel’s center with the sights. Here, you will need to measure the exact distance between you and the target before shooting.

    A red dot scope is an optical device that you can find and use with ease. This gadget improves a shooter’s precision by focusing on the field of view in front of them. You can only use this method for long ranges of about 100 yards with high accuracy. In this article, we will discuss how to sight a red dot scope without shooting.

    Difference Between a Red Dot Scope and a Red Dot Sight?

    red dot scope

    Before differentiating between these two, first we need to define the concept of the “red dot”. A red dot optic helps you acquire a target using a red dot to help you shoot your gun accurately. A red dot scope and sight work similarly in helping you zero in on your target, you can magnify your view with a red dot scope, a feature missing in a red dot sight.

    How Does a Red Dot Scope Work?

    Light Emitting Diode (LED)

    A red dot is usually radiated through a Light Emitting Diode (LED) on a glass plate. This LED keeps the red dot reticle aligned with your gun regardless of your eye location. The red dot contains a circular mirror that works to reflect the red LED.

    When the light from the LED hits the mirror, it bounces back to the shooter’s eyes. This red dot scope will remain in the shooter’s eyes once you have zeroed in on the aiming point.

    A simple red dot appears crisp and clean and does not need extra lenses or focus.

    To use this red dot scope, aim it at your target before shooting. The more accurate your aim is, the sharper your shooting accuracy will be.

    Laser Diode

    A laser diode is a semiconductor device. The diode works by generating high-intensity and clear light. The laser diode uses the Light Amplification by Stimulated Emission of Radiation (LASER) to generate laser light.

    Laser Diode sights will cost more money than the LED ones because you will need to add extra components. This ensures the aiming is crisp. When powered, the system will allow your laser diode to emit light that a mirror will reflect. This light will then hit a reflector that is usually found behind the lenses and roof of the sight.

    This ensures that the light reflects and travels in a straight line instead of spreading out. The light then bounces back again on the holographic grating, through the lens, to the shooter.

    Types of Red Dot

    Reflex Sights

    dot reflex sight

    Reflex sights are the most common type of red dot scopes. They function by using a small LED that projects a colored dot of light against a lens. The lens reflects the speck of light towards your eyes, which will allow you to see the red dot through the red dot sight.

    These sights have an advantage because they are light, compact, and can mount on any rifle. But they do not function well in bad weather conditions.

    Red dot scopes on reflex sights are usually larger than the other types of sights. They are best for situations when you need to have a small dot for tactical use. We recommend buying reflex sights for short ranges. This is because they are less sensitive to the eye’s position.

    Prism Sights

    prism red dot sight

    Prism Sights work like traditional lens scopes, but they use a prism instead of lenses. The prism sights use a prism to focus the image and the light.

    A reflective prism works by reflecting light. The prisms can flip, rotate, invert, or diverge a beam of light. Prism Sights are available with slight magnification. This allows for etched or illuminated reticles.

    We recommend these for average distances because their magnification can improve long-range precision.

    Holographic Sights

    red dot holographic sight

    Also known as Holographic Diffraction Sights, Holographic sights are weapon optics. They include lasers and mirrors that send the image of a reticle back to the shooter’s eyes.

    These sights are better than the other sights because they focus on your target faster. While other sights focus the dot to your eyes, these project the reticle in front of the sight.

    They are also durable and can withstand extreme weather environments.

    Bore Sighting

    Bore Sighting involves aligning the center of a gun’s barrel (bore) with the sights on your firearm. This process is usually simple and essential to amateur and seasoned shooters.

    A bore sighting tool aids in perfecting your target’s aim without needing to shoot. The problem is that bore sighting will not be as accurate as when you’re sighting using a rifle unless you’re shooting somewhere close. You need to secure your gun and ensure it sits still to line up your laser beam to the target.

    If you want to shoot a target about 50-100 yards away then any slight difference in the way the laser fits into the chamber or barrel might cause a change in your bullet’s trajectory.

    Types of Bore Sighting

    There are three types of bore sighting tools. These include visual bore sighting, laser bore sighting, and optical bore sighting.

    Visual Bore Sighting

    Visual Bore sighting is a conventional technique that is quite simple. Here, you proceed by removing the bolt from the rifle before proceeding.

    It entails lining up the center of the firearm’s barrel with the sights. You can choose to point the rifle on a steady platform. Fine-tune the knobs while looking through the bore to line it up.

    You can also use the mirror method. This method uses a mirror that you place at a distance so you can see your reflection. Make sure to point the rifle with a straight barrel within the gun’s reflection. Then twist it to align it with the weapon’s barrel.

    Laser Bore sighting

    This type of bore sighting is usually high-tech and bullet-shaped. The size is usually determined by the gun you are shooting with. A laser bore sight is generally mounted on the firearm’s barrel inside the muzzle like ammo. You will then look inside the barrel to spot the red dot.

    Control the dot with your eye to ensure it centres with the target highlighted. This method gives you a faster, easier, and more precise shooting experience. Continue rotating the scope’s crosshairs until the red dot aligns with the target.

    To achieve this, you will need to adjust the knobs, which are the scope, to align everything. This will ensure that the red dot is at the centre of the laser and your gun zeroes in on the target.

    Optical Bore Sighting

    This method is more complicated than the Laser Bore Sight but works the same way. An Optical Bore sighter is usually mounted to the end of your weapon’s barrel. After aligning the optical, line up the lens on your gun to the scope.

    Proceed by focusing on the red dot to line up with the grid displayed through the scope. Ensure you rotate the crosshairs to achieve a central point on the red dot. Remove the optical boresight once done and shoot away!

    https://www.youtube.com/watch?v=8-8WQhY5mRo

    How to Sight in a Red Dot Scope without Shooting

    Before starting this activity, you should know the process of sighting a red dot scope. If you are a new shooter, we recommend some initial training steps. Before jumping in, you should learn how to choose a rifle, balance and align it. You also need to align your gun and practice with a weapon and a dot.

    1. Measure the distance between you and your target

    This will help you balance and align to ensure your target is well placed. The minimum range for an experienced shooter is 100 yards. In comparison, a rifleman can go up to 250 yards. New shooters can shoot at a 20-25 yards range.

    2. Tools and equipment

    After measuring your distance, collect the equipment needed for the shoot. Ensure that you follow all necessary precautions to avoid injuries and accidents. Choose an open place for practice. Ensure that your gun is not loaded at this stage.

    To sight in a red dot scope without shooting, you will need your gun and red dot installed on it. You will also need a powerful laser pointer at the end of your barrel, or into the chamber depending on your gun. 

    Remember that the boresight should match your rifle’s diameter. This will approximate your shot’s point of impact.

    3. Mounting the Scope

    Insert the bore sight into the rifle. Confirm that your setup is stable while mounting. The scope should be on top of the receiver and tightened to minimize movements. Cheaper bore sights cannot tighten up or fit well. So it is important to choose high-quality sights. These sights will cost a little bit more.

    4. Check your target

    • Depending on your choice, you can zero in at 25 yards or 50 yards. Ensure that your target is set. Deciding the distance is essential as your red dot will only be precise at a distance you zero.
    • At this step, your bore sight might not have a lot of battery because it ensures daylight visibility. 
    • Get your rifle on aim while using the laser, while ignoring the red dot sight first.
    • Once you adjust the laser to the center of the target, secure the rifle without holding it.
    • Use the windage and elevation adjustments to move the reticle to lay on top of the laser.
    • Once complete, you can zero into 25 or 50 yards, though we recommend first bore the rifle at 25 yards and then at 50.

    5. Take Your Shot

    After you complete the preparation steps, take a shot at your target. Start with at least 3-5 shots depending on your grouping.

    Check the centering of the groupings. Measure the distance from the center point to where aiming. Adjust the red dot and repeat the shooting.

    Benefits of Red Dot Scoping

    • Red dot scopes assure you of close-range accuracy. It is easier to target in close-range situations than with magnification. This scoping method is accurate and easy to operate.
    • Red dot sights do not need an intermediary to assist you. This will give you the headspace to focus on your shot instead of lining everything up.
    • The red dot appears larger at a higher setting than on a lower one. This gives you Multiple Minutes of Angle (MOA) options. These options allow you to adjust depending on your preference and distance.
    • The red dot ensures you zero in on the target in less time. This will give you, the shooter, the confidence you need to shoot faster.   
    • A red dot is easier to sight in the darkness.
    •  Allows you to shoot with both of your eyes open.

    Disadvantages of Red Dot Scoping

    • Red dot sightings are battery-operated and consume more energy in daylight. They will need a lot of power for visibility. This is a setback, especially if the battery shuts down during a shooting session.
    • While it may guarantee accuracy within close ranges, it may not help with long distances. Red dots allow the shooter to shoot with both eyes open. This ensures maximum situational awareness.

    Final Thoughts

    Shooting is the best way for you to feel an adrenaline rush but still maintain concentration and accuracy. In this article, we discussed how to sight in a red dot scope without shooting. We also touched on the benefits and drawbacks of using this technique. 

    We hope you successfully learned the types of bore sightings. Red Dot Sighting is the best way to save you your ammo and give you near-perfect precision. The secret is getting a high-quality boresight and ensuring you’re accurate when sighting. 

  • 38 Super vs. 357 SIG: Which One Should You Buy?

    38 Super vs. 357 SIG: Which One Should You Buy?

    In the shooting world, there’s no question that the 38 Super and 357 Sig are two of the most popular types of ammo. They excel in a variety of firearms and can be used interchangeably in many cases.

    38 Super vs. 357 Sig: Which is better? How to know which one is right for you? We will look at the major differences between these two rounds and how they stack up against one another.

    Let’s start with the basics. 

    What is the .38 Super?

    38 super vs 357 sig

    The .38 Super is a pistol cartridge created in the late 1920s by Colt. The cartridge was designed for the M1911 pistol, a modified version of the Colt 1911 handgun.

    The .38 Super (also called .38 Super Auto) was developed to fill the need for a pistol round that could work with the 1911 design but would have higher velocity and better performance than the .45 ACP cartridge.

    If you’re looking for a ballistic twin to the .45 ACP, look no further than the .38 Super. The .38 Super was designed to have similar ballistics to the .45 ACP but with lower recoil and higher magazine capacity. Specifically, the magazine capacity of .38 Super is 15 rounds.

    Although other cartridges have eclipsed the .38 Super, it remains popular with competitive gun owners for self-defense purposes.

    What Does the .38 Super Fire?

    The .38 Super ammo fires a 9.04 mm bullet. Its older model, the .38 ACP, fires a 130-grain bullet. 

    The .38 auto propels a 0.356″ diameter bullet at high muzzle velocities.

    What is the Firing Speed of the .38 Super?

    .38 super pistol

    .38 Super fires at an incredible speed of 390.1 m/s. It’s much faster than its ancestor, the .38 ACP, which fires at a decent speed of 320 m/s. The .38 Super delivers incredible knockdown power due to its velocity and is suitable for short-range target shooting.

    If you want an accurate and powerful round, you can’t go wrong with .38 Super.

    Why Does the .38 Super Have Such a Low Recoil?

    While the .38 Super isn’t as popular as other handgun calibers, it shoots with deadly accuracy and low recoil.

    The pressure limit for .38 Super Auto is around 36,500 psi. Since it operates at high chamber pressure, a compensator will counteract recoil. That’s because the compensator, or muzzle brake, diverts the gas pressure when it reaches the muzzle. 

    With more gas volume, the compensator becomes more effective at reducing recoil. 

    The .38 Super can be a great choice if you have small hands because of its smaller grip size. Accurate grip size is essential to avoid hand fatigue and shoot precisely. 

    A Quick Word on the .38 Super’s Design

    The .38 Super is a straight wall case specifically designed for the 1911 frame. However, double-stack magazines may encounter feeding problems due to rim-lock caused by the cartridge’s semi-rimmed case.

    Uses of the .38 Super 

    The .38 Super is a semi-auto round that could penetrate the bodies of automobiles. It’s a big boy amongst powerful handgun cartridges and is popular in action shooting sports such as IPSC and USPSA.

    Initially, the .38 Super was very common in the police sector. Armed peace officers used the cartridges in handguns. The .38 Super Caliber was then regularly found with FBI personnel. 

    Even now, it’s a good option for personal defense, thanks to its deep penetration and effective range. Shooting lovers enjoy this caliber because of its lightweight body and lower recoil.

    This effective cartridge is particularly popular in countries where military cartridges are banned for the civilian population.

    Why is the .38 Super Still Relevant?

    The .38 Super is one of the industry’s most efficient, powerful, and versatile cartridges because of its shooting velocity and lower recoil. As a result, it’s ideal for casual plinking, state and national-level competitions, personal defense, and police duty.

    Even though most users prefer 9mm cartridges, the .38 Super is still relevant in shooting circles, sporting competitions, etc. 

    What is the .357 Sig?

    38 super vs 357 sig

    The .357 SIG is a bottlenecked rimless cartridge for centerfire handguns. It comes from the Swiss-German weapon manufacturer SIG Sauer.

    The .357 SIG is a relatively new design — just 27 years old. Moreover, it was the first commercially used bottleneck cartridge. 

    Although the .357 SIG was a strong contender, it never achieved popularity and commercial significance after its introduction in 1994. That’s because it was twice as expensive as a 9mm bullet which was already popular with commercial and professional shooters.

    Law enforcement agencies are still partial to the .357 SIG as it offers a high muzzle velocity and powerful cartridge.

    What is the .357 SIG Bullet Weight?

    According to the bullet type, the .357 SIG proprietary cartridges have varying weights. Here is a quick rundown:

    • Double-tap bonded defense weighs 7 grams for 115 grains and 10 grams for 147 grains
    • Double-tap FMJFP match weighs 8 grams for 125 grains and 10 grams for 147 grains. 

    The .357 SIG bullet diameter is about 0.355-0.356.”

    Who Should Use the .357 SIG?

    The .357 SIG has an intense recoil that can cause problems for those who aren’t used to using it. Also, if you don’t want any issues reloading your weapon during an emergency, then it’s probably best to avoid this gun. But if you aren’t a beginner-level shooter and want to add some spice to your shooting experience, go for it.

    What is the Firing Range of the .357 SIG?

    The .357 SIG’s high velocity makes it an excellent unit for longer ranges. For example, if you have a 6-inch target, you can shoot the 125 grain .357 SIG bullet from a 122-yard distance. 

    The .357 SIG has the best point-blank range among handguns and common-use pistols.  

    What is the .357 SIG Firing Speed?

    Based on the type and mass of the bullets, the firing speed of the .357 SIG can range from 410 m/s to 580 m/s. This makes it a valuable cartridge for high-end applications.

    How Strong is the .357 SIG’s Recoil?

    The .357 SIG recoil is more than the 9mm’s, generating about 9ft-lbs of recoil pressure. You’ll need to carry a larger frame pistol to balance the immense recoil pressure.

    38 Super vs. 357 SIG: How Do They Compare?

    Here is a quick comparison of some top features of .38 Super and .357 SIG:

    Firing Range

    Typically, the .38 Super manages to get a range of around 200 yards. In comparison, the .357 SIG has a range of just 122 yards. So, the .38 Super has the upper hand in terms of firing range.

    Firing Speed

    Different variants of the .357 SIG have different firing speeds. The top speed is about 580 m/s, way more than the 390 m/s from .38 Super cartridges. If speed is your thing and you’re willing to compromise accuracy and effective range, then the .357 SIG is a good option.

    Availability

    The consumer base for the .357 SIG is considerably small. That’s why the original manufacturers don’t produce these bullets anymore. As a result, they are much pricier than the .38 Super. 

    While the .38 Super is an older model, there is still a demand for this gun, and it remains in steady production. Finding a .38 Super will be easier than a .357 SIG. 

    However, .38 Super factory loads are difficult to come by. If you only rely on factory ammo, the .357 SIG has a slight edge over the .38 Super as its ammo is available in bulk.

    If you check out manufacturers like Buffalo Bore, you will find ammo for your .38 Super. It offers an impressive 38 Super +P load that fires a bullet at 1,450 fps and provides 537 ft-lbs of muzzle energy. However, be careful where you buy your defense load from, as the muzzle energy will vary from each manufacturer. 

    Recoiling Factor

    While the .357 SIG has a major advantage over other comparable pistols, the .38 Super is still the clear winner in recoil. If you can’t handle heavy recoil and muzzle blast, the .38 Super is a better option. Furthermore, the .38 Super has an edge in reliability and accuracy over the .357 Sig. 

    Design 

    The jacked case design of the .357 SIG allows it to be chambered and fed more reliably than straight wall designs like the .38 Super. 

    Conclusion

    In conclusion, the .357 SIG and .38 Super are excellent calibers, offering slightly different benefits. For instance, the .357 SIG is more powerful, while the .38 Super is more cost-effective with lower recoil. 

    So, the 38 Super vs. 357 SIG — who wins in a gunfight? Well, both will perform quite effectively, especially if the guns are high quality. It comes down to your preference in the end.

    Again, we recommend starting with the .38 Super and transitioning to the .357 SIG once you’ve had some experience with handguns.

  • How to Hold a Revolver – Here’s the Proper Way to Grip Your Gun

    How to Hold a Revolver – Here’s the Proper Way to Grip Your Gun

    Learning how to hold a revolver properly is not difficult, but it would take some getting used to. It’s important to practice your stance and proper grip techniques to build up that muscle memory. 

    Revolvers, in particular, can seriously damage the user’s fingers or blow them off completely if held incorrectly – you can thank the cylinder gap for that.

    In this step-by-step guide, you will learn the correct way to stand when holding a firearm and four proper ways to grip a revolver:

    • Thumbs wrapped
    • Thumb over hand
    • Thumbs tucked
    • Thumbs stacked

    how to hold a revolver

    Is There Really a Right Way to Hold a Revolver?

    Yes, there is! There are a few correct ways to hold your revolver so that it does not harm you or anyone around you.

    Whether they’re small, colorful, or look cute, firearms still are no joke! In the US alone, every year, more than 27,000 people are injured in accidental shootings, and close to 500 people die. 

    Learning how to hold your revolver the right way could save you or someone else a trip to the emergency room.

    Is There a Difference Between Grasp and Grip?

    Most people use the words “grasp” and “grip” interchangeably when they’re talking about guns. To grasp something means to hold it firmly. Now, “grip” refers to the act of firmly holding the gun, but as a noun, it also refers to the part of the gun that you hold on to. 

    Confusing? Take a look at this simple labeled diagram showing the parts of a revolver.

    how to hold a revolver

    Shooting Stance – The First Step

    The first step in holding a revolver properly is having the right stance. We’ll briefly describe two of the most commonly used shooting stances: the isosceles and the Weaver.

    Isosceles Stance

    In this stance, the shooter positions their body squarely in the direction of the target. 

    If you’re unsure what “square” means here, it essentially means that the shooter is facing the target directly, with their head held straight and in line with their body and the feet positioned about shoulder-width apart.

    In the isosceles stance, the shooter’s knees are slightly bent, toes pointed forward, arms fully extended in front of them, and both hands holding the gun. 

    The shooter also leans slightly forward, which helps them not to lose balance.

    Weaver Stance

    The Weaver stance is very similar to the isosceles. The main difference is that in this stance, the shooter is not square, and the feet are not in line with each other. Instead, one foot is behind the other. 

    The shooter steps the dominant foot behind the other foot at an angle. In this stance, the shooter leans their head slightly to the side to get a good aim at the target.

    Now let’s look at the techniques for holding a revolver.

    Best Techniques For Holding a Revolver

    Thumbs Wrapped

    The shooter holds the revolver so that the thumb on the supporting hand is wrapped over the thumb of the shooting hand. Holding the gun in this way gives the shooter a high, comfortable grasp on the grip of the gun. 

    This lessens the impact of the recoil and keeps the thumbs away from the cylinder gap. This is the safest technique for using small revolvers in particular. 

    Here’s how it’s done:

    1. Very firmly grasp the grip of the revolver with your dominant shooting hand.
    2. Wrap the fingers of the other hand over the fingers of your shooting hand so that the supporting hand’s thumb is pressing on the dominant hand’s thumb.
    3. At this point, your thumbs will be at the back or close to the side of the gun. Position your thumbs so that the revolver’s hammer will not strike your hand after you fire the gun.

    Thumb Over Hand

    This technique is a variation of the one above. Instead of wrapping one thumb over the other, the shooter places the thumb on the supporting hand on the back of the shooting hand. 

    This technique is better for when using larger revolvers.

    Thumbs Tucked

    The thumbs tucked technique keeps the revolver shooter’s thumbs safely away from the cylinder gap. Here’s how you do it:

    1. Grasp the gun firmly with your shooting hand.
    2. Again, wrap the fingers of the supporting hand over the fingers of your shooting hand.
    3. Instead of crossing your thumbs, bend them as if you were trying to hide them. The thumb of your supporting hand should generally be hiding your dominant thumb up to the first knuckle.

    Thumbs Stacked

    This one resembles the thumbs forward technique commonly used with semi-automatic pistols

    However, it is different. Instead of the thumbs extending to the full length of the frame (or as far as they can reach), they are stacked one on top of the other at a safe distance away from the cylinder gap. Here is how to do it:

    1. As with the techniques above, get a firm grip on the revolver with your dominant hand.
    2. Wrap your supporting fingers around your dominant fingers as if you were about to do the “thumbs wrapped” method.
    3. Instead of wrapping the supporting thumb over the dominant one, stack the dominant thumb on top of the supporting one, pointing it downward. 

    At this point, your thumbs will be at the side of the revolver next to the trigger guard.

    Recap of How to Hold a Revolver

    Now that you know how to hold a revolver properly, let’s quickly recap the key points:

    • Practice your stance. Get familiar with different shooting stances and practice them.
    • The “thumbs wrapped” technique is a favorite among expert revolver shooters, and it is also perhaps the safest.
    • The “thumbs tucked” technique is one of the safest ways to hold a revolver.
    • The “thumbs stacked” technique is easy to learn and safe to use, as long as you do it properly.

    These two-handed grip techniques are also ideal for an in-experienced shooter who might be struggling with recoil control. The one you choose to use depends on your personal preference.

  • How to Bore Sight a Rifle: 3 Easy Methods

    How to Bore Sight a Rifle: 3 Easy Methods

    Bore sighting your rifle can be a quick, easy process to check your rifle’s aim that doesn’t require you to waste time and money shooting several rounds of ammunition to get it dialed in. 

    The most accurate way to get your gun on target is by using a bore sighter such as a laser or a collimator. If you don’t have access to any of these devices, your eyesight is the next best thing to use and can be done without special training. 

    This guide will teach you how to use a laser, a collimator, and your eyes to align your rifle with its scope.

    Read on to find out how to bore sight a rifle.

    What is Bore Sighting?

    Bore sighting, also known as “zeroing,” is the process of aligning the bore of a gun to the reticle of its scope. 

    If you’re not sure what the bore is, it is simply the inside of the barrel of the gun. The reticle of the scope, also called “crosshairs,” is the set of lines that you see when you look through the scope. In some scopes, the reticle has a colored dot instead of lines.

    You can use the bore sighting process if you don’t want to waste ammunition firing at a target and adjusting the reticle until you get your rifle sighted. It is a much quicker, easier, and more accurate way to align your rifle’s sights.

    When Should You Bore Sight a Rifle?

    You should bore sight your rifle if it’s new and you’ve never used it before, or if you haven’t used it for a long time.

    You can also bore sight your rifle at anytime if you find that the alignment is off.

    Bore Sighting Methods

    When using, cleaning, or calibrating a gun, always remember to practice good gun safety. So, before you begin to sight your rifle, check and ensure that there are no bullets in the gun and that the safety is engaged. Failure to do so could be dangerous.

    Next, you should center the rifle’s scope in its adjustment range. In other words, set the elevation and windage at their midway points and numbers.

    Now it’s time to bore sight your firearm. You can do this with the help of a laser bore sighter, a collimator, or just using your eyesight.

    Let’s look at how to bore a sight rifle using these methods.

    how to bore sight a rifle

    Using a Laser

    The first thing you will need to do before attempting to sight your rifle using any method is to set up a target about 25 yards away in a safe location. The best place to do this is at a shooting range. 

    Remember, safety first. Next, you’ll need to set up a shooting rest on something sturdy and level, like a table. When you’re done doing this, follow these steps:

    Step 1

    Place the laser bore sighter into the barrel or chamber of the gun, depending on the type of laser you have. Make sure it fits snugly and securly.

    If your rifle has a muzzle brake, it’s a good idea to remove it before you turn on the laser.

    Step 2

    If any turret caps are on your rifle scope, remove them, then turn the laser on.

    Step 3

    Shift and adjust the gun so that the laser points to the center of the target.

    Step 4

    Turn the “elevation” turret to move the reticle up or down, and turn the “windage” turret to move it left or right.

    Note that turning the elevation dial “up” moves the reticle downward and vice versa. Similarly, turning the windage to the left will move the reticle to the right and vice versa.

    Step 5

    After positioning the reticle in the center of the laser dot, remove the laser from the gun’s barrel or chamber.

    Step 6

    Now that you’ve finished bore sighting your rifle, you can test its accuracy by shooting a few live rounds at a target 100 yards away.

    Advantages of Using a Laser

    • This method is much more accurate than using your eyesight alone.
    • They are pretty affordable.
    • This is ideal for sighting guns with bolts that cannot be removed.

    Disadvantages of Using a Laser

    It would be difficult to see the laser dot on the target if you’re using this device outdoors in bright sunshine. You may want to use it at a time of day when it’s dark enough outside or at a safe location indoors that isn’t particularly bright.

    Using a Collimator

    An optical collimator is a very effective bore sighting device. It uses lenses to magnify an image of a grid inside the device. This grid contains numbers that represent one inch so that the shooter can align the scope and rifle by a measurable number of inches.

    These handy little devices are also used to collimate telescopes and binoculars.

    Because you’re looking at an image on the device and not at an actual target, it is important to make sure that the collimator fits your device perfectly to avoid alignment errors.

    Step 1

    Insert the collimator into the bore and screw it in so that it fits securely.

    Step 2

    Look into the scope of the rifle to see if the grid and reticle line up properly. Most likely, you will need to align them.

    Step 3

    Align the center of the grid to the center of the reticle using the elevation and windage turrets. See step 4 of the laser tutorial to find out how to do this.

    Step 4

    If you have to adjust the reticle more than 8 inches, check your surface to make sure that it is level, and check the shooting rest to make sure your gun is mounted properly.

    Step 5

    Like in the above method, you can test if you’ve properly aligned your rifle by shooting a few live rounds at targets 25 and 100 yards away.

    Advantages Using a Collimator

    • A bore sighting collimator is relatively cheap.
    • Parallax error is much less likely when using an optical collimator.
    • This method is more accurate than using your eyesight alone.

    Disadvantages Using a Collimator

    Errors during manufacture may result in errors in the alignment of your weapon.

    Using Your Eyesight Alone

    For this method, you will need to have a clearly visible marker in the center of your target. Leave the target at 25 yards away, then follow these steps:

    Step 1

    Take the bolt out of the rifle.

    Step 2

    Look down the bore of the gun and keep your eye at the center of the bore.

    Step 3

    Line up the center of the bore with the center of the target as best as you can.

    Step 4

    Next, look through the rifle’s scope and follow step 4 from the laser method to line up the reticle.

    Step 5

    At this point, your rifle is bore-sighted. To test the accuracy of your gun, you can shoot a couple of live rounds at your target then move it 100 yards away and take a few more shots.

    Advantages Using Your Eyesight

    • It costs nothing.
    • It is ideal for instances when you are out in the wild and don’t have a working bore sighting tool.

    Disadvantages Using Your Eyesight

    • It is not as accurate as the other methods.
    • This method takes longer.

    how to bore sight a rifle

    Common Mistakes During Bore Sighting

    Not understanding what each click on your dials mean.

    On most rifle scopes, one turn of the turret (one click) moves the reticle a quarter of an inch.

    Using the wrong size bore sighters.

    Make sure that the arbor of your laser or collimator fits the barrel or scope properly to avoid errors. Some of these devices come with several arbors of different sizes to match different calibers.

    Not reading the instruction manual.

    If you’re new to shooting or not familiar with handling rifles, you should read the instruction manual that comes with the rifle.

    Brief Recap of How to Bore Sight a Rifle

    Now that you know how to bore sight a rifle the proper way, let’s quickly recap the key steps:

    1. Safety first. Before you sight your rifle, the first thing you should do is remove all the ammunition from the gun, then double-check to make sure it is completely empty.
    2. At a safe location, set up a target 25 yards away. A shooting range is the best place to do this.
    3. If you’re using a laser bore sighting device, attach it securely to your rifle. Next, find the laser dot on your target and adjust the rifle scope’s settings to align the center of the reticle with the dot.
    4. If you’re using a collimator, attach it to the bore of your gun. Next, look through the rifle scope and use the turrets to adjust the reticle until you have it centered.
    5. Without using tools, you can still sight your rifle using your eyesight. To do this, you remove the bolt, look down the gun barrel, then through the rifle scope, and align the center of the bore with the center of the target.

    Each method has its pros and cons. It is a good idea to try all three and decide which one works best for you.

  • How Should you Hold a Handgun For Maximum Accuracy?

    How Should you Hold a Handgun For Maximum Accuracy?

    If you thought you could hold a handgun the same way that cowboys in westerns or Neo in the Matrix do and hit a bullseye, you’re quite mistaken. In real life, one has to have a proper grip on a handgun to make accurate shots. 

    Several factors contribute to accuracy, including your stance and gripping technique.

    In this guide, we will focus on the semi-automatic pistol in particular. For a step-by-step guide on holding a revolver correctly, read our article on how to hold a revolver.

    So, how should you hold a handgun for maximum accuracy? Read on to find out.

    how should you hold a handgun for maximum accuracy

    Shooting Stance

    The Isosceles Stance

    To position yourself in the isosceles stance:

    1. Square your body in the direction of the target.
    2. Hold your head straight and in line with your body.
    3. Set your feet a little wider than shoulder-width apart.
    4. Bend your knees slightly, and point your toes forward.
    5. Fully extend your arms in front of you.
    6. Lean forward slightly and shift your weight forward.

    The Weaver Stance

    Like the isosceles, this is one of the most common stances. Here is how to do it:

    1. Face your intended target, and instead of setting your feet parallel, step the dominant foot behind your other foot at an angle.
    2. Slightly lean your head to the side to align your sight with the target.
    3. Slightly bend your knees.
    4. Slightly Bend the elbow of your dominant arm and leave the other elbow loose.
    5. You may want to shift most of your weight to the front foot.

    how should you hold a handgun for maximum accuracy

    The One-Handed Stance

    This is sometimes called the power point stance. Here’s how it’s done:

    1. Face your target at as close to a 90-degree angle as possible.
    2. Set your feet about shoulder-width apart, and step the dominant foot in front to the other at about 45 degrees.
    3. Try to keep your knees straight in this standing position.
    4. Hold your head straight in the direction of the target.
    5. Fully extend your shooting arm in front of you.
    6. Make a fist with your non-shooting hand, and hold that arm close to your chest.

    How to Aim

    In these stances, you want to align your front and rear sight so that you can get a clear aim at your intended target with your dominant eye. Focus on the front sight when using an open sight.

    Proper Handgun Techniques

    how should you hold a handgun for maximum accuracy

    Thumbs Forward/Thumbs Straight Grip

    Although you don’t see this technique used in movies, it is actually the proper way to grip a semi-automatic handgun. This is a two-handed grip, and as the name implies, it involves pointing your thumbs forward. 

    Here’s how you do it:

    1. Using your shooting/dominant hand, firmly grasp the handgun as high up on the grip as possible, keeping in mind that you should also be comfortable.
    2. Wrap the fingers of your supporting hand over the fingers of your shooting hand.
    3. Your trigger finger should rest on the slide parallel to the barrel, and both your thumbs should be on the same side of the gun.
    4. Ensure that your dominant thumb is on top of or beside your supporting thumb. Adjust them to the position that is most comfortable for you.

    One-Handed Grip

    This one is a bit similar to the handgun techniques you see in police TV dramas. As the name implies, it involves holding the gun with only one hand. Of course, the one-handed stance is ideal when using this technique. Let’s go over how to do it:

    1. Position yourself in the one-handed shooting stance.
    2. Firmly grasp the handgun high up on the grip (as high as comfort allows).
    3. Your trigger finger should rest on the slide, parallel to the barrel. Do not rest your finger on the trigger until you are ready to shoot.

    Note that if you’re using a revolver, the techniques for holding this type of gun are a bit different. A revolver has a cylinder gap between the front of the cylinder and the barrel, and this part of the gun can blow the shooter’s fingers off if held incorrectly. 

    Check out this step-by-step guide on how to hold a revolver the right way. 

    Controlling the Trigger

    Your breathing, the part of the finger you press the trigger with, the amount of pressure you apply, and how long you take to release the trigger all contribute to how accurate your shot will be. Here are some tips:

    • Use the first joint or the part of your trigger finger between the tip and the first joint to squeeze the trigger.
    • Try not to tense or jerk your shoulder, arm, or hand when pulling the trigger.
    • Don’t hold your finger on the trigger too long before making a shot. In-experienced shooters do this a lot because they try to be too careful. Remember that accuracy comes with practice.
    • Apply even pressure on the center of the trigger, and squeeze toward the rear of the gun.
    • It is best to squeeze the trigger while exhaling rather than inhaling for better handgun accuracy.

    Controlling Recoil

    Having a proper shooting stance is one of the keys to controlling the recoil of your gun. Perhaps the most important factor is how you hold the gun and how tightly you hold it.

    Use proper handgun gripping techniques, and remember to hold the gun high up on the grip and lock your wrists. If you’re unsure how to lock your wrist, remember this tip: when you’re shaking someone’s hand, your wrist is locked in that position.

    Your arms also play a role in absorbing the kickback from your gun. When using a two-handed grip, make sure that your elbows are slightly bent, aligned, and parallel with each other in a comfortable position.

    Keep the forces on the gun neutral by pushing forward on the weapon with your dominant hand and pulling on the grip with your supporting hand.

    Incorrect Handgun Techniques

    You always want to make sure you hold a handgun for maximum accuracy and safety. But there are a few common handgun techniques and variations that don’t work with semi-automatic handguns. Here are the ones to avoid:

    Thumbs Wrapped/Crossed

    In this technique, the shooter wraps the thumb of the supporting hand over the thumb of the shooting hand. This type of grip is ideal for shooting with revolvers, but not with semi-automatic pistols. 

    This is because semis have a slide, which kicks back forcefully when the gun fires. If this part hits your thumb, you’ll most likely end up with a painful gash – otherwise known as a “slide bite.”

    Teacup Grip

    This technique is incorrect for holding any type of handgun. It was taught as a correct handgun technique in the past but was replaced with the proper methods we saw above, simply because it’s not ideal for controlling recoil.

    If you’re grasping your gun correctly with your shooting hand, then using your supporting hand to cup the bottom of the grip, then you’re using the teacup technique – which is not ideal.

    Holding Your Wrist

    In this incorrect method, the shooter firmly grips the gun with their dominant hand but then tightly holds on to the dominant wrist with the supporting hand. This is not ideal for shooting accuracy because it doesn’t give the shooter enough control over the gun’s recoil.

    Common Handgun Mistakes

    Resting Your Finger on the Trigger Before You Are Ready to Shoot

    Every gun user should know that this violates gun safety rules. 

    Picture this – your finger is resting on the trigger of your loaded gun when suddenly something spooks you (maybe a bee flies into your ear), and you accidentally pull the trigger. Think of all the things that can go wrong in that scenario.

    Now, do you see why it’s important to keep your trigger finger outside the trigger guard when you’re not ready to shoot?

    You should also keep your supporting index finger off the front of the trigger guard when aiming or shooting.

    Not Locking Your Wrists

    Locking your wrists when holding a gun plays a major part in how accurate your shot is and how quickly you can shoot. Remembering to do this essential step significantly helps control the gun’s recoil and keeps your hands and the weapon steady when shooting.

    Holding the Gun Close to Your Face to Aim

    There is no need to hold a handgun near your face when shooting, even if you’re using a scope. It is not a rifle.

    Using the Wrong Size Gun

    Handguns come in different sizes, and you should use the right size grip and firearm for your hand.

    Putting Your Finger on the Cylinder Gap (For Revolvers)

    We mentioned the cylinder gap earlier in this article. If you are using a revolver, this is something that you should always be cautious of. 

    The best way to keep your fingers away from the cylinder gap is by repeatedly practicing proper techniques for holding a revolver.

    How Should You Hold a Handgun For Maximum Accuracy – Let’s Recap

    When reviewing how you should hold a handgun for maximum accuracy, there are a lot of fine points to remember. It all comes down to stance, grip, and technique. Let’s touch on the main points again:

    • Get into a proper stance.
    • Practice holding the gun correctly with the thumbs forward or one-handed grip techniques.
    • Practice good techniques to control the trigger and absorb as much recoil as possible.
    • Take note of incorrect handgun techniques and make sure that you’re not doing them.
  • How to Knife Throw: Simple Guide For Beginners

    How to Knife Throw: Simple Guide For Beginners

    How to Knife Throw: Simple Guide For Beginners

    The art of knife throwing can be learned and mastered by anyone. If you’re unfamiliar with this hobby and competitive sport, it involves throwing specially designed knives at wooden targets. In this guide, we will show you how to:

    • Choose a throwing knife.
    • Grip the knife properly.
    • Position your body and throw the knife using different techniques.
    • Fix errors that cause your knife not to stick to the target board.

    Keep reading to find out how to knife throw.

    how to knife throw

    Types of Throwing Knives

    Throwing knives come in many different sizes, lengths, shapes, and designs, but a few characteristics remain the same in all competitive throwing knives.

    They typically have a pointy tip and a blunt blade. 

    The tip is sharp and pointy, which allows the knife to stick to the target, and the edges are blunt because professional knife throwers like to hold their knives by the blade.

    There is no reason for the blades to be sharp in the sport of knife throwing.

    Another characteristic is the distribution of the weight along the length of the knife. Some knives are handle-heavy, some are blade-heavy, and some are equally balanced.

    Most of the weight is concentrated in the handle of a handle-heavy knife. With a blade-heavy knife, most of the weight is concentrated in the blade. A balanced knife has a balanced weight distribution.

    In terms of the knife’s overall weight, it should neither be too light nor heavy. A knife weighing an average of 200 grams is ideal for most knife throwers, although a heavier knife may be better for throwing over longer distances. 

    This is because the more mass an object has, the more momentum it can carry to it’s target.

    Some of the most popular knives used in knife throwing are the combat knife, the kunai, the bowie, and the dagger.

    How to Grip a Throwing Knife

    We talked about weight distribution in throwing knives earlier in this guide. 

    Where you should hold the knife depends on how the weight is distributed. The general rule is that you hold the knife at the heavier end. You might ask – even if the blade is heavier? The answer to that question is yes. 

    As for balanced knives, they can be held at either end. Learning proper gripping methods is essential in learning how to knife throw.

    There are two main types of grip used in this sport: the pinch grip and the hammer grip.

    Pinch Grip

    This technique looks like it sounds. The thrower holds the knife between the thumb and tips of the other fingers. 

    This approach is ideal for gripping a lighter knife. When holding a larger, heavier knife using this grip, the thrower may need to use more of the surface of their fingers and hand. 

    With a pinch grip for heavier knives, do not enclose the knife in the palm of your hand. Your thumb should be pressing on the handle, pinching it instead of grasping it.

    how to knife throw

    Hammer Grip

    This gripping technique also looks like it sounds. The thrower holds the knife the same way one would hold a hammer. Throwing using this grip causes the knife to rotate faster than when using the pinch grip. For a hammer grip, you’ll want to:

    1. Grasp the handle of the knife in the palm of your hand.
    2. Wrap your four fingers around the handle, with your thumb overlapping those fingers.
    3. Grasp it firmly enough so that you can release it well, but not too tight that it goes off course.

    How to Throw the Knife 

    Stance

    Proper stance is key to accuracy and a good throwing technique. The best way to position yourself is to stand square with your body facing the target directly.

    Next, step your dominant foot (the foot on the same side as your throwing hand) in front of your other foot at a comfortable angle and width. Bend your knees slightly to help you maintain your balance.

    Raise your arm and bend your elbow so that your upper arm is perpendicular to your body.

    Throwing With the Pinch Grip

    1. Position yourself in the proper stance.
    2. Grip your knife correctly.
    3. Raise your arm and bend your elbow so that your upper arm is perpendicular to your body.
    4. Bring the knife as far back as you want to go, keeping in mind the size and weight of the knife and the distance between you and the wooden target.
    5. Swiftly swing your forearm forward and throw the knife, lengthening your arm and maintaining your stance as much as possible.
    6. Follow through the motion with your arm.

    Throwing With the Hammer Grip

    1. Get into the correct stance.
    2. Grip your knife correctly.
    3. Bend your elbow and raise your arm backward behind or in line with your ear.
    4. Throw the knife by swiftly bringing your arm forward, then down, leaning forward while completing the motion. Remember to maintain a proper stance.
    5. Follow through by continuing the downward swing to improve accuracy.

    Knife Throwing Techniques

    Two main techniques are used in the art of knife throwing: the spin technique and the no-spin technique.

    No-Spin Technique

    This approach sounds like how it looks – the knife has no spin on it while traveling through the air.

    To throw a knife with no spin on it, hold the knife with a proper grip, then place your index finger on the back of the knife instead of where you would put it in the pinch grip or hammer grip.

    Now, throw the knife, and release it with your index finger, using good posture and follow-through.

    Spin Technique

    This approach is used to rotate the knife while it is traveling. Several factors contribute to the amount of spin on your knife. 

    These include how far you are from your target, how much you flick your wrist, how high up on the handle you hold the knife, and how much force you put into your throw. 

    There are different variations of the spin technique, the most popular being the half-spin and full-spin.

    To throw a knife with full spin, follow these steps:

    1. Hold the knife low on the handle with the tip of the blade pointing upward (handle-heavy knives are the most suitable for this technique).
    2. Use a pinch or hammer grip for this method, depending on your knife’s type, size, and weight.
    3. Follow steps 3 to 5 of the “throwing with the hammer grip tutorial” above.

    To throw a knife with half-spin, follow these steps:

    1. Hold the knife low on the blade, with the tip pointing downward (blade-heavy knives are ideal for this technique).
    2. Follow steps 4, 5, and 6 of the “throwing with the pinch-grip tutorial.”

    Remember, the distance between you and your target has a lot to do with the rotation of the knife. You can only figure out the right distance and throwing angle for you through practice.

    Fixing Errors With Rotation

    We mentioned earlier that several factors contribute to how much your knife rotates when you throw it. Your knife can either over-rotate or under-rotate. Below are some tips to fix these problems.

    To fix over-rotation:

    • Hold the knife higher on the handle or blade.
    • Move closer to your target.
    • Hold the lighter end of your knife to point in the direction of the target.

    To fix under-rotation, do the opposite of the instructions above for a more accurate throw.

    Safety Precautions

    Although people do knife-throwing as a hobby or as a sport, there is still a significant level of danger involved in this practice. Both experienced and novice knife throwers must take all the necessary safety precautions.

    These include ensuring that the throwing area, like a shooting range, is clear of people and animals and wearing shoes that properly cover your feet and can withstand knife penetration. 

    You should also choose a suitable type of wood to make your target boards.

    how to knife throw

    How to Knife Throw – A Quick Recap

    Now that you understand how to knife throw, let’s quickly recap the basics.

    • Choose the type of knife that you feel most comfortable with. It is a good idea to try out different sizes, weights, and designs.
    • Practice holding the knife correctly – get familiar with the pinch grip and hammer grip.
    • Practice the correct stance.
    • Hold the knife between your thumb and other fingers to do the pinch grip. Avoid enclosing it in your palm.
    • To do the hammer grip, hold the knife’s handle just like how you would hold a hammer.
    • To throw with no spin on the knife, keep your index finger on the back side of the knife while releasing it.
    • Practice using the full-spin and half-spin techniques.

    Have fun practicing your knife throwing, and remember that safety always comes first.

  • Our Review of the Iconic Walther PPK 380

    Our Review of the Iconic Walther PPK 380

    Having been featured in several high-profile Hollywood films, the .380 is an esteemed concealed weapon. The German-made semi-automatic pistol is one of the most recognizable weapons ever. Other than its fame, the Walther PPK .380 is a work of German art, with its stainless steel finish and rugged design.

    Today, we’ll review the Walther PPK 380’s features, uses, and everything you need to know before purchasing this handgun.

    History of the Walther PPK .380

    Walther is short for the German company, Carl Walther GmbH Sportwaffen (Sports Weapon). The Walther PPK .380 was issued to the German military and police in the 1930s and has since gone through several revamps. Originally, Walther PP had a 3.9″ barrel that could handle seven rounds of ammunition in .380ACP.

    The first revamp reduced the barrel to 3.3″ and made the grip frame shorter, reducing its capacity to six rounds. Walther decided on six clockwise riflings in the barrel for this update and removed the back strap.

    They also included a hammer-dropping safety. This is a valuable feature, especially when decocking your pistol — the safety lever blocks the firing pin even before it drops the hammer, preventing a misfire.

    PPK was unique because of its signal pin that would signify whether the gun was loaded or not. When loaded, the signal pin extends towards the back of the pistol, and if not, the chamber doesn’t have the extension.

    This is also one way to distinguish between centerfire and rimfire gun models. The signal pin is only available for centerfire guns.

    Then, this version was improved in 1968 because of the Gun Control Act of 1968. This became the PPK/S version (Polizeipistole Kriminallmodell), which loosely translated from German means Police Pistol Criminal Made, although they used it for non-criminal purposes. This sports version was mainly designed for undercover police work.

    The sporting pistol made a debut because the Gun Control Act restricted the use of handguns that didn’t meet some sporting criteria, and Walther’s PPK version needed to be upgraded to meet the requirement. In came Walther PPK/ S (Sporting).

    To meet GCA’s criteria, Walther shortened the PPK slide and increased the size of the PP frame. These revamps led to James Bond’s interest in the gun, and it was featured in several of his movies. Because of the fame brought from the film, Walther makes newer PPK/ S with improved features every few years.

    The Walther PPK/S has several notable features: a 3.3″ barrel, 1.0″ width, 3.8″ height, and 6.1″ overall height. When empty, this handgun weighs 19 ounces, increasing to about 22 ounces when loaded.

    Where Do They Make the Walther PPK .380?

    Walther has changed their PPK manufacturing location several times. Walther was founded in Germany and was housed there until 1952. They then diversified operations to the United States in 1978 under Ranger Manufacturing in Alabama. Walther continued its operations in Germany until 1986.

    In 2002, Smith & Wesson acquired the license to produce PPK and PPK/S, which they used until 2013. Walther Arms then acquired a production facility in Arkansas and began operations in 2018.

    Features of the Walther PPK .380

    walther ppk 380 review


    Overall Look and Feel

    The .380 comes in either black or silver. The black version has a stainless steel frame, a carbon steel slide, and a melonite finish. The silver version also has a melonite finish, although it’s made from stainless steel with a natural brushed finish.

    The Walther PPK .380 is quite solid and has enough curves and bends to conform with a shooter’s body despite its generic look. The bends make it practical to conceal. The handgun is also corrosion-resistant because it’s made out of steel.

    The steel gun is heavier, which may be uncomfortable to lug around, but you can still comfortably place it in a pocket or belt holster.

    The PPK is quite easy to conceal and remove. It has a thin slide that’s about 0.8″ thick and a 1.1″ grip.

    These days, both PPK and PPK/S come with .380 ACP and 9mm short standard. The handgun comes with both a front and a rear sight that produces a red dot.

    Although this is a pretty pistol, it has some drawbacks. For instance, the gun is designed with bends and sharp corners, especially at the rear, which can leave marks on your thumb and the web of your hand. Walther upgraded the tang in its newer .380 models, making it bigger and longer, which prevents a run-in with the slide’s edges.

    Design

    The Walther .380 was designed to use blowback action. The upgraded version was shortened to 3.3″, making it more compact. Walther’s PPK uses single action/ double action.

    Single action means that the hammer is cocked, and the trigger protrudes at the rear. In the double-action position, the hammer is down, and the spur protrudes forward.

    This pistol was designed to be concealable, making it compact enough to allow small and medium-handed shooters to grip it and have better finger control on the trigger. This sorts out double-action pull for shooters with small hands.

    The Walther PPK .380’s safety lever is located on the slide, an unusual yet practical position. The lever prevents you from pulling the trigger when the hammer is down, and it also locks the trigger when you engage the hammer while cocked.

    This pistol’s magazine release comes in a frame-mounted button located below the side. Its grips are plastic with grooves to help you keep a firm grip on the handle as you shoot.

    You also get two seven-round magazines when you purchase this pistol. The first has an extended finger rest for freelance shooting, while the other has a flat base to make it easier to conceal.

    Function

    The PPK’s compact design makes it suitable to conceal. It’s reliable, but you may need to perform a few finishing touches for smoother shots. It’ll take a few practice shots to get your handgun to work smoothly, and you may have to use a few rounds of ammo to break your pistol in. We recommend breaking your firearm in with cheap ammo first.

    The newer PPK version is designed for amateur shooters who aren’t so experienced in handling the recoil that comes from shooting using the .380. Experienced shooters can also use this gun as a backup.

    The good thing about this pistol is that it meets its intended purpose. The wavy serrations cut the glare on the top of the slide and still manage to amp its aesthetic.

    The reason people prefer this gun for self-defense purposes is that its DA/SA mechanism makes it ready to use at any time. The fact that it’s hammer-fired with a safety lever makes it an even better choice for concealed carry. With this design, users can choose the resistance level they want when pulling the trigger.

    Pulling the trigger makes for higher resistance. If you’re looking for lower resistance, first cock the hammer and then fire. There is an extra lock in place for safety reasons that disengages only when you pull the trigger.

    The PPK and PPK/S are the same, and the difference is in the grip section. The sports version is slightly longer.

    Sights and Trigger

    Your PPK .380 comes with a red painted fixed front blade and a rear notch to help you keep track of your target. The red dot is small and efficient unless you have to use it in the dark, in which case you might want to invest in luminescent paint.

    When it comes to its trigger, the PPK .380 takes the prize. According to the manufacturer’s stats, the trigger pull averages around 2.6 pounds in single-action mode and 13.4 pounds in double action. Unlike other .380 ACP pistols, the PPK feels smoother and lightweight.

    The single-action trigger is mostly for medium distance shots, and its pull feels light. The double-action trigger is long and heavy but will pack a punch. Aside from this, the pistol is relatively steady on the hand despite its size and relative weight. Once you figure out how to handle the gun’s recoil, then you can quickly hit your target.

    How To Disassemble the PPK/S

    Disassembling the PPK/S is pretty straightforward:

    Because this pistol uses an old-school design, reloading it takes a slightly different approach. First, you’ll need to unload the gun and remove the magazine to prevent accidental shots. Then, ensure that you’ve fixed the muzzle to face away from you.

    The next step involves moving the trigger guard until it’s held only by the pin that holds it to the front strap. The trigger guard is prone to slipping back in place, so push it slightly to the side and remove the slide.

    You will see the barrel with a recoil spring around it. This process is straightforward and prevents you from losing tiny parts of the gun as you disassemble it. Reverse the process to assemble it.

    If you’re an amateur and afraid of forgetting how to piece it together, take pictures of every step you take during disassembly and use it as a guide.

    This pistol’s spur has a hole in the middle, adding to its overall aesthetic.

    Drawbacks of Using the PPK

    The Walther .380 works well when you use the correct ammo. This pistol is designed to have a pre-hollow point, which should work best with round nose FMJ rounds. It’s not compatible with most other bullets, and you may have feeding problems when using additional hollow point rounds.

    You may also experience some magazine jamming, but the gun is otherwise reliable. Loading the magazines is a hassle to begin with because the magazine well is too narrow, and you have to place the slide in a precise position for it to fit correctly.

    This will be an inconvenience if you’re in a situation where you need to reload your gun quickly. The magazine release’s position is slightly off, which may inconvenience you, especially if you’ve been using other pistol types before.

    Despite being functional, this pistol still uses its 1930s rugged design, and we think that some extra polishing would go a long way in ensuring comfortable shots.

    We recommend keeping your PPK holstered even when placing it in your pocket or purse to prevent the hard edges from scratching them. You can also customize your PPK by polishing it to clear the rough edges.

    The magazine release placement is higher than other pistols, and you may need to train your thumb to release the slide after you reload it.

    The PPK carries lower capacity magazines than newer guns out there, so most people use it as a backup gun. It’s still an excellent self-defense choice, primarily because of its compact nature that allows you to carry it concealed.

    Even though the stainless steel design makes this pistol durable, guns these days are made of lightweight alternatives like aluminum or polymer. Despite its compactness, the PPK is a little on the heavier side.

    Some might say this is a good feature in a small gun as it helps to manage the recoil. However, it uses straight blowback action, which isn’t a good idea for amateur shooters considering the specs.

    The Walther PPK .380 is frequently upgraded, but each new edition harkens back to the original.

    Final Thoughts

    After reading our review of the Walther PPK, it’s clear that this gun is not only a beautiful, solid piece. It’s also easy on your hands and will give you a great experience once you figure out the mechanics of using it. This is an excellent way to keep in touch with your inner hero for James Bond fanatics.

    The German design is quite expensive, but its aesthetics and corrosion resistance makes it worth the price. It’s something worth getting and keeping. If you’re looking for a concealed weapon or a backup, this compact handgun is a perfect choice.

  • .30-30 vs .30-06. Which Cartridge is Better?

    .30-30 vs .30-06. Which Cartridge is Better?

    You can find any type of cartridge you want on the market today, which can be a real problem when you have to make a decision. Your firearm and the reason you’re getting the cartridge are the biggest factors that determine which cartridge is the best for you.

    You can use the .30-30 and the .30-06 for several purposes, including hunting and shooting competitions. In this article, we’ll compare the .30-30 vs. .30-36 as well as discuss each of their properties and applications.

    The .30-30 Winchester

    The .30-30 was released in 1895 and is a popular cartridge in deer and medium-game hunting because of its effectiveness. This cartridge was designed for the Winchester Model 1894 rifle, a lever-action gun. Its name is adapted from the bullet diameter (.308) because its cartridge uses 30 grains.

    The .30-30 was mainly designed and marketed as a sporting cartridge, but the gun is perfect for both hunting and target shooting. Hunters also prefer this model because of both the rifle’s and the cartridge’s lower price. The lever-action gun consists of a tube magazine that requires flat-nosed bullets, and the .30-30 doesn’t have a pointy tip.

    In the beginning, the .30-30 Winchester needed 160-grain bullets, although these days, you can get bullets with between 110 grains and 200 grains.

    30 30 vs 30 06

    The .30-06 Springfield

    This cartridge was developed in the early 1900s and was mainly designed for military and police force use. It’s also known as “Thirty Aught Six” and is common in bolt-action rifles.

    Unlike the .30-30 Winchester, this cartridge is lighter and more powerful. Because it was adapted for military use, it’s mostly designed for speed and long-distance coverage.

    The .30-06 Springfield is retired now, but it was the main cartridge used in WWI, WWII, Korea, and Vietnam. It isn’t used for military use now, but the design and purpose also make it perfect for deer hunting.

    The cartridge can take a wide range of bullets ranging from 110 to 220 grains, with the most popular ranging between 150 and 180 grains.

    This cartridge takes the cake when it comes to versatility. You can find it in ammunition stores, and it comes in different designs to cater to various hunting needs.

    30 30 vs 30 06

    The Differences Between the .30-30 Winchester vs the .30-06 Springfield

    Both cartridges are pretty similar in diameter, but they have significant differences that will help you make a decision between them.

    Dimensions and Size

    This is the only category where you’ll notice a similarity. Both cartridges fire the same diameter bullets (.308″). Still, the 30-30 Winchester is a slightly smaller cartridge compared to the .30-06. The base diameter is where the difference comes in — a 30-30 measures 0.47″ in diameter, while a 30-06 measures 0.42″.

    The .30-30 cartridge is about 0.4″ shorter, so it only works with a short action rifle, while its counterpart works with a long action rifle. Short action rifles should, in theory, allow a hunter to take quicker follow-up shots.

    The cartridge sizes mean that the .30-06 Springfield can carry more gun powder (68g of propellant) and can hold a power charge. This cartridge also allows you to use heavier bullets without compromising on ballistic properties.

    The size and capacity affect the SAAMI spec maximum pressure. The 30-06 can handle 60,200 PSI in comparison to the 30-30, which can only handle 42000 PSI.

    Ballistics

    Ballistic properties include the trajectory, ballistic coefficient, and velocity. Each of these three features influences the others, and we will look at each of them and compare which one makes for better cartridges.

    Ballistic Coefficient

    The ballistic coefficient shows how well the bullet performs at wind and air resistance. We will not go into the formula to measure this, but the heavier the bullet, the higher its ballistic coefficient. On average, the ballistic coefficient of the .30-30 is 0.231, and the ballistic coefficient of the .30-06 is 0.427.

    A higher ballistic coefficient means better target penetration and trajectory and a higher velocity. When the coefficient is higher, you can extend the range that your rifle can cover.

    Trajectory

    Shooting trajectory is mostly affected by velocity, and the .30-06 is much more effective in a flatter trajectory. This is especially if you want to shoot at a target that’s more than 100 yards away. Both cartridges will perform the same in lesser ranges.

    Velocity

    Velocity represents the speed of a bullet, and this affects each of the other features. The .30-06 is usually the winner in this category, as its bullets travel between 2500 to 3000 FPS primarily because of their size and weight. The .30-30 comes at a close second, with speeds ranging from 2200 to 2700 FPS.

    Recoil

    Although both cartridges fire the same bullet size, the .30-30 was designed for a lighter recoil. We can use a 150-grain bullet as an example because it can handle both cartridges.

    When using a Remington Core-Lokt with these cartridges, you will feel a recoil of about 23 ft-lbs with the .30-06. With the 30-30, you’d feel a recoil of 14ft-lbs.

    Recoil is mostly affected by case capacity and a muzzle’s velocity. The 30-06’s case is longer than the .30-30 and can carry more gun powder, meaning that the bullet will travel further. According to Remington’s stats, the 30-06’s muzzle velocity stands at 2910 FPS, while the muzzle velocity of the 30-30 is 2390 FPS.

    A shooter will have to experience the other side of the higher muzzle velocity, and this is what recoil is all about. Because the 30-06 has a longer case, they will feel the recoil much more than a 30-30 shooter.

    Stopping Power

    The stopping power measures the ability of a bullet to cleanly take down a target without causing a large wound. This feature depends on how much energy the bullet carries, affecting how bad the penetration will be.


    The stopping power depends on the sectional densities and the bullet momentum.

    Sectional Energy

    The purpose of the gun you chose matters when choosing the correct cartridge. For example, if you need a hunting rifle, then you’ll have to select bullets that can penetrate your target’s bones and thick hide.

    You’ll need to measure your cartridge’s sectional density to determine how effectively your bullet will hit the target. Your bullet’s weight and diameter define sectional density.

    With these two cartridges, the diameter is the same, but the .30-30 is heavier, although the difference in sectional density is negligible because the diameter is the same.

    Most Whitetail deer hunters in North America prefer the 30-30, and it hasn’t failed them so far. The main concern we have is the range. For instance, to effectively hunt a deer, you need about 1000 ft-lbs of energy, which the 30-30 will be okay with at short ranges of 100 yards.

    But, a 30-06 hunting rifle would be a better choice for long-distance shots. A deer is smaller than big-sized game such as elk and moose. For this, you’ll require between 1500 and 2200 ft-lbs of energy. These animals also require a closer shot compared to deer.

    Momentum

    The momentum will help determine how much penetration your bullet has in your target. The more momentum a bullet has, the more pronounced the target will be.

    You will need more momentum to take down something as large as an elk because they have denser bones, more body fat, and a thick hide. When comparing the two cartridges, the .30.06 cartridge carries more momentum than the .30-30.

    Accuracy

    You’ll need many more factors to calculate the accuracy of a cartridge, including the rifle you’re using, your experience as a hunter, and the shooting range you’re working with.

    Despite all these features, we have come up with a general idea of other features that can help measure accuracy. When it comes to factors such as ballistic coefficient, velocity, and trajectory, the .30-06 would most certainly win this race, especially for long-range shots.

    The next thing to consider is the bullet momentum, especially for long distances. The .30-06 averages around 600 yards of supersonic flight, which gives it an edge over the .30-30.

    When discussing accuracy with the .30-30, recoil comes to play. A hunter using the .30-30 is more likely to make more follow-up shots than one using the .30-06 because of its feather-light recoil.

    Energy

    A cartridge’s energy is mostly affected by its weight. Heavier items tend to move slower, and we have established that the .30-30 is slightly heavier than the .30-06, which means it travels at a lesser speed.

    The laws of physics tell us that anything moving at a faster speed carries more kinetic energy than an item moving at a slower speed. This means that the .30-06 produces more kinetic energy and will likely kill larger game like moose.

    When it comes to medium-sized game, both cartridges produce almost the same energy to penetrate their targets.

    Reloading

    Both cartridges need a large rifle primer and 30-caliber bullets. You have a ton of choices for 30-caliber projectiles because manufacturers such as Barnes, Nosler, Speer, and Hornady have huge selections of 30-caliber bullets. You can also choose between different bullets and powders to create your own custom-made ammo.

    30 30 vs 30 06

    Pricing and Rifle Availability

    There is no significant difference in pricing for both cartridges, and both fall under the $1/ round mark. The .30.06 is slightly more expensive, but this price difference is dwarfed by the number of benefits you get from the cartridges.

    Since the .30-06 was a military issue, you can find affordable military surplus ammo for it instead of the .30-30 that relies on factory production.

    The military is a big client, and because most manufacturers want to maintain the rifle’s popularity, they keep improving the cartridges. There are about three times more 30-06 bullet varieties than its 30-30 counterpart.

    Popular .30-06 Rifles

    Some of the rifles that support the .30-06 cartridge include:

    • Browning X-Bolt
    • Winchester Model 70
    • Savage 110 Hunter
    • Ruger Hawkeye

    Popular .30-30 Rifles

    Some of the modern rifles compatible with the .30-30 cartridge include:

    • Marlin 336
    • Mossberg 464
    • Winchester Model 94
    • Henry All-Weather Side-Gate Lever

    Frequently Asked Questions (FAQs)

    What Does .30-30 Mean?

    The .30-30 (Winchester Center Fire/ WCF/ Winchester Smokeless) was Winchester’s brainchild before Marlin took over. The .30-30 follows a common cartridge naming structure. .30 represents the bullet caliber, while the second 30 stands for the grain capacity of the original bullet. This cartridge fires 0.308″ diameter bullets.

    What Does .30-06 Mean?

    The first 30 represents the caliber, and 06 shows when it was adopted (1906). The 06 is pronounced as “Aught Six.” This cartridge was designed after a series of failed cartridges made during the early 1900s. It was mainly a military issue but was later discontinued. These days, this cartridge is more efficient for hunting.

    Which Cartridge is Better (.30-30 vs .30-06)?

    Each of these cartridges has features that align with its purpose. The .30-06 wins the battle between the cartridges, especially when looking at the ballistic properties and energy. The .30-06 is also more versatile because you can effectively use it for hunting large and small animals.

    However, when it comes to recoil, the .30-30 is far superior, and we recommend it for amateur hunters. The .30-30 penetrates game much more effectively and doesn’t ruin most of its meat.

    Final Thoughts

    Cartridge and gun comparisons are interesting topics, especially for hunters. The performance of your rifle and bullets will determine whether you’re returning home with deer or not.

    This topic is beneficial for people who hunt and want to choose the right firearm depending on their terrain and intended hunting purpose.

    Although the .30-30 is an all-time favorite among hunters, the .30-06 is giving it a run for its money mainly because of precision that holds up even with extensive distances and large game hunting. In terms of which is better, the .30-30 vs the .30-06, the choice boils down to your preference.

  • What Are Tritium Sights, and Are They the Right Type of Night Sight for You?

    What Are Tritium Sights, and Are They the Right Type of Night Sight for You?

    Tritium sights are an essential tool for anyone that uses a modern handgun, especially when it’s dark. Unlike red dots, these lights are not too bright and therefore won’t give away your position. Plus, there’s no risk of the light suddenly ceasing to work. Throughout this article, we will provide insights into what tritium sights are and other important things you should know about them.

    What Is a Tritium Sight?

    A tritium sight is a radioactive hydrogen- 3 (3H) isotope used for illumination. The isotope is a byproduct of nuclear fusion mainly derived from nuclear weapons production.

    This isotope of hydrogen consists of a hydrogen atom with one proton, one electron, and two neutrons, but this doesn’t light up on its own. Manufacturers store the isotope in small phosphorus-coated glass vials so that the electrons in 3H react with the phosphorus, creating light.

    Tritium lights don’t need a constant energy source to light up, so manufacturers love them. It’s an independent light source that’s reliable and durable. Tritium is quite expensive, so manufacturers use it in small amounts, a gram of Tritium will cost you around $30,000.

    Who Uses Tritium Lights?

    Tritium sights are used in defense weapons such as handguns, but they are also present in glow-in-the-dark watches and wall clocks. Additionally, you can find them in glow sticks and self-illuminating emergency exit signs.

    Shelf Life of Tritium Sights

    Tritium degrades and has a halflife of about 12 years. This causes the sights to become dimmer with time, and eventually stop glowing. After about 12 years, your sights will be half as bright as when you first installed them.

    Some colors hold up better than others, but as a general rule, we recommend replacing the tritium sights in your handgun every 5-6 years to keep the sights bright and easy to use.

    Factors That Affect Tritium Sights Shelf Life

    Because this chemical is so expensive, you need to understand what makes it degrade faster to help you care for your tritium sights better. Here are some of the factors that affect its lifespan.

    Color

    Tritium comes in different colors, each of which degrades differently. Green tritium, for instance, is easily recognizable even in the dark, and it’s also the most durable, spanning 12 years. Its durability and visibility make it the most popular.

    The yellow version is still bright, but it’s dull compared to its green counterpart. Yellow tritium tends to strain the eyes, especially if you’re targeting an area further than usual. This color also spans around 12 years.

    Tritium comes in orange as well, and this is rarely used in firearms because it’s harder to pick up, is less reflective, and makes it hard for a shooter to focus on what’s ahead. Orange tritium lasts about five years.

    Quality

    The quality depends on the brand and your preference for glowing intensity. Several manufacturers produce this kind of sight, but the best thing to look for is a manufacturer that makes sights with a high tritium percentage.

    Usage and Storage

    Tritium night sights aren’t chargeable but use minimal energy. Problems arise if you have incorrect usage and storage mechanisms. These sights will start to work when dim, so their lifespan will reduce if you store them somewhere dark. Using your night sights daily will also result in the tritium light degrading faster than usual.

    Other Types of Night Sights

    what are tritium sights

    Photoluminescent Sights

    If you’ve ever had a glow-in-the-dark watch, then you’re familiar with this kind of lighting. Photoluminescence is the ability of a light source to trigger an object to light up.

    Depending on the quality of the sight, photoluminescent sights can last up to 8 hours and will need to be recharged. You can, for instance, charge this type of light for ten to thirty minutes under direct sunlight. The main advantage of this night sight is that you can recharge them, and the main disadvantage is the need for a light source.

    Laser Sights

    Laser sights focus on a target, and if you have a single target on sight, then you have a chance for more accurate and faster follow-up shots. These sights come in a wide range of colors, with red and green being the most common.

    The main issue with this type of lighting is that it’s more visible, and a target may notice they’re being tracked. The incredibly-focused lighting may also give away your position.

    These sights require electricity to recharge, and some can be battery-powered. Laser sights also cost less than tritium sights, although tritium has the advantage of needing no recharge.

    Fiber Optic Sights

    Fiber optic sights can be a bit difficult to install on firearms, but they can last for a long time when installed correctly. These sights are essentially made from strings of optical fiber, and they come in a myriad of colors. Fiber optic sights are also significantly cheaper than tritium night sights.

    Like photoluminescent sights, fiber optic sights require a trigger to charge them, and they depend on an external light source to illuminate. When it comes to overall reliability, fiber optic sights win over tritium sights because tritium sights will degrade over time. Fiber optic sights don’t degrade even after being stored for decades — all you have to do is expose them to a bit of light, and they light back up. They also pair well with tritium sights.

    Reflex Sights

    Reflex sights work well with a medium-range target and use light to point at a target with a red mark. These lights are battery-operated and heavy compared to other sights, and despite all these disadvantages, reflex sights are still pricey.

    Frequently Asked Questions (FAQs)

    What Are Night Sights?

    Night sights are weapon sights that glow in the dark. Sights help shooters align their shots to their targets. Most of these night sights are made of tritium, although some are made from other chargeable materials. Most firearm experts prefer using tritium sights because they’re durable and don’t need standard charging. A tritium night sight will not give away your position as a shooter.

    Is It Safe To Use Tritium Sights?

    Despite being a radioactive material, tritium only emits negligible amounts of beta radiation, which is less harmful to humans. Tritium sight manufacturers also address this danger by housing the tritium in rugged vials that absorb this radiation, making it harmless to any sight user.

    The only way this radioactive product would harm you is if you directly inhale or ingest the iridium, for instance, if the protective housing breaks. Even then, manufacturers use very little iridium and hydrogen, which is the building block of this isotope that would react in your body to form water.

    Tritium loses its radioactive nature within seconds of being exposed to air. Aside from the fact that tritium is made from broken nuclear weapons, this isotope is also produced in the environment because of gamma rays reaching the earth.

    Can I Make My Tritium Sights Brighter?

    The only way to make a tritium sight brighter is to use it in extremely dark areas. Unfortunately, as this is an independent light, you can’t charge your night sights. You can, however, enhance a night sight’s brightness by using a UV or foil reflector.

    How Long Can I Use My Tritium Sights?

    You can use your tritium sights for as long as they can produce light. If your sights have become dimmer, supplement the light by using a shining UV or foil reflector to magnify it. Tritium’s half-life is slightly more than a decade before its ability to produce light wanes.

    Can We Make Tritium?

    Tritium is a byproduct of nuclear reactor operations and nuclear weapon production. It’s primarily made it by irradiating lithium metal. In nuclear reactions, tritium is used alongside deuterium to fuel nuclear fusion.

    How Much Tritium Is in Gun Sights?

    Gun sights use artificially-made tritium. A typical rifle sight contains about 0.012 curies.

    Are Fiber Optic Sights or Night Sights Better?

    Both are excellent choices for your firearms, although they each have their advantages and disadvantages. Fiber optic sights need exposure to light to work, and tritium sights will produce light without needing a recharge.

    Fiber optic lights work in the dark better than tritium sights and are more reliable in storage and reliability. There is no risk of radioactive exposure with tritium.

    Final Thoughts

    You now have a clear understanding of what tritium sights are and how they compare to other types of night sights. Despite being practically harmless, tritium is still a chemical compound that needs proper storage. We have already covered potential risks, such as the risk of radiation exposure, but beta radiation isn’t that much of a threat.

    Still, you need to take the proper precautionary measures to keep yourself protected. Before storing your firearm, inspect it to ensure that the glass vial isn’t compromised.

    Your firearm’s night sights will come in handy, especially when you need light in the dark to locate and lock in your target. This chemical doesn’t need to recharge and has a long shelf life, which makes it extremely reliable. There’s no chance that it’ll suddenly switch off when you need lighting most.

  • The 44 Mag vs 45-70: What’s the Difference?

    There is a lot of debate surrounding the 44 mag vs 45-70 cartridge debate. Both calibers are popular lever gun choices, but what are the fundamental differences between them? 

    In this blog post, we will explore the pros and cons of each cartridge type. We will also look at which cartridge is better for hunting big game animals and self-defense purposes. 

    Ultimately, it comes down to personal preference – so which cartridge do you prefer and why?

    What Are The Pros And Cons Of Each Cartridge Type?

    The 44 mag vs 45-70 cartridge debate is a popular topic of discussion among gun owners and enthusiasts. The 44 magnums were first introduced in 1955 by Smith & Wesson to improve their Model 29 revolver, which had been chambered for .44 Special cartridges since 1934. 

    It took some time before other manufacturers followed suit. Today, there are numerous options available for 44 magnum guns – both handguns and rifles alike.  

    1. One advantage with the 44 Magnum cartridge is its size. While not quite as big as other rifle calibers like the 30-06 or 300 Weatherby Mag, this round still packs enough punch to stop large animals like deer elk at relatively close range. In addition, the 44 mag has less recoil than some of the larger rifle calibers, making it a bit more manageable for those who may not be as comfortable shooting a bigger gun.
    2. On the downside, there is some debate over whether or not the 44 Magnum round is genuinely effective for hunting larger game animals at longer ranges compared to other rounds like the 45-70. Some hunters feel that while the 44mag is excellent for taking down deer or elk up close, it may not have enough power to take them down at greater distances. 
    3. The 45-70 cartridge was first introduced back in 1873 and has been used by civilians and military personnel alike ever since. It got its name from being able to fire a bullet .45 inches in diameter and 70 grains of powder. 
    4. The 45-70 has a fair amount of recoil, which some people may find uncomfortable. This recoil may lead to inaccuracy for people not used to handling a bigger recoil cartridge. This makes it a more practical hunting cartridge for taking down larger animals like elk or deer at longer ranges. In addition, many hunters feel that the 45-70 has better terminal ballistics than the 44 Magnum, meaning that it is more likely to cause significant damage to an animal when hit. 
    5. Compared with 44 magnum cartridges, 45-70 rounds can fire much further distances than their 44 magnum counterparts, which makes them ideal for hunting big game like elk or moose at long range. However, they have some drawbacks as a result of the larger recoil force, which could lead to inaccuracy.

    That doesn’t mean you can’t get good results if you practice enough. One other negative aspect about these rounds is that not all guns accept both types, so make sure you look into it before purchasing any firearm, because there will be limitations on what ammo you can use.

    44 mag vs 45-70

    Which Cartridge Is Better for Hunting Big Game Animals Like Elk or Deer?

    If you’re an avid hunter, then this question is probably something that has crossed your mind at some point. In most cases, 44 magnum cartridges are better suited for hunting big game animals like elk or moose because they can fire further distances, making them more effective than 45-70 rounds, which only have a maximum range of about 500 yards.

    However, if the distance isn’t an issue and accuracy matters more to the user, 44 magnums might not be as good, since those guns usually don’t come with sights attached. So, instead, it would make sense to buy one equipped with open or peep sights (which allow users to see through tiny holes on either side). 

    If neither option appeals to you but you still want something that can take down large animals, then 44 magnums might just be what you’re looking for. 

    Which Would Be Best To Hunt American Game?

    The 44 Magnum and 45-70 are rifle cartridges that shoot heavier bullets than the regular pistol rounds. The heavier bullets mean that these two cartridges can be used for hunting American big game animals like elk or moose. 

    Some people prefer 44 Mags over 45-70s because they’re easier on the shooter’s wrist and hand when firing multiple shots in succession (i.e., rapid-fire).

    However, if you need better accuracy, this may not matter much – just remember practicing your shooting skills.

    What About Self-Defense Purposes? Which Cartridge Is More Effective In Stopping An Attacker Dead In Their Tracks?

    Again, this is a question that doesn’t have a definitive answer. In general, though, it could be said that the 45-70 cartridge might be more effective for self-defense purposes than the 44 mags because of its larger size and ability to cause more damage. 

    However, it’s important to remember that stopping an attacker isn’t just about using the biggest or most potent round available – shot placement is also crucial. 

    People who use single-shot rifles often choose 44 magnum caliber bullets because they’re easier on the shooter’s hand than 45-70 rounds. However, some shooters may opt for 45-70 cartridges instead due to their larger size and ability to cause more damage at further distances (which makes sense if hunting big game like elk). 

    45-70 loads also tend to be more accurate than 44 magnum rounds because they have less recoil and don’t require as much effort from the user.

    Ultimately, It Comes Down to Personal Preference – So Which Cartridge Do You Prefer and Why?

    Overall, most gun enthusiasts agree that 45-70s are outstanding all-around weapons whether they’re being used as rifles or pistols. They have many applications within hunting and self-defense scenarios, making them an excellent option for those who want something versatile. 

    Conclusion

    Both 44 Magnum and 45-70 rounds have their own unique pros and cons, so it ultimately comes down to personal preference as to which one you prefer. The 44 mag vs 45-70 debate should now be clearer for you, whether you’re aiming for success with a hunting rifle in a single shot or going for self-defense.

  • 1911 Brands to Avoid: Everything You Need to Know

    1911 Brands to Avoid: Everything You Need to Know

    The 1911 pistol is a revered firearm with a rich history. It has been used by the military and law enforcement for over a century, and it still enjoys a strong following among firearms enthusiasts. 

    However, the 1911 is not without its detractors. Some people claim that it is unreliable and that its manufacturing quality leaves something to be desired. 

    In this blog post, we will take a closer look at the 1911 pistol, some 1911 brands to avoid, and discuss some of the pros and cons of owning one.

    1911 Brands To Avoid

    A 1911 pistol is a semi-automatic, single-action handgun with a magazine capacity of between seven and ten rounds. The 1911’s reputation for reliability has resulted in the gun being copied by manufacturers worldwide. 

    However, many of these companies have not lived up to the 1911’s standard for reliability and design quality. Here are six 1911 brands that you should avoid:

    1. Norinco: 1911s made in China by Norinco are inferior to 1911s manufactured in the United States. They tend to be unreliable, and some experience rusting within a few months of use.
    2. Taurus: 1911 pistols produced by Taurus often have problems with their mag release buttons becoming stuck or breaking off while the pistol is being fired.
    3. Kimber: Inexpensive Kimber 1911 models can have several quality control issues, including loose safety levers and slide stop levers that are difficult to operate. Some users also report malfunctions after firing only 300 rounds through these guns.
    4. Wilson 1911s: 1911 pistols manufactured by Wilson are often unreliable, and users have reported problems with the slide stop pins breaking. Other reports indicate that 1911 models made by Wilson can be fired even when the safety is engaged in a “fire” position, resulting in an accident.
    5. Charles Daly 1911s: 1911 pistols from Charles Daly are usually very inexpensive and poorly constructed. Users have reported problems with these guns jamming or failing to fire regularly.
    6. Springfield Armory 1911 Models (XD): Springfield Armory produces several different models of 1911 pistol, including the Range Officer Elite Champion Compact model and the XD series of polymer-framed handguns chambered for .45 ACP cartridges featuring double-action/single-action (DA/SA) triggers. 1911 pistols from Springfield Armory are often much more reliable than 1911s made by other manufacturers. Still, these guns also tend to be more expensive and difficult to find in stock at local gun stores due to their popularity among consumers.

    1911 brands to avoid

    1911 Ownership – Training, Maintenance, And Attention Required

    To ensure that your 1911 pistol remains reliable, it is crucial to understand the proper ways to handle and care for this firearm.

    1. First and foremost, you should always receive training from a certified firearms instructor before using your 1911. In addition, it is necessary to perform regular maintenance on your 1911 to keep it functioning correctly. This includes cleaning the barrel after every 100 rounds fired, checking the recoil spring for wear and replacing if necessary, lubricating all moving parts with gun oil, and inspecting the sights for damage or misalignment.
    2. Be sure to pay attention to any warning signs that may indicate that your 1911 is not functioning correctly. These include jams, stovepipes (rounds getting stuck in the ejection port), failure to feed, and failure to eject. If you experience any of these problems while shooting your 1911, stop using the gun immediately and take it to a qualified gunsmith for inspection.
    3. 1911s are often considered “high-maintenance” firearms when compared to other types of handguns available on the market today. This is partly because 1911 pistols require more attention and care than most other guns to remain reliable. However, if you are willing to put in the extra effort, a 1911 can be an incredibly enjoyable firearm to own and shoot.

    How Much Does The 1911 Cost?

    The price of a 1911 pistol varies depending on the gun’s model, manufacturer, and condition. Newer models will typically cost more than older ones because they are more reliable and easier to shoot accurately. The typical range for new models starts at around $500. However, some can be much higher priced (up to $2500).

    Used 1911s may also vary in price depending on their age and previous owners’ modifications. Typical prices start at about $400, but can go up considerably if extensive changes are made or other work is done to improve performance. 

    These can be things like fitting quality triggers with adjustable over-travel stops or installing match-grade barrels/bushings, which allow them to fire far more accurately than factory-standard handguns.

    Generally, the more expensive models are made with higher-quality materials. They will usually last longer than cheaper versions if they’re taken care of properly over time, while also being easier to shoot well due to their design features (such as having better recoil springs that make it so that you don’t have to apply as much pressure when pulling the trigger).

    Affordability Vs. Reliability: Which Gun Is Right For You?

    The 1911 pistol is a classic firearm that has been around for over 100 years and continues to be popular among gun enthusiasts today. This gun offers shooters the ability to shoot .45 ACP rounds, which are some of the most powerful cartridges available on the market. 

    In addition, the 1911 is a very reliable handgun when adequately maintained. However, it does require more attention than other firearms to keep it functioning correctly.

    Conclusion

    So, which 1911 is right for you? If you’re looking for an affordable and reliable option that doesn’t require too much maintenance, there are many models available today that will fit those criteria. 

    If you’re willing to spend a little more money for a gun that is made with higher quality materials and is easier to shoot accurately, there are also many great options available. 

    Ultimately, the decision comes down to what you are looking for in a 1911 pistol, and you now know which 1911 brands to avoid too.

  • How Much is a Used 38 Special Worth?

    How Much is a Used 38 Special Worth?

    A 38 Special, which is more technically called a 0.38 Smith & Wesson Special, is a fan favorite revolver among gun enthusiasts. The piece was originally a black powder gun but has since evolved into the design you can find and purchase today. 

    If you’re looking for something for your collection, or if you simply can’t afford a new 38 Special, buying a used one can be a good option. 

    In this article, we answer the question “How much is a used 38 Special worth?” We also talk about the history of the gun, what makes it so special, and what you should expect if you decide to purchase a used one. 

    How Much is a Used 38 Special Worth?

    Owning a brand new gun will give you the best possible experience when it comes to shooting and cleaning your revolver. If you’re going to buy a new 38 Special, the small gun will set you back about $540 in the United States. 

    If you go for a used one, you can expect to spend anything between $300 to $500 for a 38 Special. The amount you pay will depend on the age and condition of the gun. This means that you will have to properly inspect what is being offered before you buy it. 

    how much is a used 38 special worth

    What is the Best Place to Buy a Used Gun?

    A quick Google search will give you dozens of options from where you can buy used guns, though you might not be able to get your hands on the gun and check it out.

    A good way to find and buy used guns is to check your local classifieds. While the sale of guns, ammunition, explosives, or related items is not allowed on Facebook Marketplace, you can look near your area for people who are selling their guns and will be willing to let you test them before you buy them. 

    You can also visit police auctions to get good prices on used models. Several online sellers have used police guns for sale on their websites. 

    Before you buy a used gun, make sure you have all the necessary documentation. Depending on which state you live in, you might need to only purchase a gun through a licensed dealer, even for a private sale. Remember that you will need to keep your ID with you and fill out a form before you can buy a used gun. 

    How Do I Make Sure I’m Getting a Good Gun?

    Used guns can be a hit or miss when it comes to quality. You need to inspect it inside out to make sure you’re not getting a bad product. Check both the inside and outside of the revolver for cleanliness and damage. The crown, trigger, barrel, action, and bore of the gun should also be checked before you decide to buy it. 

    There should be no chips around the seams or any scarring around the screws. Make sure all the screws match should also be something you need to keep an eye out for. These factors will ensure that the revolver you’re holding has not been opened up and the insides have not been tampered with. 

    Other things to look for are the alignment of the ejector rod, the positioning and stability of the cylinder, and the condition of the firing pin. 

    You can learn more about this by watching this Buying Used Revolvers video.

    how much is a used 38 special worth

    Why Should I Buy a 38 Special?

    A 38 Special has been a popular gun for a long time, used in wars and for police work. The accuracy of the gun is quite great, making shooting it a pleasure. The power on the gun is low without being ineffective, which makes it a low recoil gun. 

    The 38 Special is also compact and easy to conceal carry. Loading and unloading the gun is quite easy as well, making it a good fit for women. Revolvers in general are less complicated and more intuitive to use than other guns.

    Reliability is another important factor when it comes to a 38 Special, and even a used gun will give you years of reliable, point-and-shoot experiences. You are also spoilt for choice when it comes to ammunition options. If you’re looking for something to own as a self-defense weapon, a 38 Special can be your best bet. 

    A used gun, besides being relatively more affordable, might also come with accessories and some extra ammunition included by the seller. This will give you the ability to use your gun immediately without having to buy everything separately. 

    What are the Cons of a 38 Special?

    While a 38 Special is certainly a great gun for hunting or to keep in the house for self-defense, it comes with certain disadvantages as well. The round capacity is not too high, which means you will quickly run out of loaded bullets if you’re shooting hard. Reloading the gun will also take longer than, say, a semi-automatic gun. 

    Besides this, a 38 Special’s trigger pull will be slightly harder than what you might find on a semi-automatic gun. While you can always cock the hammer to make your shot softer, it might not be the best idea for a high-pressure situation. 

    Conclusion

    If you’re in the market for a used gun, we hope that this article has given you all the information you need about buying a used 38 Special and what to expect. 

    If you want to learn more about guns (for example, the working of a single-action revolver), please check out our other posts as well!

  • 380 vs 22 Mag: Pros, Cons, and Which is Better for You?

    380 vs 22 Mag: Pros, Cons, and Which is Better for You?

    When it comes to 380 vs 22 caliber rounds, each has pros and cons. 380 ammo is a bit more powerful and can be used for self-defense or hunting larger game. However, 22 mag ammo is smaller and more lightweight, making it better suited for pocket pistols. 

    Prices for 380 and 22 mag rounds also differ, with the 380 being a bit more expensive.

    Initial Considerations

    When choosing a caliber for your firearm, it’s helpful to consider the purpose of the gun. 380 ammo is best suited for self-defense or hunting larger game like deer, while 22 mag rounds are better used on smaller targets like varmints and rodents. 

    380 pistols also tend to be a bit more expensive than their 22 counterparts since they have higher magazine capacities and are typically made from stainless steel, which adds weight to the firearm. 

    380 ammo is also considerably bigger than its counterpart, so you must keep this in mind when choosing your caliber! If you’re looking for an affordable handgun with minimal recoil, then 380 might not be suitable for you.

    Ammunition selection is another crucial factor to consider, as 380 ammo can be a bit harder to find than 22 mag rounds.

    380 vs 22

    Which is better for self-defense or hunting?

    The answer to this question really depends on what you’re using the gun for. If you’re looking for a cartridge to take down larger prey, 380 ammo is your best bet. 

    However, if you need something lightweight and affordable for self-defense or varmint hunting, 22 mag rounds are ideal.

    The 380 and 22 mag cartridges are actually both excellent options for self-defense. Both rounds have similar muzzle velocities, but the 380 is a bit more potent than its counterpart due to its size (which makes it heavier). 

    Although these two calibers may seem like they’re equally matched, keep in mind that each round has different pros and cons. For example, if you need something lightweight with minimal recoil, the 22 mag might be what you need for faster and recoil-limiting experience.

    Which caliber is better? That’s a tricky question to answer because it depends on various factors, including your experience level with firearms, the size and weight of the gun, and the purpose of the firearm itself. 

    The following points may be used as a guideline when deciding between 380 vs 22 ammo:

    1. 380 pistols are generally larger than their counterparts and have higher magazine capacities, making them better suited for self-defense (or hunting) applications. They also tend to be more expensive due to the materials used in constructing these firearms – like steel or stainless steel, which add weight and recoil potential. Ammunition selection is another important factor since finding high-quality ammunition can sometimes prove difficult with some calibers (such as .22 LR).
    2. If you’re looking for a cartridge that will take down larger prey, 380 ammo is your best bet. The smaller size of 22 mag rounds, on the other hand, makes them perfect for pocket pistols. Because of the smaller size of the 22 mag rounds, you’ll need to hit with accuracy and aim at vital organs or areas for it to be effective.

    380 vs 22

    How do the prices compare for each round?

    Ammunition prices vary by caliber and manufacturer. Generally, 380 ammo is more expensive than 22 mag rounds. This is because there are fewer manufacturers of 380 ammo than those who make 22 LR rounds. Additionally, .22LR cartridges are typically cheaper than their larger counterparts because the market for this ammunition is much larger.

    The following points may be used as a guideline when comparing ammo prices:

    1. 380 ammo is more expensive than 22 mag rounds because there are fewer ammo manufacturers for this caliber. Additionally, .22LR cartridges are typically cheaper than their larger counterparts because the market for this ammunition is much larger.
    2. 22 ammo prices vary by manufacturer and caliber, but in general, it’s cheaper than .380 ammo because there are more options. The cost of 380 rounds can range from $0.40 – $0.55 per round, while 22 ammo is typically priced between $0.25-$0.35 per round, depending on quality or brand name.

    What to consider when choosing a handgun cartridge

    1. The size and weight of the firearm being used for your cartridge selection (i.e., if you are looking at 380 ammo, then consider purchasing something like an S&W M&P Shield, which weighs around 20 ounces unloaded). It’s important to note that larger pistols may not fit into all holsters, so consider when deciding on a handgun size/caliber combination! 
    2. Purpose of the gun: the purpose of your firearm will help determine what type of ammunition you need to purchase for it. For example, if you are looking at 380 ammo, then consider purchasing something like an S&W M&P Shield, which weighs around 20 ounces unloaded.)
    3. Your experience level with firearms (i.e., beginner vs. advanced shooters). Beginner shooters may want more control over their weapon and prefer smaller calibers like 22 mags. This is because they can handle them easier than larger ones, such as .380 Auto or 45 ACP, which advanced users may have more comfort with.

    Conclusion

    The 380 vs 22 debate is common among gun owners, and it’s essential to consider your purpose when choosing which caliber you want to purchase. 

    380 ammo will work best for self-defense or hunting applications, while smaller rounds like 22 mag may be more suitable if you just need something around the house to protect yourself from intruders who try to break into your home!

  • How Red Dot Sights Work: Everything You Need to Know

    How Red Dot Sights Work: Everything You Need to Know

    If you have owned or shot a firearm recently, there is a good chance that it came with a red dot sight. Red dot sights are incredibly popular because they offer you an enhanced alignment experience. No matter what position your eye is in, you will not experience any parallax error. 

    Red dot sights are not only used on bigger firearms (for example, rifles) but can now also be found on smaller weapons like handguns. Options like Pinty Scopes can be fixed on all different types of guns. The purpose of a red dot sight is to give you an accurate idea of the target by showing you exactly where you’re shooting. 

    But do you know how red dot sights work? In this article, we talk about the working of a red dot sight, the alternatives, and the pros and cons of this type of aiming device. 

    How Do Red Dot Sights Work?

    Red dot sights employ the use of an LED (light-emitting diode) and a spherical mirror to give you the clear, focused dot that you can see on your scope. The reason the color red is used is because of its sharp contrast to the color green. If you’re hunting or enjoying a spot of casual shooting, there is a good chance that your background will be green. 

    The spherical mirror that is used on the scope lets the light beams be completely parallel when they bounce off it. This gives you the bright, focused point in your scope without causing distortion or flashing. 

    A special type of coating (partially silvered multilayer dielectric dichroic) is used on the curved mirror in the sight. Even though the LED is red, there might be some other colors present in the light emitted by it. Using this coating allows other colors to pass through the mirror by only reflecting red, giving you a bright, pure point. 

    how red dot sights work

    How Do Red Dot Sights Work for So Long?

    If you get a red dot sight, you might realize that the lifespan of the reticle can be up to thousands of hours. This is because of the LED used in the scope. You get a solid-state LED that does not consume a lot of energy, so you can safely use your red dot sight for years without having to replace it or refresh the battery.

    What are the Different Types of Mounting Types for Red Dot Sights?

    Red dot sights are available in many different mounting types. Because guns exist in a variety of mounting patterns, you need to make sure that your scope and the top of your gun are compatible. For this reason, a lot of scopes are designed to fit on multiple mounting patterns. 

    The most common mounting patterns that you will find for red dot sights are the Docter/Noblex standards, the C-more standard, the Shield standard, the Trijicon RMR standard, and the Aimpoint Micro standard. 

    how red dot sights work

    What are the Advantages of Using Red Dot Sights?

    Red dot sights are hugely popular. Here are some of the advantages that make red dot sights such a ubiquitous thing in the gun community. 

    • Ease of Use

    Red dot sights offer you a simple solution to aiming. You can just look into your scope, point, and shoot at whatever the dot lands on. Whether you’re new to shooting or you’ve been shooting for years, using a red dot sight is as intuitive and easy as it gets. 

    • Speed

    If you are shooting quickly at a short-range (for example, hunting), red dot sights can change your shooting for the better. As you always have a proper dot to fall back on after recoil or reloads, you can shoot more quickly at short distances while also keeping both your eyes open. 

    • Accuracy

    Red dot sights, when calibrated and set up properly, offer great accuracy at short distances. Newer red dot sights come with holographic variations, which means you get no parallax error. This can cause a huge improvement inaccuracy. 

    • Alignment

    Conventional sights mean that you have to align the rear and the front sight. With a red dot sight, there is no need to carry out this adjustment because of the optical characteristics of the scope. 

    What are the Disadvantages of Using Red Dot Sights?

    Although red dot sights offer a great shooting experience, they are not perfect. Here are some things you need to consider before buying a scope of this type. 

    • Price

    Red dot sights are NOT cheap. If you go for a high-quality mount from a popular brand, you might end up spending hundreds of dollars on them. Entry-level dots might be more affordable, but the truly good ones will be an investment. 

    • Magnification

    While there might be some magnification options when it comes to these scopes, most red dot sights do not come with any magnification at all. This makes them unsuitable for long-range shooting. 

    • Long Range Shooting

    Speaking of long-range shooting, magnification is not the only issue when it comes to red dot sights. While you might find the option to change the size of the reticle on some sights, shooting at a target far away might not be as accurate with these kinds of scopes. 

    Conclusion

    Red dot sights have become very popular for all types of guns in recent years, including rifles, shotguns, and even handguns because of the kind of speed, accuracy, ease of use, and overall convenience they offer. For short-range shooting, red dot sights are an excellent option, both at the range and while hunting. 

    We hope that this article has explained how red dot sights work and their pros and cons well. Check out our other posts to learn more about everything related to guns!

  • What Do the Numbers Mean on a Rifle Scope?: Explained

    What Do the Numbers Mean on a Rifle Scope?: Explained

    Gun enthusiasts understand that while your gun might be the most important item in your hunting or range kit, the experience is incomplete without the accessories that come with it. Scopes are one of the most important gun accessories you could own. 

    This is because shooting is only fun when you’re achieving the accuracy you want. You cannot enjoy your day of hunting if you’re missing every target. Whether you’re buying a rifle or a shotgun scope, you will see that the scope specifications come with numbers. 

    What do the numbers mean on a rifle scope? In this article, we talk about everything you need to know about these numbers and how to pick the right set of numbers for your hunting experience.

    What Do the Numbers Mean on a Rifle Scope?

    Every rifle scope has specifications with two numbers. Let’s call these numbers x and y. Your scope will have specifications in the form of x x y. 

    The first number, x, is the magnification of a rifle scope. While scopes on shotguns and handguns are meant for short-range shooting, rifles are meant for long-distance shooting. Therefore, all scopes for rifles will come with a magnifying factor. 

    Sometimes you might see rifle scope specifications in the form of three numbers, i.e. x – z x y. This means that the rifle has customizable magnification instead of a fixed one and you can get any magnification between x and z. This is also called variable magnification power. 

    The second number, y, on a rifle scope indicates the size of the objective lens. The objective lens is the one on the front of the scope. 

    Therefore, if you have a rifle scope with the specifications 4 x 32, it means that the magnification is 4 times and the diameter of the objective lens is 32 millimeters. Similarly, if you have a rifle scope with the specifications 4-12 x 50, it means that you have an adjustable magnification of 4 times to 12 times with the scope and an objective lens diameter of 50 millimeters. 

    what do the numbers mean on a rifle scope

    How Does Magnification of the Scope Affect Shooting?

    Magnification is quite straightforward to understand when it comes to shooting. If you’re shooting a rifle at a target that is a long distance away, a properly aligned scope that provides you with a magnified view of the target will help you shoot more accurately. 

    However, more is not always better when it comes to magnification. If you’re choosing a rifle scope with fixed magnification power, you should get one that is most suited to the kind of hunting or shooting you mostly participate in. 

    Choosing Magnification Powers

    Choosing a magnification power higher than what you need will not let you focus properly on your target. Similarly, choosing a power lower than what you need will not give you the accuracy you need to make an accurate shot. 

    Therefore, when you’re choosing a rifle scope, choose a power range depending on the usual distance of your targets. If you use your rifle for small game that you can shoot within 100 yards, a 4x magnification should suffice. Magnification of up to 8x should work for shooting targets up to 200 yards. 

    Higher magnifications might be needed for targets that are shot in open landscapes. For example, if you’re hunting animals in a large field, an open plateau, or a desert, you might need a rifle scope with up to 12x magnification power. 

    Fixed vs. Variable Magnification

    As a general rule, variable magnification power is a better option. This is because you can adjust the magnification properly to shoot your most accurate shot instead of relying on a single frame of view. 

    what do the numbers mean on a rifle scope

    How Does the Diameter of the Objective Lens Affect Shooting?

    The size of the objective lens directly affects how much light is entering your scope. This, in turn, affects the brightness that you get when you’re scoped in. 

    The higher the magnification on your rifle scope, the lower the brightness will be. This means that you will get a brighter picture at 4x zoom than you will at 12x zoom. For the same reason, a 50-millimeter objective lens will give you much better visibility at higher magnifications than a 32-millimeter lens. 

    But does this mean that you should go for the highest magnification objective lens for the best long-range shooting experience? The answer is not that simple. There are some factors that you should consider before choosing the size of your objective lens. 

    Price

    The bigger the diameter of your objective lens, the more expensive your rifle scope will be. While increased brightness will certainly improve your visibility and offer a better shot during long-range shooting, the extra dollars you will spend might not be worth the slight improvement. 

    Size and Weight

    You cannot get a larger objective lens on your scope without increasing the overall size and weight of the scope. When you’re out hunting, you need to make sure that the weight of your rifle is manageable for you to take a stable, clean shot. A heavy scope might cause instability and ultimately reduce the accuracy of your rifle, defeating the point of the larger objective lens. 

    The Bottom Line

    Choosing the right rifle scope can make or break your hunting experience. If you do not have enough magnification, you might not be able to hit your targets accurately. Too much magnification also has the ability to ruin your shooting by not letting you focus properly. 

    We hope that this article has helped you to understand exactly what the numbers on a rifle scope mean and how to make an informed choice regarding these numbers. Check out Future Army Officers for more informative articles on firearms and accessories!

  • Kimber Custom II Problems: Everything You Need to Know

    Kimber Custom II Problems: Everything You Need to Know

    If you love guns, you probably remember the first time you saw a Kimber Custom II. This full-sized 1911 pistol is one of the most beautiful guns you can buy. It comes in customizable colors and options, but the two-tone version with its brushed polished carbon slide, the stainless steel frame, and the rosewood grips make it one of the best-looking guns on the market. 

    Kimber has also made a name for itself due to the number of institutions that have adopted their guns. The LAPD SWAT, United States Marines assigned to Special Operations Command, the LAPD SIS, and the USA Shooting Rapid Fire Pistol Team have all chosen Kimber for their activities. 

    Despite the positive reputation, these guns do not come without problems. While the Kimber Custom II is certainly a good-looking gun with a lot of great reviews, there are some things you might want to consider before you choose to buy one. 

    Kimber Custom II

    The Kimber Custom II will set you back almost a thousand dollars if you’re buying it new from the official Kimber website. For this hefty price tag, you do get several great features. The 90-degree barrel height is 5.25 inches, making this quite a large gun in its size range. With a magazine capacity of 7, you also get to shoot more between reloads. 

    There is a full-length guide rod on the gun that gives you more accuracy while shooting. The semi-automatic handgun is 1911, which lends the gun its size and weight. 

    kimber custom ii problems

    Pros

    The Kimber Custom II advertises itself as the gun that all other guns should be like. How much of this is true? Let’s talk about the advantages of guns first. 

    • Looks

    While this may not matter much to most gun owners, there is no denying that the Kimber Custom II is a beautiful gun. The build quality, the attention to detail, and the finishing touches on a traditional 1911 gun make the Kimber Custom II excellent to just look at and admire. 

    • Accuracy

    Kimber guns are advertised as having great accuracy, and the full-length guide rod on the gun makes for great precision. The match-grade barrel on the gun also adds to its accuracy and gives you an even shooting experience. 

    • Reliability

    A well-built gun will always be reliable, and Kimber guns are usually high-quality products that are well manufactured. While there might be some issues with the gun, as we will discuss in the later sections, overall the Kimber Custom II is a reliable 1911 option to own and shoot.

    Cons

    What you need to keep in mind is that not all guns are made the same. If a factory makes a thousand guns, there is a slight chance that a small percentage might not work as well as the rest of them.

    When we consider the disadvantages of the Kimber Custom II, they are meant to be taken with a pinch of salt. While the gun certainly isn’t perfect, the problems mentioned in this article have been faced by real people who are verified, customers, and long-time gun users. 

    • Price

    The Kimber Custom II is not expensive, but it is certainly not cheap. While you can get 1911 guns for lower prices, the customization looks, and build quality of the Kimber Custom II drive up its price. There are other semi-automatic options from competitors on the market that people would swear by instead of going for a Kimber. 

    • Handling

    Once all is said and done, the Kimber Custom II is just a customized 1911, and the handling might not be the best fit for everyone. Even though it is one of the most popular models you can buy today, it is still a single-action automatic handgun. 

    • Complaints

    There have been very divided reviews about Kimber guns. While some people swear by the gun and claim that the Custom II is the best and the most reliable gun they have ever owned, others say that the quality control is just not great and that there were several issues with the piece. 

    One of the most common issues with Kimber Custom II handguns is the quality of their stock magazines. Many people say that the magazines that come with the guns are not great. They should be tested out with different types of ammunition to see which one works best. 

    If you want to buy a Kimber Custom II and are worried about their magazines being unreliable or not giving you the best shooting experience, gun enthusiasts suggest you go for magazines like Wilson Combat or Chip McCormick. While the Kimber guns themselves can work very well over time, the magazines are an issue. 

    Another complaint that has been reported is that the guns have a feed ramp issue. If you run into failure to feed when you’re out hunting or if you’re using the gun for self-defense, it might be a serious problem. 

    Conclusion

    Kimber Custom II handguns are a popular choice among gun enthusiasts and for good reason. They’re on the lower end of expensive prices, they’re accurate and precise in shooting, and they’re some of the best-looking handguns on the market. There are still some issues with magazines, feed ramp, and overall reliability have been reported by verified users. 

    We hope that this article has helped you understand Kimber Custom II’s problems and issues before you decide to pull the trigger and buy one for yourself. An alternative option you might consider for a semi-automatic handgun is the Taurus Spectrum 0.380. For more informational articles and reviews, check out the posts on Future Army Officers!

  • Glock 20 Gen 4 Problems: What You Need to Know

    Glock 20 Gen 4 Problems: What You Need to Know

    For many years, the Glock 20 Gen 4 pistol has been a popular choice for self-defense and concealed carry, though there have been some complaints about its performance. 

    In this blog post, we will look at some of the problems with the Glock 20 Gen 4 pistol and see if it is a good choice for those applications. We will also discuss some modifications that can be made to improve its performance and reliability. Lastly, we will compare it to other firearms on the market and see which ones are better suited for those purposes.

    Glock 20 Gen 4 Problems to Look into Before Buying a Pistol

    The Glock 20 Gen has been a popular choice for several years, but you should be aware of some inherent problems with the design before purchasing one.

    1. It does not cycle reliably with certain types of ammunition, and users have had trouble using Buffalo Bore and Underwood ammo.
    2. The pistol tends to “bite” shooters when firing, which can cause discomfort and lead to poor accuracy. Many have also complained that the grip angle is too steep, making it difficult to hold and shoot accurately.
    3. This pistol is quite large and heavy, which may not be ideal for those looking for a concealed carry weapon.
    4. Although the Glock 20 Gen comes with a standard magazine capacity of 15 rounds, some users have reported that it does not always lock back at the end of their last shot due to an issue with the magazine follower being too small for the spring inside.
    5. The slide can be difficult to manipulate when using gloved hands or under stress due to its lack of serrations and aggressive texturing on top.

    glock 20 gen 4 problems

    Is The Glock 20 Gen 4 Pistol A Good Choice for Self-Defence or Concealed Carry Purposes?

    In general, we would say no. There are other firearms on the market better suited for those purposes. If you are set on purchasing a Glock pistol, we would recommend looking at the Glock 17 or Glock 19 instead.

    Those models have been revised and improved over the years and have had many problems with the original design fixed. Of course, there is no perfect firearm, and each one has its own unique set of pros and cons, so make sure to do your research before making a final decision.

    What Modifications Can Be Made to Improve the Performance of The Glock 20 Gen 4 Pistol?

    If you are still interested in purchasing a Glock 20 Gen, some modifications can be made to improve its performance.

    1. One is to install an aftermarket barrel from companies like Buffalo Bore or Underwood Ammo. These barrels are typically machined out of 416R stainless steel and have been precision-fitted to the Glock 20 Gen. They offer improved accuracy and reliability over the stock barrel.
    2. Another option is to replace the factory grips with aftermarket grips with a better grip angle. This will help reduce muzzle flip and make it easier to hold and shoot accurately.
    3. There are also many different types of magazine extensions available for the Glock 20 Gen that will increase its capacity by anywhere from one to six rounds.
    4. Different types of sights on the market can be installed to improve visibility and accuracy.

    How Reliable Is the Glock 20 Gen Compared to Other Pistols on The Market Today?

    1. The Glock 20 Gen has a reputation for being very reliable in firing every time you pull the trigger without any malfunctions or stoppages. Yet, it does have some drawbacks regarding reliability, such as its large size and weight making it harder to conceal carry than smaller models.
    2. This pistol does not have any external safety features, which means that it can fire accidentally if dropped or snagged on something.
    3. The magazine release is located right next to the trigger guard, so be careful when handling this gun around other people because they could easily pull out your magazine and cause an unintentional discharge. 

    While Glock 20 gens are very reliable overall due to their durable construction and simple design, there have been reports of some models having issues with feeding hollow point ammunition (which may lead them to jam up). This problem can be resolved by replacing your current barrel with one designed for use with these types of rounds.

    Are There Any Other Firearms Better Suited for Self-Defense or Concealed Carry Than the Glock 20 Gen?

    If you’re looking for a reliable and well-made handgun, we recommend considering either the Smith & Wesson M&P Shield or Ruger LC380. These guns have been designed with concealability in mind while still offering excellent stopping power. 

    They also come standard with external safeties that make them safer to handle around children and others who may not know how firearms operate. The only downside is that they both lack an internal hammer (so no second-strike capability if your first shot fails to ignite primer).

    The Sig Sauer P320 Compact is another excellent option because it has the same features as its full-sized counterpart. The only difference is that it’s smaller and easier to conceal carry at all times without any discomfort or hassle due to reduced weight of roughly 60% when compared with other compact models such as Glock 19 Gen III/IV, Ruger LC380, Smith & Wesson M&P Shield EZ, etc.).

    You can choose between three different calibers: .40 S&W (standard), .357 SIG (optional), or even more impressive firepower than both of those previous rounds combined if you opt for their newest caliber.

    It has a polymer frame that is strong enough to withstand up to 400 lbs. of pressure without breaking, making it an ideal choice for someone who wants a gun that will last long and perform reliably under any kind of stress. 

    Sig Sauer P320s also come with a modular design that allows the user to change out various components (grips, barrel length, etc.) to suit their individual needs or preferences better.

    The Glock 19 Gen III/IV is another excellent choice if you’re looking for something with a bit more stopping power than other models on this list. It also has a slightly longer barrel than models like the Smith & Wesson M&P Shield or Ruger LC380, giving you better range accuracy. 

    Note that it is a bit more difficult to conceal carry because of its larger size. It’s chambered in an extremely common round that many police officers carry as their duty sidearm, so finding ammo shouldn’t be too difficult either.

    How to Prevent or Minimize Glock 20 Gen 4 Problems from Happening?

    One way to help reduce the chances of experiencing any malfunctions with your Glock 20 Gen is to maintain it well. This means regularly cleaning and lubricating all of the moving parts, as well as making sure that there’s no dirt or debris build-up in the barrel. You should also test fire a couple of rounds through your pistol after you’ve performed any maintenance work (even if you only changed the oil), just to make sure that everything is still functioning correctly.

    If you experience a jamming issue, try switching out your current barrel for one explicitly designed for use with hollow-point ammunition – this will ensure smooth feeding and prevent any potential stoppages from happening. 

    Always remember to keep your gun unloaded when not in use and store it in a safe place where unauthorized individuals cannot access it.

    Should I Buy a Glock 20 Gen 4?

    The Glock 20 Gen IV is an excellent choice for self-defense or concealed carry, but it’s not the only option out there. If you’re looking for something slightly different that offers more stopping power than the standard .40 S&W round, we recommend considering the Sig Sauer P320 Compact in either .357 SIG or .45 ACP. Both of these calibers offer more knockdown power than the average handgun cartridge. 

    If you’re primarily interested in target shooting or home defense, you should opt for a Ruger’s revolver such as the LCRx (which comes chambered in both .38 Special and .357 Magnum). It has a simple design that makes it easy for anyone to operate, and it comes with adjustable sights so you can accurately aim your shots where they need to go. 

    Conclusion

    The Glock 20 Gen IV is an excellent choice for anyone looking for a reliable, durable, and powerful handgun that can handle just about any situation. With proper maintenance and customization, you can leave behind all your Glock 20 gen 4 problems. 

    Remember to keep your gun well-maintained and test fire a few rounds through it after you’ve made any modifications, and you should be good to go!