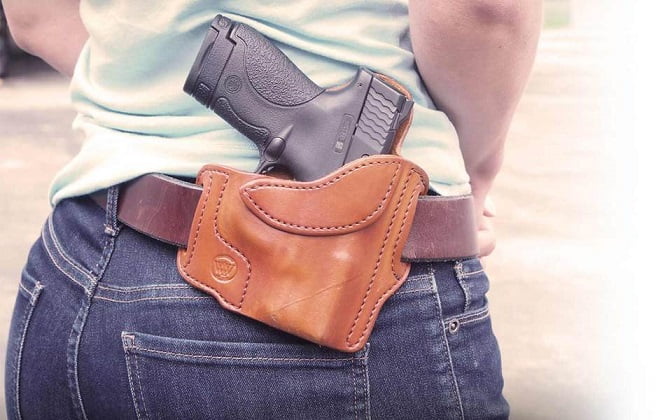
For those DIY lovers who want to make their leather holster, this is a great weekend project. The tools should generally be available to any crafts enthusiasts, and the guide is simple. Here are the steps to cover the template creating, leather cutting, finishing, and final stitching.
Step 1: Preparation of the Tools and Materials
Here are the tools that you need to make a leather holster:
- Awl
- Hammer
- Clips
- Cutting Board
- Cutting Surface
- LeatherCraft Cement
- Leather Punches
- Rotary Punch
- Sewing Needles
- Waxed Thread
Prepare the following materials:
- Card or thick paper for the template
- The leather of your choice. For this, it is highly recommended to use the thin upholstery kind of leather.
Step 2: Creating the Pattern
For this particular guide, the leather holster is for an air pistol.
- Use tape to attach two pieces of paper along a common edge.
- Place an unloaded air pistol on the center of the enlarged pattern. Position it in a way that you have enough room around it.
- Draw the pistol’s outline on one side of your paper. It is wise to include your gun’s specific features, likes the trigger guard.
- Take three-fourths to one-inch space around your gun’s outline.
- Make sure that you have the correct shape of the gun. Use your paper template to test the size. This is cricial because you don’t want to waste good leather. Always try the paper pattern and make revisions as necessary.
Step 3: Cutting the Leather and Checking the Perfect Fit
- Trace out your final paper pattern into your leather.
- Cut the leather-based from the shape of your pattern by going outside the original pattern lines and gradually trimming it towards the final line.
- After having your leather pattern, recheck the size by using clips so you can check how snug or how loose the holster will be. You can put your gun in the holster pattern and turn it upside down and see if it will fall off automatically or if the holster’s edge will hold it. From here, you might need to make more adjustments to make it fitter. Else start with another paper pattern.
Step 4: Cutting the Belt Loop and the Retainer
- Cut two rectangular-shaped pieces of leather. It has to be long and thin enough to fit over the gun’s grip.
- Prepare the rectangular strips and your holster pattern for stitching. To do this, you prepare the holster and the belt with the leather punches and layout the stitching pattern.
- Apply some glue to the stitched leather and the holder and clamp it. You can also put some weight on it.
- Let it dry completely.
Step 5: Gluing the Holster and Adding Stitch Lines
- With clamps, secure the leather in the proper orientation.
- Take off the clamps one at a time while adding glue to the surface of the leather. Note that it should only be a thin coat of glue but strong enough to hold the pieces together.
- Let it rest and give it enough time to dry.
- With your leather punches, mark out the stitching lines.
- At this point, you can already punch the appropriate holes using a hammer.
Step 6: Stitching and Trimming
There are different stitches designed for leather. The best one is called the saddle stitch. If this is your first time sewing leather, it is best to practice some scraps first and then inspect the seams’ outcome when you try to stretch it slightly.
- Stitch the leather components together.
- Trim down the excess leather if it is more than half of a centimeter on the edges.
Step 7: Finishing Details
Your leather holster is done at this phase. You can try to put your pistol into the holster and see how it carries the gun’s weight. You can test its fit by moving it around.
At this point, if you have a backplate of a cuff link lying around somewhere, you can use this too. Else, you can use a snap button or a hook and loop to achieve that fancier and sleeker look.
This simple DIY project is yours to tweak and modify based on your liking. Overall, it is a good fundamental guide, and as you go along and do this several times, you can incorporate your style and shortcuts.