Category: Blog

  • How to Wear an Ankle Holster

    How to Wear an Ankle Holster

    How-to-Wear-an-Ankle-Holster

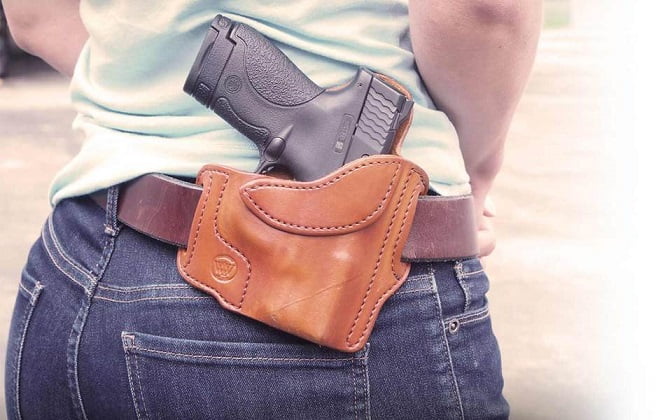
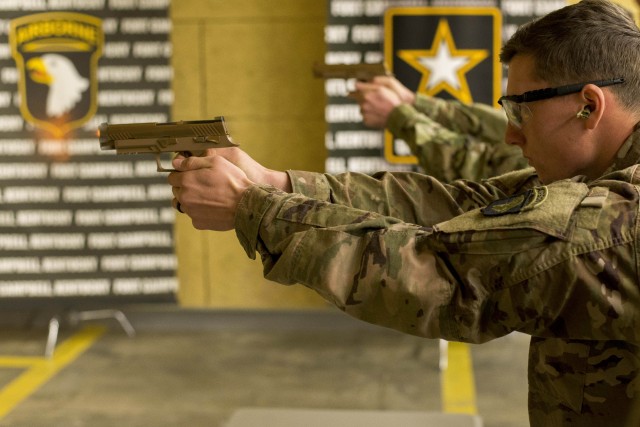
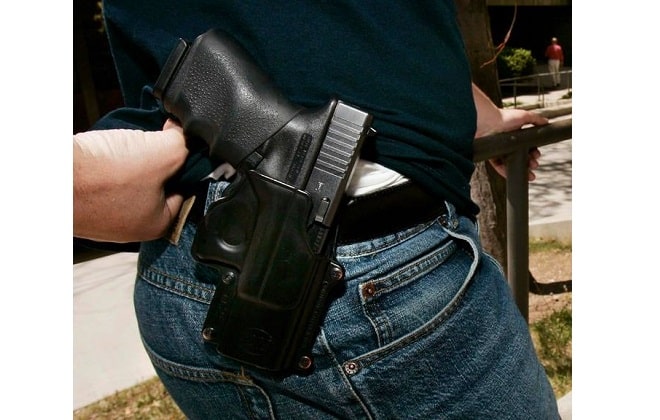
    Although not as popular as shoulder and waist carry systems, there are still a lot of people who believe in an ankle holster’s excellent concealment capabilities. Many law enforcements officers and military personnel use this holster type to carry and conceal their secondary or backup weapons. It can be a life-saver if you know how to wear an ankle holster properly.

    How to Wear an Ankle Holster

    Step 1. Check If Your Handgun Fits into an Ankle Holster

    Not all guns make excellent candidates for an ankle carry. For example, it would be impossible to conceal a Smith & Wesson SD9 VE or a Ruger SR1911 on your ankles without creating the pistol’s telltale form. These weapons can also make movement cumbersome because of their weight.

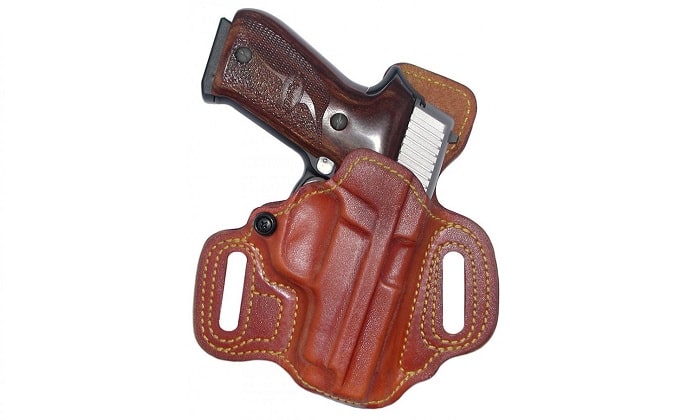
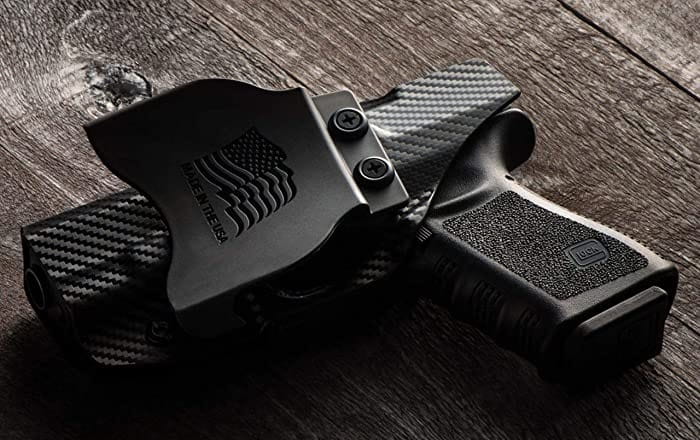
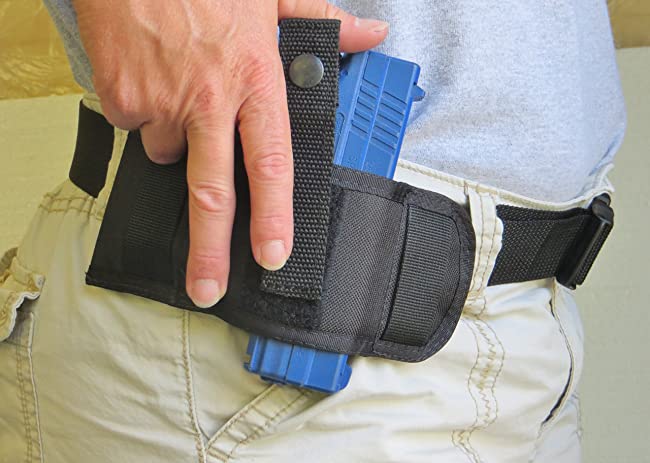
    Ideally, you will want to ankle-carry a compact gun or a sub-compact pistol, such as the Glock G43X, Smith & Wesson M&P9, and the Springfield XD 3.3. These are lightweight and have a small form factor that your pants can conceal on your ankles.

    Step 2. Wear the Correct Pants 

    As a rule, the thicker your pants’ fabric material is, the better it is as attire for the ankle holster. Jeans are the best because they are thicker and denser than dress pants or slacks. Even if your handgun’s butt pushes against the fabric, it will not create the characteristic gun outline that can alert other people to what you are carrying.

    Always wear bootcut jeans or pants with a wider bottom opening. These pants minimize the printing of the handgun’s outline on the fabric. It would be best to stay away from skinny jeans because it will be difficult to pull the pants’ bottom over the gun. Avoid bell-bottomed jeans, too. The loose fabric can get in the way of effective drawing.

    If you do not like jeans, you can try wool dress pants or khakis.

    Step 3. Wear Tall Socks

    No matter how smooth the holster’s skin-side surface is, it can still irritate your skin if you wear it without socks. Tall socks halfway between your ankles and knees are best. They protect your skin, especially if you decide to use an ankle holster support strap to stabilize the holster.

    It would also be ideal to match your socks’ color to your ankle holster’s color. Doing so will maintain the stealth of your weapon when the pant legs ride up in certain positions. No one will know you are carrying a handgun on your ankle.

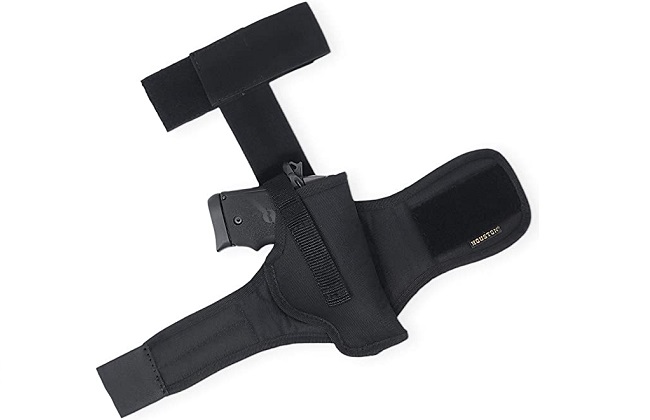
    Step 4. Wrap and Secure the Holster around Your Ankles

    Most ankle holsters feature a single strap with Velcro, while others may have two straps. A few ankle straps may have a different closure mechanism. The straps can come in the form of either nylon or neoprene, both of which are soft and breathable.

    Position the ankle holster above your ankles, ensuring the holster sits on the inside portion of the leg. Also, always place the holster on your non-dominant side. For example, if you are a right-handed shooter, you will want to draw your handgun from the inside aspect of your left leg.

    Once you are okay with the holster’s placement, you can wrap the straps around your leg and secure them. Do not over-tighten the straps to avoid diminishing circulation in the area.

    You can also add another layer of protection by wrapping a holster support strap around your leg, slightly above the holster strap.

    Step 5. Secure Your Handgun

    Slide your handgun into the holster and push it in. Secure it with the holster’s latch to keep it safe.

    Stand up and roll down the pant leg. Ensure that the leg bottom covers the handgun without creating any characteristic bulge.

    Try to move around and check if the holster retains your handgun. Walk, run, jump, and sit to check for fit. You will not want your firearm to fall off the ankle holster. You also do not want the holster to move around your lower leg as you move.

    Step 6. Practice Drawing and Re-holstering Your Weapon

    The most practical position to draw your weapon from its ankle holster is sitting. If you are standing and need to draw your firearm, you will have to drop on your knee first.

    Practice drawing your handgun from the ankle holster by pulling the pant leg first. You should be able to pull your weapon out smoothly.

    Conclusion

    The ankle holster is not an ideal gun-carrying system for those who need instant access to their firearms. However, it offers the best concealment for your weapon. Learning how to wear an ankle holster properly can enhance gun concealment and improve pistol-drawing.

  • How to Make a Leather Holster

    How to Make a Leather Holster

    How-to-Make-a-Leather-Holster

    For those DIY lovers who want to make their leather holster, this is a great weekend project. The tools should generally be available to any crafts enthusiasts, and the guide is simple. Here are the steps to cover the template creating, leather cutting, finishing, and final stitching.

    Step 1: Preparation of the Tools and Materials

    Here are the tools that you need to make a leather holster:

    • Awl
    • Hammer
    • Clips
    • Cutting Board
    • Cutting Surface
    • LeatherCraft Cement
    • Leather Punches
    • Rotary Punch
    • Sewing Needles
    • Waxed Thread

    Prepare the following materials:

    • Card or thick paper for the template
    • The leather of your choice. For this, it is highly recommended to use the thin upholstery kind of leather.

    Step 2: Creating the Pattern

    For this particular guide, the leather holster is for an air pistol.

    1. Use tape to attach two pieces of paper along a common edge.
    2. Place an unloaded air pistol on the center of the enlarged pattern. Position it in a way that you have enough room around it.
    3. Draw the pistol’s outline on one side of your paper. It is wise to include your gun’s specific features, likes the trigger guard.
    4. Take three-fourths to one-inch space around your gun’s outline.
    5. Make sure that you have the correct shape of the gun. Use your paper template to test the size. This is cricial because you don’t want to waste good leather. Always try the paper pattern and make revisions as necessary.

    Step 3: Cutting the Leather and Checking the Perfect Fit

    1. Trace out your final paper pattern into your leather.
    2. Cut the leather-based from the shape of your pattern by going outside the original pattern lines and gradually trimming it towards the final line.
    3. After having your leather pattern, recheck the size by using clips so you can check how snug or how loose the holster will be. You can put your gun in the holster pattern and turn it upside down and see if it will fall off automatically or if the holster’s edge will hold it. From here, you might need to make more adjustments to make it fitter. Else start with another paper pattern.

    Step 4: Cutting the Belt Loop and the Retainer

    1. Cut two rectangular-shaped pieces of leather. It has to be long and thin enough to fit over the gun’s grip.
    2. Prepare the rectangular strips and your holster pattern for stitching. To do this, you prepare the holster and the belt with the leather punches and layout the stitching pattern.
    3. Apply some glue to the stitched leather and the holder and clamp it. You can also put some weight on it.
    4. Let it dry completely.

    Step 5: Gluing the Holster and Adding Stitch Lines

    1. With clamps, secure the leather in the proper orientation.
    2. Take off the clamps one at a time while adding glue to the surface of the leather. Note that it should only be a thin coat of glue but strong enough to hold the pieces together.
    3. Let it rest and give it enough time to dry.
    4. With your leather punches, mark out the stitching lines.
    5. At this point, you can already punch the appropriate holes using a hammer.

    Step 6: Stitching and Trimming

    There are different stitches designed for leather. The best one is called the saddle stitch. If this is your first time sewing leather, it is best to practice some scraps first and then inspect the seams’ outcome when you try to stretch it slightly.

    1. Stitch the leather components together.
    2. Trim down the excess leather if it is more than half of a centimeter on the edges.

    Step 7: Finishing Details

    Your leather holster is done at this phase. You can try to put your pistol into the holster and see how it carries the gun’s weight. You can test its fit by moving it around.

    At this point, if you have a backplate of a cuff link lying around somewhere, you can use this too. Else, you can use a snap button or a hook and loop to achieve that fancier and sleeker look.

    This simple DIY project is yours to tweak and modify based on your liking. Overall, it is a good fundamental guide, and as you go along and do this several times, you can incorporate your style and shortcuts.

  • How to Make a Kydex Holster

    How to Make a Kydex Holster

    How-to-Make-a-Kydex-Holster

    Kydex is among the best materials that you can use for a holster. Kydex is a thermoplastic acrylic polyvinyl chloride type of material. It combines both acrylic and PVC properties making it rigid and durable with an excellent finish. The material is also lightweight with good retention, often used for a wide range of applications such as sheaths for knives, aircraft bulkheads, and, of course, firearm holsters.

    In this article, you will learn the process of making your Kydex holster. It will be a step-by-step guide and, by the end of it, you should be able to produce a beautiful, durable, and secure to keep your firearm.

    Materials Needed

    Before anything else, here are all the materials that you will need to make a Kydex Holster:

    • Kydex
    • Box cutters
    • Measuring tape, ruler, or other measuring devices
    • Rivet flaring die and guide
    • Rivets
    • Sheath foam
    • Wood boards
    • Wood clamps
    • Marker or pencil
    • Hairdryer
    • Gloves
    • Drill (1/4” bit)
    • The firearm

    How to Make a Kydex Holster

    After gathering all the materials, let’s get down to business.

    Step 1. Prepare Kydex and the firearm.

    Place your pistol on the Kydex sheet that will be closest to your waistband. Position it, leaving no gap of Kydex along with the handle, a 1-inch gap on the nuzzle side and a 2-inch gap above the slide.

    Step 2. Score the Kydex

    Using the box cutter, score the Kydex and split it by hand.

    Step 3. Outline the firearm.

    Still keeping the gaps along the side and muzzle, outline your pistol using a pencil or a marker on the reduced sheet of Kydex. If you prefer to have the non-reflective side outside, draw on the shiny side and vice versa.

    Step 4. Remove the Kydex around the grip.

    To have easy access to the grip once you draw your firearm, make sure to draw out an area on the Kydex around the grip, score it and remove it from the sheet.

    Step 5. Cut the Kydex sheet that will be furthest away from the waistband.

    Place the pistol on the Kydex and keep the similar dimensions as given in Step 1.

    Step 6. Prepare the oven.

    Set your oven at around 220 degrees Fahrenheit to form the Kydex.

    Step 7. Place the Kydex in the oven.

    Place both of the Kydex sheets you have cut into the oven and leave it partially open. Use the sheath foam and lay it on the oven door over to the stovetop to warm it up to create a better and well-defined mold later.

    Step 8. Heat the firearm.

    Pick up the Kydex sheets inside the oven using your gloves and see if it begins to soften and bend. If they do, heat your weapon with the hairdryer. You can also use a heat gun for the job.

    Step 9. Create the mold.

    After the Kydex sheets are flexible and the firearm warm, place a piece of the foam on the wood boards and place one Kydex sheet on the foam (the pencil outline facing up). Put the firearm on the Kydex and place the other piece of foam over it and then the wood board.

    Clampdown the two boards like that of a sandwich and let it sit for 15 mins. Repeat the whole process with the other half of the Kydex sheet.

    Step 10. Sketch your holster design.

    Draw the holster design on the Kydex sheets and remove the area not part of your design.

    Step 11. Piece the Kydex together.

    With the firearm in the middle for proper measurements, piece the two sheets of Kydex together.

    Step 12. Draw the holes and install the rivets.

    Draw the holes you want your rivets to go and begin drilling through them. Install your rivets in place after.

    Step 13. Sand the edges.

    Using a file or sandpaper, sand the edges of the Kydex to fix any alignment issues and even out the two sides. Then use fine-grit sandpaper to clean any rough finish on your holster.

    Step 14. Add belt loops

    Cut strips of Kydex and heat them to shape and bend them however you like. Now, you have done all the steps, and you now have a new beautiful and durable Kydex holster.

    Hope you learned something from this guide and use it in making your KYDEX holster today!

  • How to Put on a Shoulder Holster

    How to Put on a Shoulder Holster

    How-to-Put-on-a-Shoulder-Holster

    Shoulder holsters are one of the best firearm-carrying accessories any gun owner can have. Not only does it ensure optimum comfort by distributing your handgun’s weight evenly across the shoulders. It also allows for carrying a magazine or two. You can enjoy these benefits only if you know how to put on a shoulder holster correctly.

    How to Put on a Shoulder Holster

    Step 1. Put on the Holster Harness Over Your Shoulders

    Remove your handgun from the shoulder holster and slip one arm through an arm loop. Slide one harness strap over your shoulder. Insert your other arm through the other loop as if you are putting on your backpack. Check the position of the gun and clip holsters. The holsters should be below the arms.

    You can also wear the holster harness by partially sliding both arms into their respective loops. You can then lift the straps’ cross-section and move it over your head. Slide both arms simultaneously until the straps rest over your shoulders and back.

    Step 2. Ensure the Correct Placement of the Shoulder Straps

    Ensure the correct positioning of the back straps. They should cross right over your spine between your shoulders. This position ensures uniform weight distribution and holster balance.

    The straps should lie flat against your upper back and shoulders without any twisted section. For holster harnesses with shoulder pads, it would be best to position the cushion squarely over the shoulder near the neck. This placement helps improve uniform weight distribution and comfort.

    Step 3. Adjust the Holster Harness Straps to Ensure the Correct Fit

    Like wearing your backpack, you will also want the holster harness to stay close to the body. Holster harnesses come with adjustable straps, allowing you to tighten or loosen them to ensure the correct fit.

    Look at yourself in a mirror to check the placement of the holster harness. Perform a series of movements, including raising your arms and moving them sideways and towards your front and back. Watch how the harness moves while noting your comfort level.

    If the harness moves a lot with every movement you make, it can be a little bit loose. If you have limited movement, the harness is too tight. Make the necessary adjustments and watch the harness again while performing different movements.

    It may take a while before you can find the sweet spot between comfort and sufficient holster harness movement.

    Step 4. Position the Holster

    Shoulder holsters come in different holster placements. It would be best to get a shoulder holster with movable or adjustable holsters. Ideally, you should position the holster under the armpit and slightly in front of your non-dominant arm. The magazine holster should also be under the armpit on the opposite side of the holster harness.

    If your shoulder holster does not allow for adjustment of the holster placement, you will have to acclimatize yourself with its position.

    Some products have detachable holsters. It is always best to position the handgun holster on your non-dominant side. For example, if you are more proficient with your right hand, you should position the holster in your left, under your armpit. This position allows your dominant hand to draw your weapon with ease.

    Step 5. Adjust the Holster’s Angle

    Most gun owners prefer to position their holsters at a 60-degree angle relative to the ground. This angle puts the handgun’s butt readily accessible during drawing.

    Some people like to place their holsters parallel to the ground. This position is suitable for those who have the holster higher up their body. It is also a more comfortable placement than having the holster at an angle.

    You may want to practice drawing and re-holstering your weapon to determine which position works best. Try to determine which angle gives you the quickest draw while maintaining comfort.

    Step 6. Secure Your Handgun and Magazine (If Any) Into the Holsters

    Grab your pistol and slide it into its holster. If your holster comes with a latch, you can also secure it to ensure your weapon’s integrity. You can do the same with your magazine if your harness comes with a clip holster.

    Conclusion

    The steps about how to put on a shoulder holster are as straightforward as learning how to put on a backpack for the first time. The key here is to find the perfect balance over your shoulders. It also helps to ensure the correct fit of the harness and the positioning of the holster.

  • How to Make a Shoulder Holster

    How to Make a Shoulder Holster

    How-to-Make-a-Shoulder-Holster

    A shoulder holster gives you instant access to your handgun when you are strapped to your car seat. It can also be an excellent choice for concealment while improving overall comfort. While you can buy a shoulder holster for about $50 to $150, you can make your own. All you need are several materials, a few days, and this guide on how to make a shoulder holster.

    How to Make a Shoulder Holster

    Step 1. Gather Your Tools and Materials

    Check your house if you already have any of the following materials. Buy only those that you do not have.

    • Leather
    • An empty handgun serving as a mold and a guide for making the inserts
    • A spool of heavy stitching string
    • Leather-stretching clamps
    • Leather-stretching blocks
    • Needle for stitching
    • Hammer
    • Razor knife
    • Leather cement
    • Pronged punches

    Step 2. Prepare Your Leather

    Start by preparing the large 12×12-inch leather square that will serve as a pocket for your handgun. Fold the leather square in half, ensuring the firearm’s handle sticks out. Cut the leather square to match the gun’s barrel with about an inch of allowance.

    Unfold the leather and cut 1-inch tall triangles from the four corners. If you have a large gun, you can cut up to 3 inches.

    Soak the leather square in water for about ten minutes or until it is pliable. Squeeze the leather to remove excess water.

    Step 3. Create the Holster

    Place the leather on a flat surface with the rough side facing down. The less tough leather side will form the holster’s interior.

    Position your gun on the leather and wrap the leather over your handgun under the trigger. Create the holster by applying pressure on the leather material and following the gun’s contour. Use the stretching blocks for this step. Secure the stretching blocks using clamps.

    Place the holster under the sun to dry for a few hours.

    Step 4. Make Holster Inserts

    The inserts will stiffen the holster and improve weapon security and safety. Place the top of your handgun over the leather and outline. Do the same for the left and right sides of your pistol. Cut the inserts. It would be best to cut outside the trace, ensuring better adjustments.

    Step 5. Place the Inserts into the Holster

    Bring the holster inside and remove the clamps. You should see the holster beginning to take shape. Dampen the holster’s outer side. You should feel it wet without leaving water on your fingers.

    Insert your empty firearm into the holster. Place the inserts around your weapon inside the holster. Reapply the stretching blocks to ensure a perfect fit and secure with clamps.

    Dry the holster with the inserts under the sun for the next 24 to 48 hours.

    Step 6. Secure the Inserts

    Once the holster is completely dry, it should hold its shape when you remove the clamps and blocks. Apply glue on the holster’s top and place the top insert. Place and clamp blocks over the insert for five to ten minutes. Remove the clamps and blocks and check the holster for the proper fit.

    Use a pronged punch to create holes for your stitching needle to go through. A hammer will help you drive the punch through the leather. Stitch and secure the top insert on the leather holster. It would be best to perform a double stitch to secure the insert.

    Perform the same process on the side inserts. Observe five to ten-minute glue drying time and ensure a perfect fit before stitching the inserts.

    Step 7. Finish Your Holster

    Glue the extra leather and secure it with clamps. Allow at least ten minutes to dry. Check for fit. Once satisfied, you can stitch the leather.

    Step 8. Make and Add a Shoulder Strap

    Cut the small leather rectangle (2×4 inches) to serve as a bridge for the arm loop. Place the middle of the 48-inch long leather strap at the bottom of the leather rectangle and secure it with stitches.

    Loop the leather strap’s right side towards the rectangle’s top section. Stitch it to secure. Do the same process with the strap’s left side.

    Wear the shoulder straps and position the holster where you want it secured and concealed. Mark the holster’s placement and remove the shoulder straps. Secure the holster to the strap using leather cement and leave it to dry for about 10 to 15 minutes.

    Conclusion

    The steps on how to make a shoulder holster are straightforward. What is essential is to ensure the correct fit of your handgun in each step before securing the holster. Keep in mind to schedule no more than a week to work on your shoulder holster to guarantee optimum leather workability.

  • How to Break in a Leather Holster

    How to Break in a Leather Holster

    How-to-Break-in-a-Leather-Holster

    Holsters made of leather adapt to the firearm after a break-in. The leather construction will need some time before it can naturally conform to the shape and form of any firearm. Leather is a natural material and it reacts to its environment, adapting to it slowly with constant use.

    Leather holsters work the same way as any case wherein it will need some time getting used to for the firearm to fit like a glove. It may seem like the gun does not fit properly, but a proper break-in will make it the perfect fit. Here’s how to break-in a leather holster.

    There are three proven ways on how to break-in a leather holster. There are a few additional materials needed for the break-in, depending on the method.


    Plastic Bag Method

    This method will require the leather holster, the gun, and the plastic bag.

    Step 1: Insert the gun in the plastic bag. This is done to increase its mass, reduce friction, and to protect the gun from any scratches.

    Step 2: Place the gun in a plastic bag inside the holster. This may take quite some time and force, but continue twisting and turning until it fits fully in the bag.

    Step 3: Let the firearm sit in the holster overnight.

    Step 4: After letting it sit overnight, withdraw the firearm from the holster and remove the plastic bag.

    Step 5: Insert the gun in the holster and notice how it now fits more precisely than the previous day. You may stop at this step if you now find the gun to perfectly fit the holster.

    Step 6: If it is still hard to holster the firearm around, repeat the process. Remember that they may be some retention, so do not overdo the process to avoid having a loose bag.


    Leather Strap Break-in Method

    This method will only require the leather holster and the gun. It will also take some time and some force.

    Step 1: Grab the leather holster. Use the thumb and the index finger to grab the strap outwards.

    Step 2: While holding the leather holster, insert the firearm inside. Push the firearm with some force. Simultaneously pull the strap as the firearm is pushed. Pull the strap in opposite directions, with gentle sideward and twisting motions. Note that pulling it too far or twisting it excessively can harm the leather.

    Step 3: After some time, try to pull the strap around the gun. At this point, it should be easier to fit the gun with the straps.

    Step 4: You may repeat the process if the straps are still too far from being joined around.


    Wet Method

    This method needs the leather holster, the gun, a plastic bag, and the break-in kit that contains the liquid suitable for leather material.

    Step 1: Take out the break-in kit. Soak the brush with the break-in liquid. Apply the soaked brush to the key points of the holster. This may be the trigger guard and the straps. Rub the brush on these leather areas couple of times. This will soften and distort the original leather molding.

    Step 2: Insert the gun in a plastic bag to increase its size, reduce friction, and to protect the gun from any scratches before placing it inside.

    Step 3: Place the gun in a plastic bag inside the treated holster. This may take some time and force to fully insert the gun in the bag. Continue twisting and turning so it can be accommodated inside.

    Step 4: Leave the gun inside the holster overnight.

    Step 5: After letting it sit overnight, take out the wrapped gun from the holster and remove the plastic bag.

    Step 6: Insert the gun in the holster. Notice how it is now a lot easier to insert the gun, and now has a more precise fit.

    Step 7: If it is still difficult to put the gun inside, repeat the entire process.

    Knowing how to break-in a leather holster will save time and energy into putting the firearm in place. The leather holster will need some time getting used to, but the given methods will ease out the owner and let the firearm slip with ease. A new leather holster is meant to be expanded with the conformity of the gun, and the break-in will let the case slowly adapt to homing the gun for a long time.

  • What is a Paddle Holster

    What is a Paddle Holster

    What-is-a-Paddle-Holster

    What is a paddle holster? A paddle holster is usually the preferred outside the waistband (OWB) carrier of civilians, undercover cops, and police authorities. It makes use of a firm “paddle-shaped” flat or sometimes a broad contoured clip to securely hold it in place to your belt or inside your pants’ waistline.

    A paddle holster is made up of two parts: the paddle and the holster. The paddle part is intended to snugly fit against your body inside your pants while the holster holds the gun. The holster is worn outside than pants. These two parts are stitched together to create a paddle holster.

    It is a popular option to carry concealed weapons because of its convenience. It can easily be clipped on your waistband and can be used by both men and women. Removing it is as easy as you need to pull it out and store it somewhere safe.

    Advantages of paddle holsters

    With what is a paddle holster already defined, understanding what’s in it for you when you have one is equally essential.Here are the advantages of paddle holsters:

    Ease of Use – due to the holster cradling your gun outside your pants, attaching and detaching your holster means a simple gesture of pulling up the gun and pushing it down. This easy and convenient on and off design of paddle holsters implies that you don’t need to pause and look at your holster to get your gun out.

    Comfort Wear – compared to inside the waistband holsters, paddle holsters are considerably more comfortable. It molds to your body, and it is designed for all-day wear without your movement feeling restricted.

    Ease of Draw – paddle holster a favorite because having access to your weapon in seconds can make all the difference in emergencies. You have control over where you want to carry your gun and easily have access to it which can help you buy time and save lives in high-pressure circumstances.

    Ease to Re-holster – as important it is that you can draw your weapon at your call sans the fumbling around, it is also crucial that you can re-holster your gun without the need to look down and getting distracted. This plays a vital role, especially when you need to be 100% focused on your target.

    Carrying Options – due to the design of paddle holsters where they can easily be attached, you are given more freedom where and how you want to angle your gun. It is recommended that your weapon is placed on your stronger side, but with paddle holsters, you can customize the position of where your gun is to where you are also most comfortable.

    Disadvantages of paddle holsters

    Like all things, paddle holsters also have their set of shortcomings. Knowing these disadvantages will help you identify choices or at least create compromises with your paddle holster. The important element here is awareness of the possible setbacks.

    Lesser Stability – due to its attachment methodology, paddle holsters might not provide you the stability expected from a belt holster. Unless your preferred choice of pants is naturally snug, then there might be instances where the placement of the holster may shift.

    This is not a significant challenge, but you might be caught off-guard when you suddenly need your gun, and it is a few inches away from where you originally placed it.

    Reduced Control – if you are in an altercation with an assailant, your paddle holster may not be the safest option for you because there is a possibility that your weapon can be pulled away from your holster. Again, due to its convenient design, it is also easy for another person to get the gun out for you.

    Not recommended for big tummies – if your mid-section is on the large size, it is best to steer clear of paddle-holsters. This option might not be the most comfortable one since it will mold and press against your midsection.

    Types of paddle holsters

    Today, most paddle holsters are classified based on the material used in creating them. The most common leather paddles are leather and plastic.

    Leather paddle holsters – as the name suggests, this is made of leather flaps stitched together. Some designs would incorporate a small steel plate or other hard materials to make it stronger. Using leather paddle holster is simple. You need to insert the paddle either behind your waistband or between your belt and waistband.

    Plastic paddle holsters – for this kind, hard plastics such as Boltaron, Kydex, and molded nylon are used as the primary material. Plastic paddle-holsters are worn the same way as leather ones.

    How to care and maintain for paddle holster? 

    Daily to regular cleaning and maintenance of your paddle-holster is essential, primarily if you use it every day. As it regularly contacts your skin, sweat, and dirt, caring for it should be a routine.

    For leather paddle-holsters, you should always wipe it every after use. You can use a moist and soft cloth to wipe it clean but make sure that you dry it completely in front of a fan. Also, as tempting it is always to use a leather conditioner to soften your paddle-holster, do not overuse it to the point that it ruins the shape of your holster.

    Plastic holsters are easier to maintain as you need to wipe them with a soft cloth and warm water.

  • How to Wear IWB Holster

    How to Wear IWB Holster

    How-to-Wear-IWB-Holster

    An inside-the-waistband (IWB) holster is a favorite of handgun owners who require maximum concealment of their firearms. It is also more stable, allowing gun owners to go about their daily business without worrying about firearm retention. An IWB holster is also versatile, giving you a multitude of carrying positions. The question now is how to wear IWB holster correctly. You are in the right place.

    Step 1. Choose the Right Gun Belt

    Always pick the gun belt size that supports both your handgun and the IWB holsters. As much as possible, avoid wearing a conventional belt because it does not have the necessary structure to ensure correct and secure holster attachment.

    Step 2. Wear the Correct Pants

    It is always advisable to wear the correct pant size to ensure comfort. You should know that wearing an IWB holster will add about an inch or two to your waistline. Hence, if you have a 40-inch waistline, adding the IWB holsters can increase your waistline to 41 or 42 inches. As such, it would be best to get a pair of pants that is one size bigger than your normal.

    Step 3. Determine Where to Sit the IWB Holster

    There are several positions for wearing an IWB holster. Your choice depends on comfort and optimum access to your handgun, its retention, and ease of re-holstering.

    • Three o’clock Position

    Many consider this holster placement the most natural, especially when drawing out your handgun. However, gun owners with bulges can push the firearm and the holster outward. If you own a hammered pistol, it can also dig into your side.

    • Four o’clock Position

    Slightly to the back of the 3 o’clock position, this holster placement is perfect for gun owners with ‘excess baggage’ around their torso. Unfortunately, if you have a full-sized pistol, a 5 o’clock location will be more suitable.

    • Six o’clock Position

    Some gun owners do not recommend this holster placement because it is uncomfortable when sitting. If you wear the holster standing, it should be okay. Drawing your handgun can also be difficult, not to mention taxing.

    • Appendix Carry

    This position places the IWB holster in front of your body, slightly forward of the 3 o’clock position. While this position offers exceptional handgun access, it is not comfortable, especially if you do not have flat abs. Sitting with this holster in this position can be unbearable for most folks.

    Step 4. Fit Your IWB Holster in Your Waistband

    Your IWB holster has a belt clip. Learn how to secure this in your gun belt before adjusting and securing your belt. Position the IWB holsters in the placement of your choice. It will be wise to check which of the carrying positions we discussed above works best for you.

    Step 5. Secure Your Handgun

    Before you start securing your handgun into your IWB holsters, ensure that its safety is on. If you are unsure about securing your firearm, you may want to check your manual.

    Step 6. Slide Your Handgun’s Barrel into the IWB Holster

    Grab your handgun’s handle while keeping your finger along the firearm’s side and away from the trigger. Make sure to hold the gun securely before sliding the barrel into the IWB holsters. Push it into the holster to ensure a secure fit. Your firearm’s handle should stick out of the holster, but not the barrel.

    If your IWB holsters come with a latch, now is a good time to secure your handgun. Make sure to snap the latch shut to guarantee optimum firearm retention.

    Step 7. Check the Fit and Reposition as Needed

    Before you finalize your IWB holster wearing, make sure it is the perfect fit. Try to pull out your handgun from the IWB holsters by grabbing its handle. You should be able to draw your firearm with ease without removing the holster. If your holster has a latch, you may want to remove it before drawing your handgun.

    If your IWB holster does not have a belt clip that secures it in your waistband, you may have to grab the holster before drawing out your firearm. Also, try to re-holster your gun.

    Do this step several times. If you are happy with it, you can leave the holster in its position. If not, you may have to reposition the IWB holsters or purchase a different holster for your handgun.

    Conclusion

    Learning how to wear IWB holster correctly is essential to ensuring optimum firearm security and access. It also makes concealment a lot more satisfying because you are comfortable with the holster and your gun inside your waistband.

  • How to Wear a Paddle Holster

    How to Wear a Paddle Holster

    How-to-Wear-a-Paddle-Holster

    Carrying handguns has never been more secure and easy with a paddle holster. A paddle holster is much easier to remove and adjust according to your comfort. But of course, to make the most out of your paddle holster and to use it more effectively, it is crucial to learn how to wear a paddle holster properly and make the needed adjustments.

    Holstering and Securing the Pistol in Place

    Step 1. Check the safety

    In dealing with any firearm, one should always prioritize safety. Do not forget to check the pistol’s safety first before performing any other steps. You can do this by checking that the handgun’s safety is on and that the gun is not loaded. Or if it is, that the firearm is uncharged. You can further consult the manual of the firearm for specific instructions on how to load your handgun safely and properly and how to check that its safety is on.

    Step 2. Slide the firearm’s barrel into the paddle holster

    Picking up the weapon by its handle, push the barrel of the handgun inside the holster. Always make sure to keep your hands off the trigger. Push it in firmly to check if the handgun is snugly seated. Once done, you should be able to access the firearm’s handle, but you will not see the barrel from where it fits securely inside.

    Step 3. Check the fit of the handgun to the paddle holster

    Check if your firearm will not fall off nor get stuck when you are trying to draw it. Try picking up the weapon by its handle – the holster should then stay in place. At the same time, you should not need to exert too much effort in pulling out the firearm, causing you to yank the holster together with it.

    Step 4. Latch the paddle holster

    Holsters have different designs for functionality. Other models secure the handgun with latches while others do not have one. Holsters without latches usually rely on the tight fit of the weapon keeping it in place. If your holster does have latches, snap it in place to further secure the handgun in place.

    Step 5. Slide the paddle in its place

    Some people prefer to slide the paddle between their waistband and underwear. Meanwhile, others use a belt to secure the holster between the outside of their waistband and the belt itself. Either way, make sure to push the paddle downward as far as it could go to secure it in place.

    Using and Adjusting the Paddle Holster

    Step 6. Draw the firearm

    Grab the handgun by the handle using your dominant hand and lift it in a swift and secure motion. If your holster comes with a latch, unsnap that first. Once your gun is entirely off the holster, grip it firmly using both hands. Keep your finger off the trigger unless you are ready to shoot. Practice your aim and make sure to aim it properly before firing.

    Step 7. Adjust the holster according to your comfort

    To use the holster more effectively, try drawing your gun several times to know which angle and position work best for you. You can try sliding the holster along your waistband and position it as you see fit where you can draw smoothly. The placement of your holster should allow you to grab or latch your firearm with ease and comfort every time. It is best to carry and angle your weapon at the FBI cant (15 degrees forward) for more effectiveness and ease.

    Step 8. To remove, tilt the holster inward and lift it upward

    You should keep the gun holstered when you want to take off the holster and to keep the weapon aside. To properly remove the holster, grab the handle of your firearm and tilt it inward. With this motion, the top part of the paddle will push toward your body while the bottom part pushes away from your body, making it easier to lift the holster upward and removing it off your waistband completely.

    After taking the holster off with the firearm, make sure to hide it securely, away from children, most especially. Be careful not to point it to anyone, not even as a joke. Handle your handgun like it is always loaded, even it is not.

  • Does Printing Matter When Carrying Concealed

    Does Printing Matter When Carrying Concealed

    Does-Printing-Matter-When-Carrying-Concealed

    So you’re out for a walk with your shooting range buddy when he suddenly tells you that you’ve got a print showing. He indicates to your concealed carry – which you initially thought was pretty well hidden. You check and see, much to your embarrassment, that your shirt was outlining the shape of your firearm.

    While this is nothing a little shirt-shimmy can’t fix, printing inevitably presents you with problems in the long run. The point of carrying concealed is to keep your firearm out of sight from the rest of the world. This gives you a tactical advantage, and from a legal standpoint, it shows that you respect the law.

    However, printing is sort of the in-between of that as it presents the poor concealment of a firearm. In some situations, it may be all right to show printing, but generally, it just doesn’t send a good signal. What’s the point of carrying concealed when you’ve concealed your carry poorly?

    How to Spot Printing

    A telltale sign of printing is a bulge on someone’s clothing – particularly on their dominant side. Even with a loose shirt, printing can still occur when some of the fabric snags on the gun’s handle. This creates a diagonal silhouette that’s very telling.

    Most newbies give themselves away by being overly conscious of how their holster is positioned underneath their clothes. Often, this blatant display of anxiety is what brings onlookers to look at where they didn’t think they would – and thus leading to the discovery of a concealed carry.

    The Risks

    Once you’ve been discovered to be armed, people around you may not take to this lightly. The initial goal for concealed carry is protection, but if you exposed yourself unwittingly due to some off-fitting clothes, then you’ve unintentionally caused some hysteria – turning you into a target.

    Even with the best of intentions, a gun is still a weapon. Unarmed civilians will wonder why you have one with you, and those with bad intentions may use it against you. There are a lot of risks to exposing yourself to be armed, so take the extra steps to minimize the printing of your concealed carry.

    How to minimize Printing

    While you’re eventually going to get used to carrying concealed and a confident gait will surely make you less conspicuous, it’s important to know the simple ways to lessen printing. You don’t necessarily have to buy expensive belly bands or get a new firearm. A few small adjustments could make a world of difference.

    First off, get a good holster. Cheap knockoffs and unkempt IWB holsters will have parts sticking out – causing some unnecessary bulges that are obvious and uncomfortable. Not only that, the functionality may be compromised. You risk discovery as well as your safety. Imagine having to draw your weapon only to find it stuck to your faulty holster. Avoid this, and be sure to invest in a durable, efficient holster.

    Next, pick the right outfit. There’s a reason why stylish bad guys on television are appealing; their patterned suits distract us from the weapon that they’re hiding. That being said, be sure to pick out a proper loose-fitting shirt when you carry concealed. Extra points if you’ve got stripes and prints that dazzle the eyes – as these are great at distracting people from the bulge of your firearm.

    Certain fabrics stick to your skin more than others, so be sure to avoid these and choose the softer, breezier options. The last thing you want is a shirt sticking to your firearm and your skin. You’re going to have a hard time drawing out your weapon, for sure.

    Lastly, adjust your holster to a sweet spot. A slight change in the position of your carrier will lessen the likelihood of printing. Depending on your body shape, this could mean moving the holster towards your stomach, or towards your back. Either way, you should balance this out with your drawing efficiency. You wouldn’t want to position your holster in such a way that you can no longer draw your weapon.

    Legally speaking…

    Carrying concealed is an art – and rightfully so. An improper exhibition of a firearm is illegal in most states, and it doesn’t take much for you to successfully conceal your carry. You won’t get into legal trouble if your gun is printing, but take it as a precaution to yourself.

    Printing matters in carrying concealed because inevitably, it could lead to trouble. Not only is your safety at risk, but also those around you. So take the time to pick out a good shirt – buy new ones if you have to.

  • Best Ways to Conceal Carry While Exercising

    Best Ways to Conceal Carry While Exercising

    Best-Ways-to-Conceal-Carry-While-Exercising

    A daily exercise routine is a great way to get keep up with the everyday stresses of life. Whether it’s at the gym or around the neighborhood, there’s bound to be a workout for you. But as safe as many of these places are, you can never be too sure about your protection. Some sports buffs and range shooters alike feel more secure when they have their firearm nearby – and for that, carrying concealed is the way to go.

    So, how does one carry concealed while exercising? As you’d know, there are a lot of workarounds to this. From specialized belly straps to compression clothing with built-in holsters, the market is rife with options for you to choose from. Just remember to keep safety your top priority, and never sneak in a firearm where it isn’t allowed.

    Things to consider first

    Like any major endeavor, you should condition your current setup. Standard holsters aren’t necessarily built to withstand excessive movement, so these are not the ones you want to jog around with. Meanwhile, exercise-friendly holsters are snugger and more compact, which means they probably won’t be able to handle larger pistols.

    Additionally, standard exercise clothing is made of tight-fitting, lightweight fabric – which means you’re going to have to wear larger, looser clothing for strenuous activities. Slapping on a sweatshirt to hide your carry is fine on a chilly day, but it’s a different story when you’re lifting weights in the middle of May.

    Even under normal circumstances, carrying concealed is a challenge. These are just a few of the considerations that await you before carrying concealed for exercise, so get ready to downsize that pistol and strap on that belly band.

    Find the Perfect Holster

    While IWB Holsters are pretty convenient, they just don’t cut it when you’ve got gym shorts or leggings on. Instead, what you’ll want is something that straps onto your body directly. Belly bands, concealment leggings, or waist packs all provide the support your firearm needs – while also being successfully tucked away.

    Depending on the type of workout you’re about to do, the type of holster you choose should be able to handle all types of unexpected movements. Jogging and weightlifting are going to need stability and support, so hip-hugging packs and belly bands are the way to go. Meanwhile, if you’re about to go hiking, then a fanny pack or a stable IWB holster should do just the trick.

    Types of Exercise-friendly Holsters

    You’d be surprised at the holster options available at the market today. Some may be pricier than others, but it’s worth the investment if you’re dead set on bringing your firearm to your next jog, hike, or gym day.

     Belly Band

    This is by far a very popular option, as it’s proven to be very good at concealing your carry and keeping it intact while you do all sorts of workout routines. The reason it’s so effective is that it utilizes real holsters. The trigger is protected and is inclined in such a way that allows for a smooth, quick draw. This is great for jogging, cycling, and weightlifting.

    Fanny Pack

    Don’t be quick to grab just any fanny pack – what your firearm needs is a fanny pack designed specifically for concealed carry. These are built with a universal holster and Velcro support straps. Most gun-specific fanny packs are sleekly designed and overall doesn’t make it obvious you’re armed. These are great for low-impact workouts such as hiking.

    Concealment Clothing

    Conveniently enough, women can now utilize clothing that already has holsters tailored to them. Not only are these stylish, but they’re sleek and go completely unnoticed. Your options include tank tops, shorts, leggings, and even sports bras. Take note that a large pistol may not be the best fit for concealment clothing, so you should get a smaller firearm instead.

    Work it out with your Workout

    Carrying concealed is a challenge even when you’re not exercising. Most of the time, comfort is pushed to the back burner as efficiency and safety are more imperative. The need to defend yourself could pop out any time, so be sure to get the best-fitting exercise holster that suits you and your workout.

  • Types of Grips a Pistol

    Types of Grips a Pistol

    Types-of-Grips-a-Pistol

    There’s more to a proper pistol grip than just looks. Action heroes and bad guys in movies have way too much leeway to mess around, but in real life, safety is the top dog. Having the proper grip on your pistol is the difference between a fun day at the shooting range and a terrible accident. There’s so much that could go wrong with a wrong grip, and the best way to eradicate accidents is to find the grip that works best for you.

    Types of Grips

    Several pistol grips have been developed to be used for a variety of purposes. Some for stability and accuracy, some for speed and efficiency. Other grips, though common, aren’t recommended at all. Let’s get into some of them;

    One-Hand

    one-handed grip is the one that’s more commonly seen, as this is the grip that your favorite action star would have on their film poster. It is also the grip that more advanced shooters utilize in emergencies. Using one hand, they draw their pistol, aim, and shoot.

    While a one-handed grip ultimately looks cool, it is by far the most unstable. Unless if you’ve got god-like dominant arm strength, the recoil of the gun will be too much to hand with this grip. There is no support from your other hand, and so your forearm and shoulder receive a lot of recoil force.

    Two-Hand

    Utilized by shooters of all levels, the two-handed grip offers significantly more stability and efficiency. Admittedly, this is the grip that looks legit. It helps you prepare for recoil and encourages accuracy. There are several variations to two-handed grips, each with its advantages.

    Thumb-over-thumb Grip

    This grip is great for beginners as is pretty easy to master. It offers great stability and encourages maximum control over recoil – which is something most beginners shudder at the thought of.

    The pistol is secured by your dominant hand, with the thumb and index finger spread apart. The pistol’s backstrap is positioned between, making sure the back strap is positioned high.

    The rest of the fingers of your dominant hand wrap around the grip, with the thumb, touch the middle finger from the other side. Your non-dominant hand then fills in the rest of the space, with the thumb going over the dominant hand’s thumb.

    Forward Thumbs Technique

    This is a trickier grip for beginners, but it has more speed and precision. Essentially, it features the same principle as a thumb-over-thumb, with the only difference being the positioning of the thumbs.

    Instead of one thumb going another, both thumbs point forward – with the thumb of your dominant hand resting on top of the thumb of the non-dominant hand. Consequentially, this grip stabilizes the shot better – but can be difficult to execute on certain pistols

    Big No-no Grips

    You’ve probably seen a TV cop hold up their pistol like they’re serving a drink. This is quite common in real life, too. It’s known as tea-cupping and is not an advisable pistol grip. It’s unstable, inaccurate, and will ultimately lead to the worst-case scenario of your pistol flying back at you upon recoil.

    Tea-cupping may look like a two-hand grip at first glance, but what you’ll notice is that the thumb of the non-dominant hand is far from the thumb of the dominant hand. Instead, it’s hanging out with the middle and ring fingers below. By lowering the position of the thumb, the non-dominant had offered little to no support from recoil.

    Similarly, another thing to avoid is crossing your thumbs at the back of the pistol. This is a common mistake amongst beginners – one that is done unintentionally. Crossing your thumbs at the back of the pistol exposes you to the full force of the slide, which could end you up in a world of hurt. It’s important to be guided by a shooting range officer, or a professional shooter, on your first few days of shooting.

    Know what works for you

    Patience and discipline are key when it comes to pistol shooting. Mastering the basics of gripping will eventually lead you to get more accurate shots, as well as a speedier draw. Safety is of utmost importance, and a good grip on your firearm will make your experience at the range more worthwhile.

  • What Do You Need to Bring to The Shooting Range

    What Do You Need to Bring to The Shooting Range

    What-Do-You-Need-to-Bring-to-The-Shooting-Range

    You’ve seen it in movies, and TV shows, but nothing beats being in an actual shooting range. If you’re a newbie, prepare for a lot of noise, a lot of people, and a lot of questions! Any first-time visitor is going to feel intimidated when left unguided at a shooting range – but the reality is that there really is nothing to worry about.

    All professional shooting ranges make safety their top priority. Most of the time, you’ll find everything you need there – ready to be rented or bought. Still, it pays to prepare, and with a high-risk sport such as shooting, you’re better soff well-equipped – regardless of what rank you are.

    1. Your Know-how

    By the time you’ve stepped onto the range, you should have done all your research already. There are numerous websites and sources for you to look up about shooting in general. Be sure you’ve covered the ins and outs of firearm safety, the things that could go wrong, and how to handle them.

    2. Your Firearm

    This is by far the most obvious. This isn’t at all imperative on your first day, as you may want to practice with the firearms at the range first. However, having your own firearm will allow you to grow and improve with it – and eventually, you’ll get used to the sound and feel of the whole experience.

    If you haven’t got around to buying your own firearm yet, most shooting ranges do rent out their pistols for you. You can practice with these for a while, just to see if you’ve got a knack for it. Once you do get your own firearm with a holster to match, by then you’d have mastered the basics of gun handling.

    3. Your own Eyes and Ears

    Hearing things go bang bang for hours on end isn’t good for your hearing at all. What more, shell casings flying in all directions could cost you an eye. With that said, be sure to pack your own heavy-duty ear mufflers and protective eye goggles.

    Pre-COVID19, it was pretty normal to rent protective gear from shooting range personnel. Nowadays you’re better off buying your own set of “eyes and ears” to avoid cross-contamination. This is standard shooting range gear, and should always be in your designated “range bag.”

    4. Your own Ammo

    Shooting is just like any sport, and to get better you’re going to need to practice a lot. While most shooting ranges sell ammunition, it’s way better to pack your own. Not only are you more in control of your rounds, but you also save a lot of money.

    There’s a big chance that bullets cost more at the range than at your favorite gun shop, so be sure to pack up those loads because you’re going to need them to get better at your stance, aim, and reloading.

    5. Your own Targets

    With all that ammo, you’re going to need something to shoot at! Like ammo and other gear, a variety of targets are also available at the range. These are great, but if you want to add your own spin to it, try printing out a picture of a zombie, your least favorite vegetable, or your ex-lover.

    Bringing in your own personal targets will motivate you to improve your aim, and will also be a sight to look at. Hopefully, whoever’s picture you’re aiming at isn’t actually at the range with you!

    6. A Mask and Hand Sanitizer

    This probably goes without saying, but we all need a gentle reminder every now and then. Sad to say, COVID is still at large and your greatest protection is still a good anti-aerosol mask and basic hygiene.

    If there are a lot of people at the range, be sure to socially distance and sanitize often. There’s no use getting better at shooting when you’re struggling to breathe, so always remember to keep safe against the virus – even when others are lax.

    7. A Friend

    Shooting at the range doesn’t have to be a solitary sport. As long as your buddy is over 18, you can have them tag along with you at the range. Over time, both of you can monitor each other’s improvements and even make up for your own challenges.

    While it may seem intimidating at first, shooting is a fun discipline to get into. Just remember to keep safety a top priority. Bring your own personal gear, keep inventory and sanitize. Stay safe and stay on target!

  • Difference Between Misfires, Hang fires and Squibs

    Difference Between Misfires, Hang fires and Squibs

    Difference-Between-Misfires-Hang-fires-and-Squibs

    So you’re at the firing range working on your aim. You’re going through round after round and getting better hitting the bullseye. Suddenly, your gun stops working halfway through a round – leaving you with a popping sound instead of a bang. Immediately, a range officer approaches you and tells you to keep your gun pointed in a safe direction. You do just that, and about thirty seconds in, your gun finally fires.

    It doesn’t take an expert to know that that situation could have been catastrophic. This delayed fire is termed a “hang fire” – which is what happens when the gun mechanism pushes the bullet but fails to leave the barrel. A cartridge problem, or powder contamination, is one of the few causes of a hang fire.

    But how is it different from a misfire; a more commonly used shorthand term for a gun that didn’t go bang? And what about a squib load? Aren’t these terms just describing the same gun failure phenomenon? Technically, no – so, let’s investigate the differences.

    Misfires

    Considered more of an annoyance, a misfire happens when the priming mixture in the bullet fails to initiate after being struck by the gun’s firing pin. The bullet was expecting a big push, but all it got was a “light hit.” A misfire is usually caused by a faulty firing pin, defective ammo, or both.

    To handle a misfire, all you must do is release the jammed bullet from the pistol. After that, you’ll be ready to go. Misfires usually are a result of faulty ammunition – likely caused by a manufacturing defect. While a misfire isn’t necessarily a dangerous gun fault, it’s hard to distinguish it from its more ominous relative: the hang fire.

    Hang Fire

    If you’ve ever seen a video of a bullet in slow motion, that’s essentially what’s going on during a hang fire. Unlike a misfire, the bullet was successfully ignited; the firing pin struck the primer, and the bullet makes its way out of the barrel. However, instead of a quick discharge, the release is slow and unpredictable. The pistol has now turned into a ticking time bomb.

    All misfires should be treated like hang fires. In a noisy shooting range, you can’t differentiate a misfire click from a hang fire click. Therefore, it’s best to play it safe and keep the pistol pointed to where it cannot harm and should be kept in that position for at least thirty seconds to a minute.

    Hang fires are extremely dangerous and should be handled with extreme caution. Once the minute of standing by has passed, you can call for assistance for an officer to help you out. Don’t try to disassemble the pistol by yourself if you’re not confident about it. Always play it safe and seek assistance when needed.

    Squib Load

    A squib load is just as annoying as a misfire, and just as misleading as a hang fire. What happens in a squibbed fire is that bullet manages to engage itself and ignite – but there is a lack of force to push it out of the barrel. Essentially, this will end up with a jammed bullet with its primer all used up.

    With the primer ignited and burned out, the chances of this bullet exploding unexpectedly have been significantly decreased. This is what sets a squib apart from a hang fire. A hang fire has a force holding it back from the barrel, while a squib lacks the force to push it out of the barrel. Despite these key differences, there’s no harm in waiting for a few seconds with the gun pointed away after a jam – just in case your squib load turned out to be a hang fire.

    How to handle misfires, hang fires, and squibs?

    The rule of thumb is to treat misfires and squibs like a hang fire. Point the gun at a safe spot, wait for a minute, and unload with caution. The last thing you want is a bullet engaging at a time you don’t expect it. While these jams are rare, they could still happen. Faulty ammunition, iffy cartridges, and even mishandling could cause all types of problems at the shooting range, and your best protection is your knowledge and your vigilance.

  • How to Spot a Concealed Handgun

    How to Spot a Concealed Handgun

    How-to-Spot-a-Concealed-Handgun

    You’ve just recently gotten the hang of carrying a concealed firearm. You feel more at ease that you always have a tool to protect you. However, you realize that this isn’t a walk in the park. Even the smallest of handguns could weigh you down – ultimately making it obvious what you’ve been trying so desperately to conceal.

    An experienced gun owner can spot an ill-fitted concealed carry on anyone. From the off-season baggy clothes to the imbalanced stance, these are but a few ways to suspect a concealed handgun on a person you encounter in public. However, human beings are crafty, and so the best way to protect yourself from unwanted surprises is just to assume that everyone is armed.

    This may sound a bit extreme, but keeping this in mind will ultimately lead you to calm down and be effectively vigilant. Poor judgment never helped anyone – especially when paired with hot-headed irrationality. As a responsible gun owner, it pays to be observant about spotting concealed handguns, and here are a few tips on how to do just that.

    How to Spot a Concealed Handgun?

    Read Body Language

    You know how uncomfortable carrying a gun around can be. When your first put on a leather holster, it felt strange and bulky. You’ve had to check your weapon now and then, adjusting the straps, and pulling up your pants at odd times of the day. Easily, you can tell if someone else is going through the same thing.

    In public, newbie conceal carriers will stick out like a sore thumb – regardless of their weapons being legal or not. They will often look fidgety and will constantly touch the area where they’ve concealed the weapon. Alternatively, they could also overdo looking natural and unbothered – ironically making them stick out even more!

    Watch Out for Printing

    The wrong choice of clothing often reveals more than it should – and the same goes for carrying concealed. A shirt that’s too tight will wrap around a handgun holstered on a torso, causing it to “print” on the carrier’s side. Some shooters will cover this up with a jacket or a bag, ultimately making it even more conspicuous.

    Similarly, tight-fitting pants could also reveal an ankle or leg holster. At this point, you’d wonder if the owner had any intention of hiding the weapon in the first place. Nevertheless, their careless choice of a garment can be used to your advantage, as you can now keep a close eye on them and anticipate their movements.

    Mr. Saggy Pants

    Historically speaking, waistband holsters have been one of the most reliable ways to carry a handgun. The weapon is right where it needs to be; close to your dominant hand at a milliseconds’ reach. Having a conceal carry from the waist is quick, efficient, and convenient – but carrying it can be blatantly obvious!

    Even with the right shirt and the proper demeanor, you can tell if someone’s carrying a concealed IWB by the alignment in their pants. One side will be lower than the other, and the subject will be constantly lifting this side. Gravity plays a huge role in this game of I-spy. So, if your suspecting someone’s carrying concealed because of their misaligned pants pockets, chances are you just might be right.

    Bracing

    Ever had to swing your backpack to the side so you can pick up a dropped item? Or pull up a fanny pack so you can bend down to crouch? You don’t give it much thought, but this mannerism is called bracing. It looks completely normal when you have something in your body that’s in the way of an action you need to do.

    Apply this mannerism to something that is supposed to be hidden, then you’ve got a telltale sign of an ill-fitted concealed carry. Gun owners with loose-fitting holsters are going to give themselves away when they must do even the most basic of tasks. You can see them brace for the action by pulling their carry closer to them or further back. Wherever it is they want to go won’t matter, because this action has already made it obvious that they’re hiding something.

    Assume the worst, but keep calm

    You can never be completely sure of a concealed carry until the last minute. For all you know, your suspect could be holstering a handgun in the least likely place. With that in mind, you should just assume that they’re armed – but don’t be rash about it. No one responds well to prejudice, and vigilance works better with a level head.

  • Can I Conceal Carry Two Guns

    Can I Conceal Carry Two Guns

    Can-I-Conceal-Carry-Two-Guns

    Carrying a gun assures you a lot of things. Safety is for one, and protection most definitely. However, like any tool, a gun is prone to malfunction. In the heat of a compromised situation, the last thing you want to happen is your trusty weapon getting jammed – ultimately endangering you and your companions.

    This is where a second handgun comes in handy – or your “secondary”, in short. While your primary gun is tucked away where you have access to it, your secondary hides in case you need backup. While the chances of you needing both guns are low, you really can never be too sure. Think of it like having a spare tire, or an extra shirt.

    However, carrying two guns isn’t the same as a spare tire. This is a loaded weapon that could cost innocent lives if misused. Most states don’t allow owners to carry more than one gun in their person. Additionally, there’s also this issue of where to put it. Should it be next to your primary? Should it be drawn with your non-dominant hand or otherwise? These are but a few things you need to consider before deciding on conceal carrying two weapons.

    Can I Conceal Carry Two Guns?

    Given the variety of waist, body, and torso holsters, you can conceal carry two guns. You can even carry more than that – even if you didn’t have to. What boils down here is how responsible you are in conceal carrying these weapons.

    If you get caught in some skirmish and your companion is unarmed, this extra gun will come in handy for them. Similarly, if your primary gets jammed, your secondary (ideally a pistol) will then come to your rescue.

    There’s a lot of advantages in concealing carrying two guns, but that’s not to say that it’s legal everywhereMost states in the U.S. only allow a minimum of one concealed carry. If you happen to be traveling with your carrier, this could pose a problem. A lot of inter-state laws aren’t at all consistent with each other, so you should research ahead on where a double carry is allowed.

    Is it safe to conceal carry two guns?

    Ultimately, this is up to you and your responsibility as a gun owner. One gun at the ready should get you out of the toughest situations, so the second is just for good measure. If you trust yourself enough to carry two guns, then do so with the best of intentions. A gun is only as dangerous as the one who wields it, so be sure to only use it when you need it the most.

    With that said, you must mindful of where and how to position your carry. The last thing you want is your arms getting entangled in a holster-y cross-draw mess. There are several ways to carry your second weapon, and ultimately where you choose to put it depends on your preferred convenience.

    Ankle Holster

    The ankle is a great area to hide a concealed weapon as it doesn’t get in the way of your main weapon – which ideally should be holstered to your waist. In a defensive crouched position, drawing your second carry from the ankle is discreet and convenient. From here, you can quickly hand over the second weapon to an unarmed companion, or draw it when your primary runs out of rounds.

    Torso

    Having your secondary near your primary plays an advantage – for as long as they are accessible to your non-dominant and dominant hands, respectively. One thing to avoid though is a cross draw where you wrap your arms around yourself and draw your guns from opposite sides.

    While doing a cross draw may look cool in the movies, it’s a risky move. Torso-holstering your primary and secondary weapons incorrectly could ultimately cause some problems. For one, you could get caught up in your limbs. Unless if you’re performing for a show, avoid a cross-draw set-up.

    Small of Back

    Like the ankle, the small of your back also offers a nice hiding spot for your secondary weapon. If doesn’t get in the way of your primary, this spot will do you good in times of an emergency. Just remember to practice drawing your secondary with your non-dominant hand – to allow better efficiency, speed, and safety.

    Be Responsible

    Conceal carrying two guns is a great way to heighten protection. But remember that a gun is only as dangerous as its wielder. In the end, it all boils down to who and how this weapon is used. Remember to understand the laws and limitations of this double-carry set-up, or any concealed carry set-up, and be mindful always.